Setup Prisma SASE App – Multi-Tenant
Table of Contents
Expand all | Collapse all
- Strata Multitenant Cloud Manager
- First Time Setup
-
- Monitoring Summary Across All Tenants
- SASE Summary Dashboard
- Prisma Access Summary Dashboard
- Prisma Browser Summary Dashboard
- Prisma SD-WAN Summary Dashboard
- Monitor Tenant Applications
- Monitor Tenant Branches
- Monitor Tenant Devices
- Monitor Tenant Licenses
- Monitor Tenant Upgrades
- Monitor Using Prisma Access Insights
- Switch Tenants
-
- Monitor Status of Services through the ASC Support View
- Monitor Performance of Tunnel Status through the ASC Support View
- Monitor Performance of Auto Scaling through the ASC Support View
- Monitor Performance of Throughput through the ASC Support View
- Monitor Performance of the System through the ASC Support View
- View Licenses through the ASC Partner Portal
- View Status of Upgrades through the ASC Support View
- Manage Multitenant Reports
Setup Prisma SASE App – Multi-Tenant
Contains instruction to setup the app in an multi tenant environment
Ensure that you have the following:
- Root tenant service account with admin privileges.
- TSG ID, client ID, and client secret that were generated when creating the service account.
- ServiceNow instance username and password with the system admin role.
- Install the Domain Extension Installer PluginThe Domain Extensions plugin extends domain separation to application tables, enabling data, processes, and integrations to be isolated per tenant in a multitenant environment. This ensures that each tenant's data remains secure and segregated while allowing multiple tenants to share the same ServiceNow instance.
- Install ServiceNow IntegrationHub Starter Pack Installer PluginThe ServiceNow IntegrationHub Starter Pack Installer plugin enables IntegrationHub functionality in the instance, including IntegrationHub actions, and provides tools to easily connect ServiceNow with other systems and automate workflows using actions, subflows, and flows.
- Install Security Incident Response Plugin (Optional)The Security Incident Response (SIR) plugin is required for the management of security incidents in ServiceNow. It introduces the Security Incident [sn_si_incident] table, where all security incidents are stored and managed.
Use the guided workflow to set up the Prisma SASE App for ServiceNow and integrate it
with Strata Cloud Manager. The setup requires you to configure credentials and
connection details that allow Prisma SASE to communicate with your ServiceNow
instance.
- Access your ServiceNow Instance.
- Log in to your ServiceNow instance as an administrator.Select Prisma SASE APP for ServiceNowApp SetupBasic Settings.Configure Prisma SASE Connections.Prisma SASE connection configuration includes configuring the Prisma SASE platform credentials, application gateway URLs used to connect to Prisma SASE, connection alias.Although you can have multiple credentials and connections, only one credential and connection will be active at a time.
- Select Configure Prisma SASE Connections.Create Credentials.Credentials are details of the service account created in the Strata Cloud Manager. This credential will be used by the ServiceNow app to connect securely with Prisma SASE.
- Select Create CredentialsConfigureNew.
- Specify the TSG ID, Client ID, and Client Secret.
- Submit the configuration.
- Mark as Complete.
![]() (Optional) Create Connection Alias.A connection alias is a defined label that represents a specific combination of credentials and connection details. It allows ServiceNow integrations to reference the alias rather than using the credentials and connection information directly, providing consistency and simplifying configuration management.A default connection alias, Prisma SASE API, is available. If you choose to use this default alias, click Mark as Complete and proceed to the next step.If you want to create a new connection alias, perform the following:
(Optional) Create Connection Alias.A connection alias is a defined label that represents a specific combination of credentials and connection details. It allows ServiceNow integrations to reference the alias rather than using the credentials and connection information directly, providing consistency and simplifying configuration management.A default connection alias, Prisma SASE API, is available. If you choose to use this default alias, click Mark as Complete and proceed to the next step.If you want to create a new connection alias, perform the following:- Select Create Connection AliasConfigureNew.
- Specify the following:
- Name- Connection alias name.
- Type- Connection and Credentials.
- Connection type- HTTP.
- Submit the configuration.
- Mark as Complete.
![]() Create Connections.
Create Connections.- Select Create Connection AliasConfigureNewHTTP(s) Connection.
- Specify the following:
- Name -Connection name.
- Credential and Connection alias- Search and select the credential and connection alias that you created in the previous steps.
- Connection URL- Prisma SASE API gateway URL.
- Submit the configuration.
- Mark as Complete.
![]() Configure ServiceNow Credentials.These are the credentials that will be used by the Prisma SASE to securely connect to the ServiceNow instance and access Incidents, Alerts, and tickets.Although you can have multiple ServiceNow credentials, only one credential will be active at a time.
Configure ServiceNow Credentials.These are the credentials that will be used by the Prisma SASE to securely connect to the ServiceNow instance and access Incidents, Alerts, and tickets.Although you can have multiple ServiceNow credentials, only one credential will be active at a time.- Select Configure ServiceNow CredentialsConfigureNew.Specify the Name, ServiceNow Instance UserName, and ServiceNow Instance Password.Submit the configuration.Mark as Complete.
![]() Customize Configuration.Perform the following steps to set the Tenant Service Group Mapping to active. This process populates the appropriate domains, initiates domain-separated configuration for tenant-specific data management, and automatically creates a company for each domain.
Customize Configuration.Perform the following steps to set the Tenant Service Group Mapping to active. This process populates the appropriate domains, initiates domain-separated configuration for tenant-specific data management, and automatically creates a company for each domain.- Select Prisma SASE Customized Configuration ConfigureTenant Service Group Mapping.
- Select Active.
- Update the configuration.
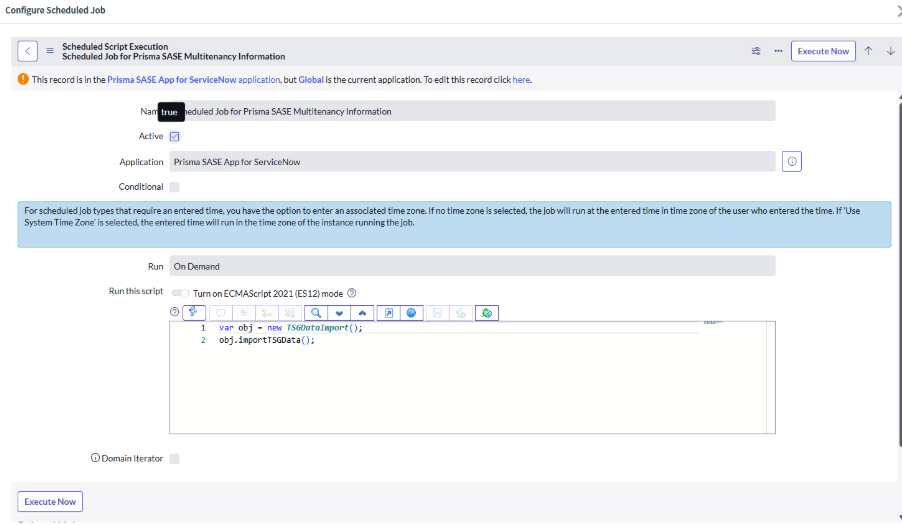
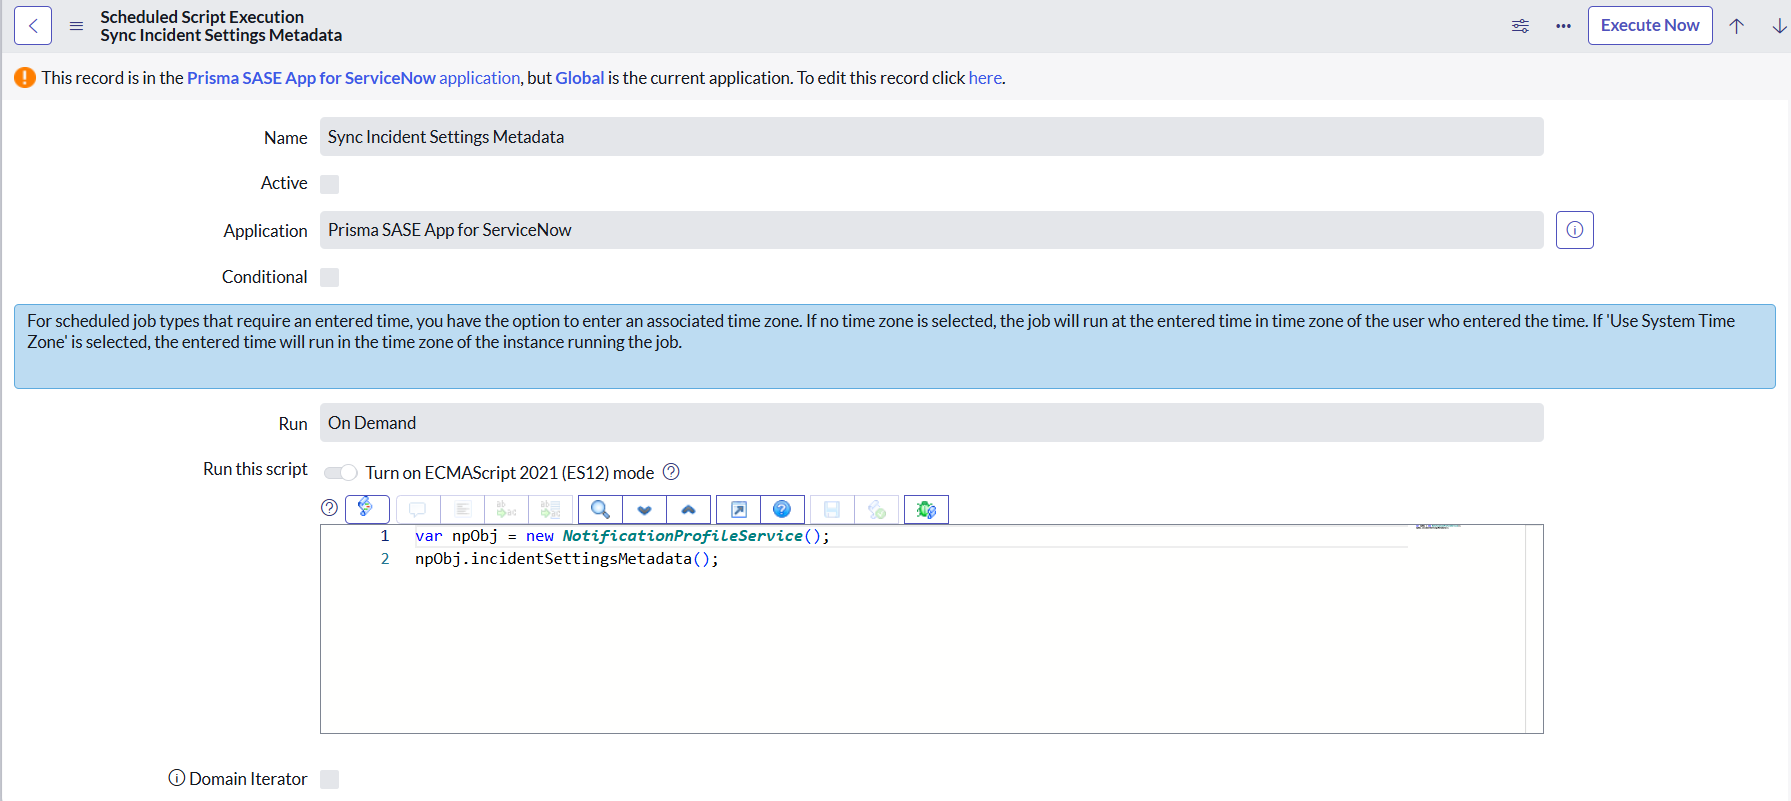
Execute Scheduled Jobs.By default, the App includes scheduled jobs to synchronize the data between the Prisma SASE and ServiceNow. These jobs are configured to be executed on demand. However, you can also modify the job configuration to automatically run them periodically.Execute the following jobs:- Scheduled Job for Prisma SASE Multitenancy Information- This
job is used to fetch the multitenancy data from the Prisma SASE and
automatically create the corresponding domains in ServiceNow.
![]()
- Sync Incident Settings Metadata- This job updates the
Incident Settings Metadata, including Category, Subcategory, and
Code Mapping values, which are required for Notification Profile
configuration.
![]()
- Select Configure Scheduled JobConfigure.
- Select the job you need to execute manually.
- Select Active.
- Click Execute Now.
Ensure to mark Steps 2 to 5 as complete or skip them. Only when the completion status reaches 100%, the connection between the ServiceNow instance and Prisma SASE will be established.After you set up the app, you need to create a user for the tenant and assign the required roles and permissions. This account will be used by the tenant to log into the ServiceNow instance.- Create a new user for the root tenant.
- Select OrganizationUsersNew.
- Specify the Name, User ID, and Email.
- Search and select the Company. The company name matches the domain or tenant name. Each company represents a tenant organization and ensures the segregation of data and processes.
- Submit to create a new user.
- Assign roles.
- Search for the newly added user by name.
- Select the user.
- Select RolesEdit.
- Search and add the roles based on the user's responsibility.For details about the roles and their permissions, see Roles and Permissions
- Save the user.


