First time SaaS Security Inline Activation - Multiple Customer Support Portal Account
Table of Contents
First time SaaS Security Inline Activation - Multiple Customer Support Portal Account
Learn how to activate your SaaS Security Inline application for the first time
if you have multiple Customer Support Portal accounts.
If you have multiple Customer Support Portal accounts, follow these steps for first
time SaaS Security Inline activation.
- If you have multiple Customer Support Portal accounts, choose the Customer Support Account number that you want to use.
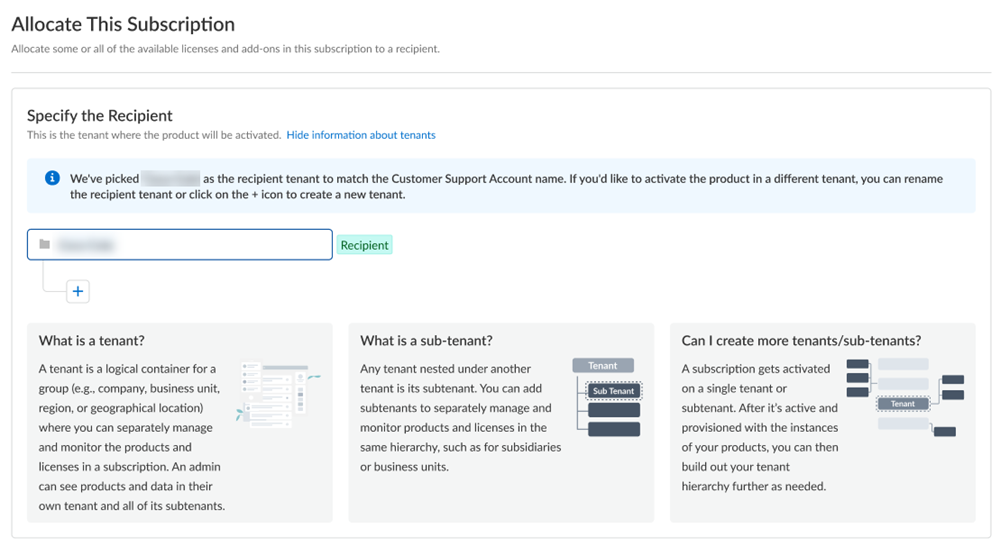
![]() Allocate the product to the Recipient of your choice.You can allocate your entire license to one recipient or you can share it with multiple recipients in a tenant hierarchy. What is a tenant?
Allocate the product to the Recipient of your choice.You can allocate your entire license to one recipient or you can share it with multiple recipients in a tenant hierarchy. What is a tenant?- If you need just one tenant, use or rename the tenant provided. The name provided matches your Customer Support Portal account for convenience.
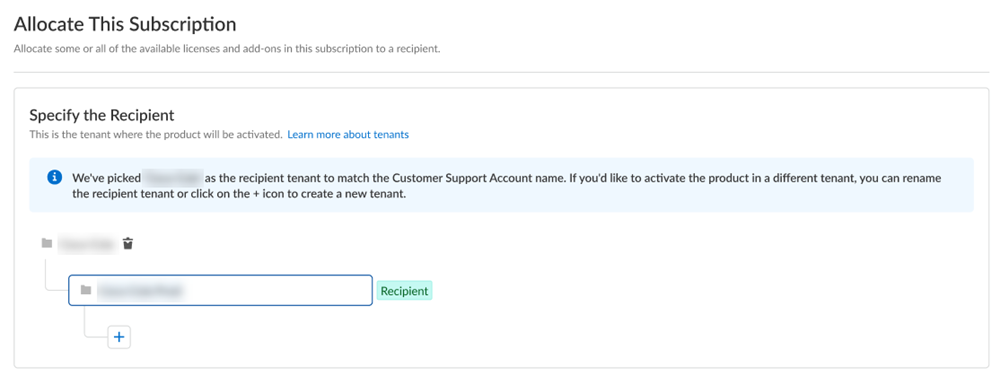
![]() (Optional) This step applies if you are a managed security service provider (MSSP), a distributed enterprise customer, or need multiple tenants. After you create the first tenant, you can Allocate to subtenant and use or rename the tenant provided.
(Optional) This step applies if you are a managed security service provider (MSSP), a distributed enterprise customer, or need multiple tenants. After you create the first tenant, you can Allocate to subtenant and use or rename the tenant provided.![]() A subscription gets allocated on a tenant or a sub-tenant. This step is for choosing a tenant where you want to allocate a license, not for building a complete tenant hierarchy. You can create only a tenant and subtenant here, and you can choose to allocate a license to that subtenant.After activation, you can build out your tenant hierarchy as needed through tenant management. You can create your tenant hierarchy to reflect your existing organizational structure. You can also consider identity and access inheritance when creating the hierarchy, in addition to tenant hierarchy limits.Select Done.Select a Region where you want to deploy your product.Add Strata Logging Service.
A subscription gets allocated on a tenant or a sub-tenant. This step is for choosing a tenant where you want to allocate a license, not for building a complete tenant hierarchy. You can create only a tenant and subtenant here, and you can choose to allocate a license to that subtenant.After activation, you can build out your tenant hierarchy as needed through tenant management. You can create your tenant hierarchy to reflect your existing organizational structure. You can also consider identity and access inheritance when creating the hierarchy, in addition to tenant hierarchy limits.Select Done.Select a Region where you want to deploy your product.Add Strata Logging Service.![]()
- Select a Strata Logging Service instance for storing your logs.Enter the amount of data log storage.The region is grayed out, but is autopopulated with the same region that you used for Strata Logging Service.Select Cloud Identity Engine or create a new CIE instance to identify and verify all users across your infrastructure.
![]() Agree to the terms and conditions, and Activate.A single default tenant is autocreated behind the scenes, and the product is activated in the tenant.This tenant, and any others created by this Customer Support Portal account, will have the Superuser role.displays the status of the activation, such as initializing or complete.After the status is complete, you must go to the tab to add firewalls to the tenant: Device Associations.Get started with SaaS Security Inline.(Optional) Manage identity and access.
Agree to the terms and conditions, and Activate.A single default tenant is autocreated behind the scenes, and the product is activated in the tenant.This tenant, and any others created by this Customer Support Portal account, will have the Superuser role.displays the status of the activation, such as initializing or complete.After the status is complete, you must go to the tab to add firewalls to the tenant: Device Associations.Get started with SaaS Security Inline.(Optional) Manage identity and access.