Configure Shared Interconnect
Table of Contents
Configure Shared Interconnect
Explains how to configure shared interconnect
| Where Can I Use This? | What Do I Need? |
|---|---|
|
|
A shared interconnect uses a single connection to carry traffic for multiple tenants
at the same time. This approach simplifies management, scales easily, and enables
faster deployment when connecting multiple tenants.
To set up a shared interconnect, perform the following:
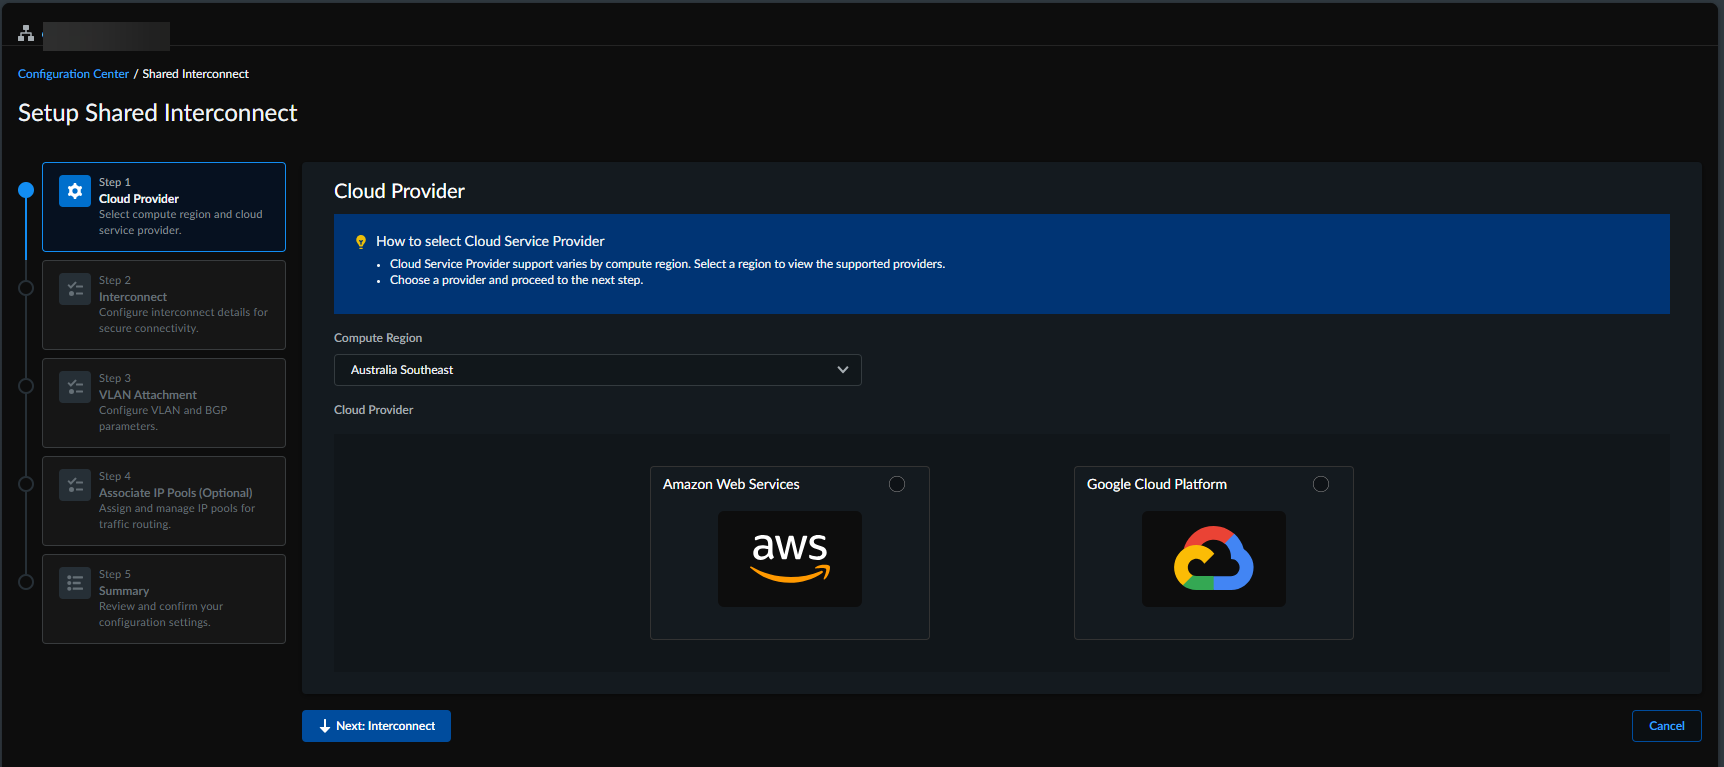
- Access the Strata Multitenant Cloud Manager and selectConfigure the Cloud Service Provider:
- Select the Compute Regionfrom the list of supported regions where your cloud service infrastructure is deployed for the SPI instance.
- Select the Cloud Service Provider, such as GCP, and proceed to the next step.
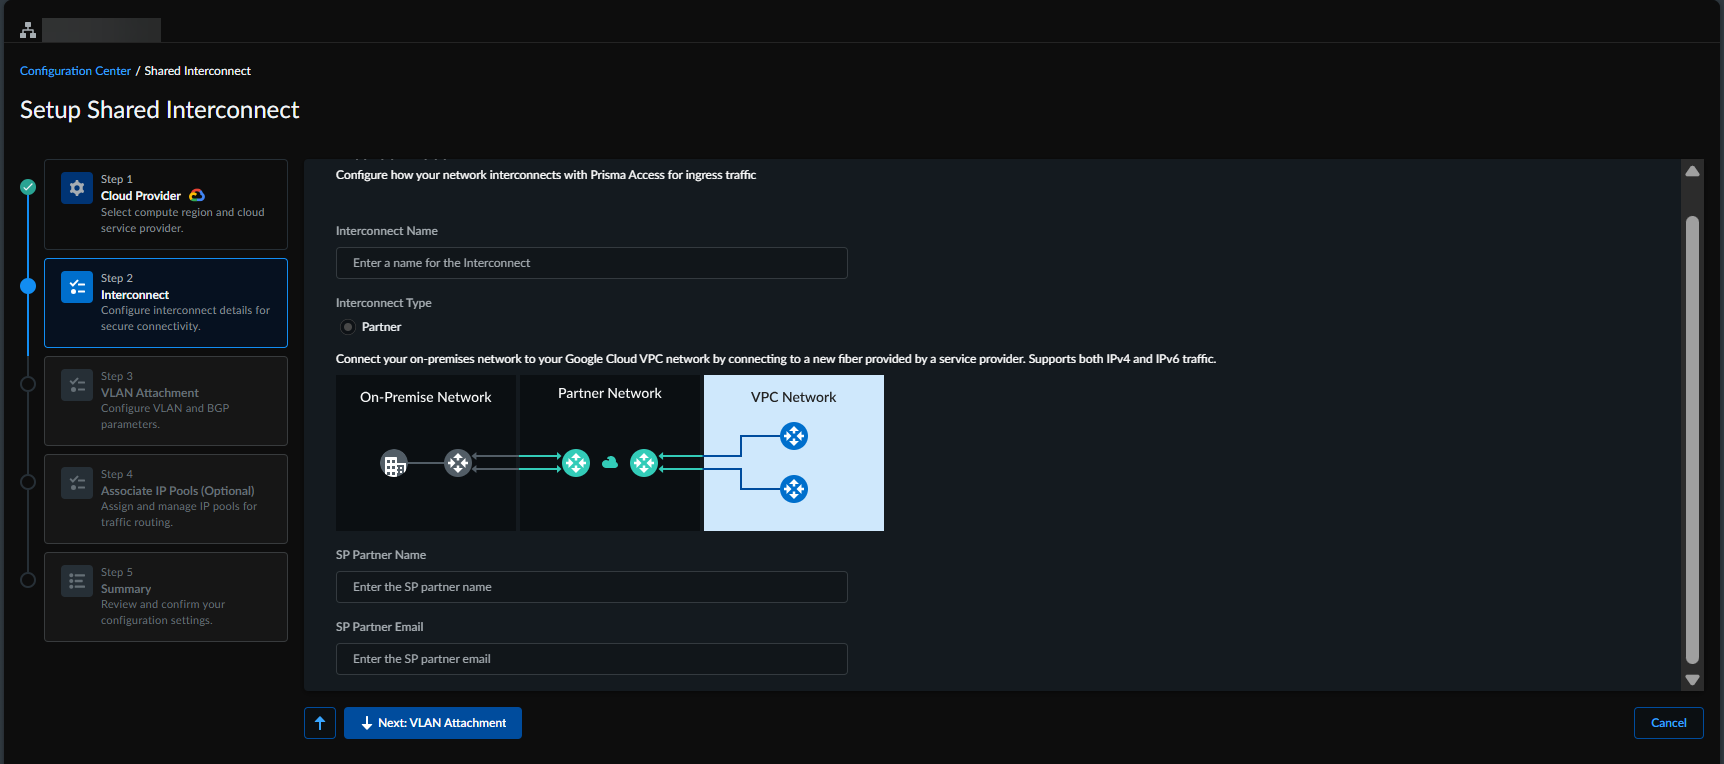
![]() Configure Interconnect:
Configure Interconnect:- Enter a unique Interconnect Name.
- Enter a unique SP Partner Name.
- Enter a valid email address for the partner.
Currently, only partner interconnect type is supported which is selected by default.![]() Configure the VLAN Attachments.
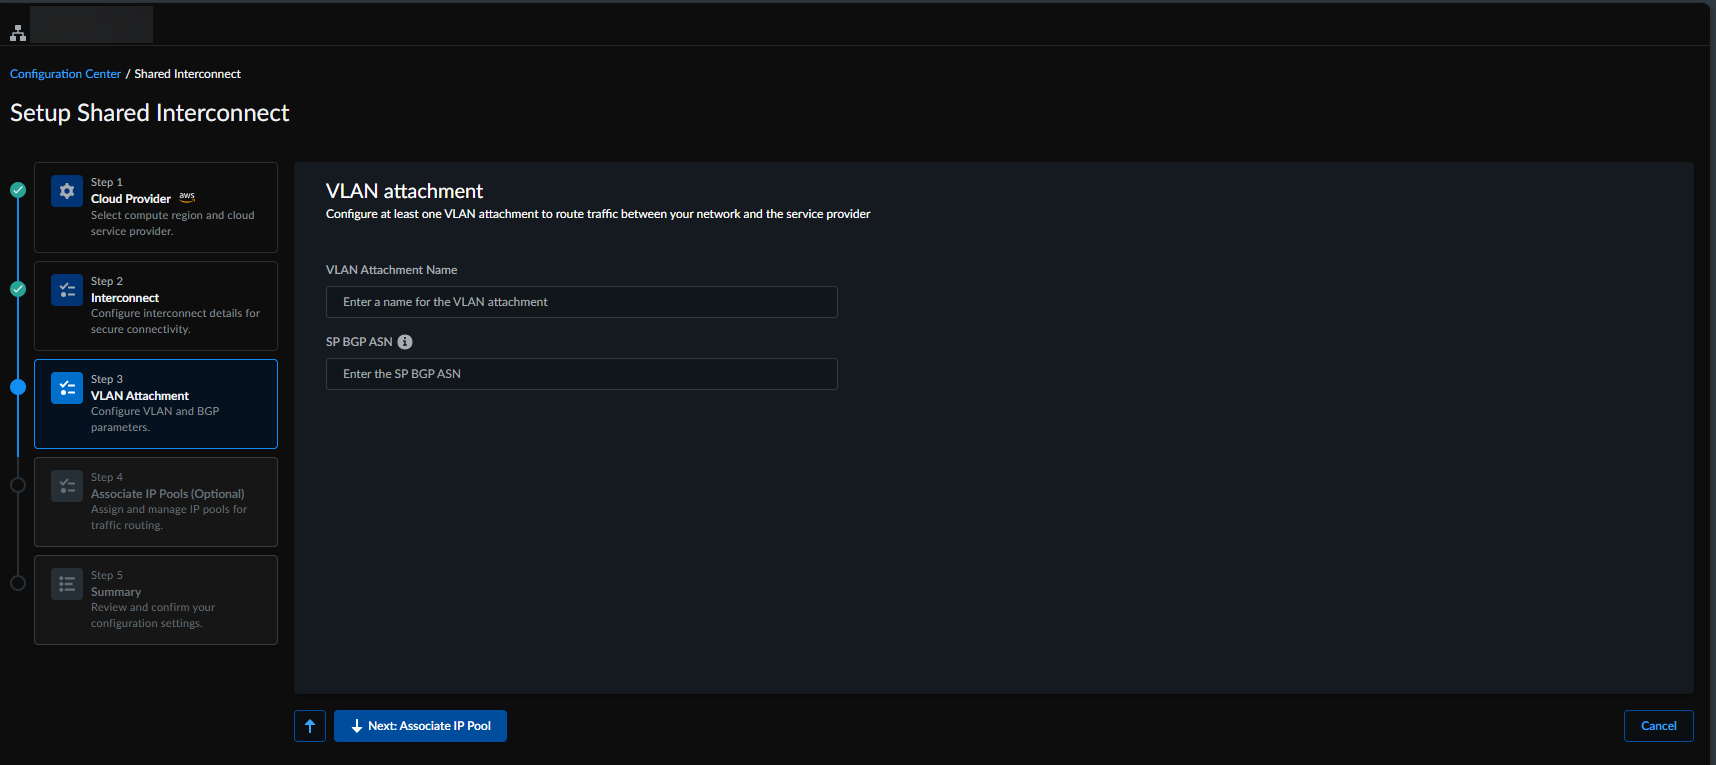
Configure the VLAN Attachments.- For AWS, specify the following:
- Enter the VLAN Attachment Name.
- Enter the public or private Border Gateway Protocol (BGP) Autonomous System Number (ASN) to establish peering for route exchange between the service provider network and the public cloud.
![]()
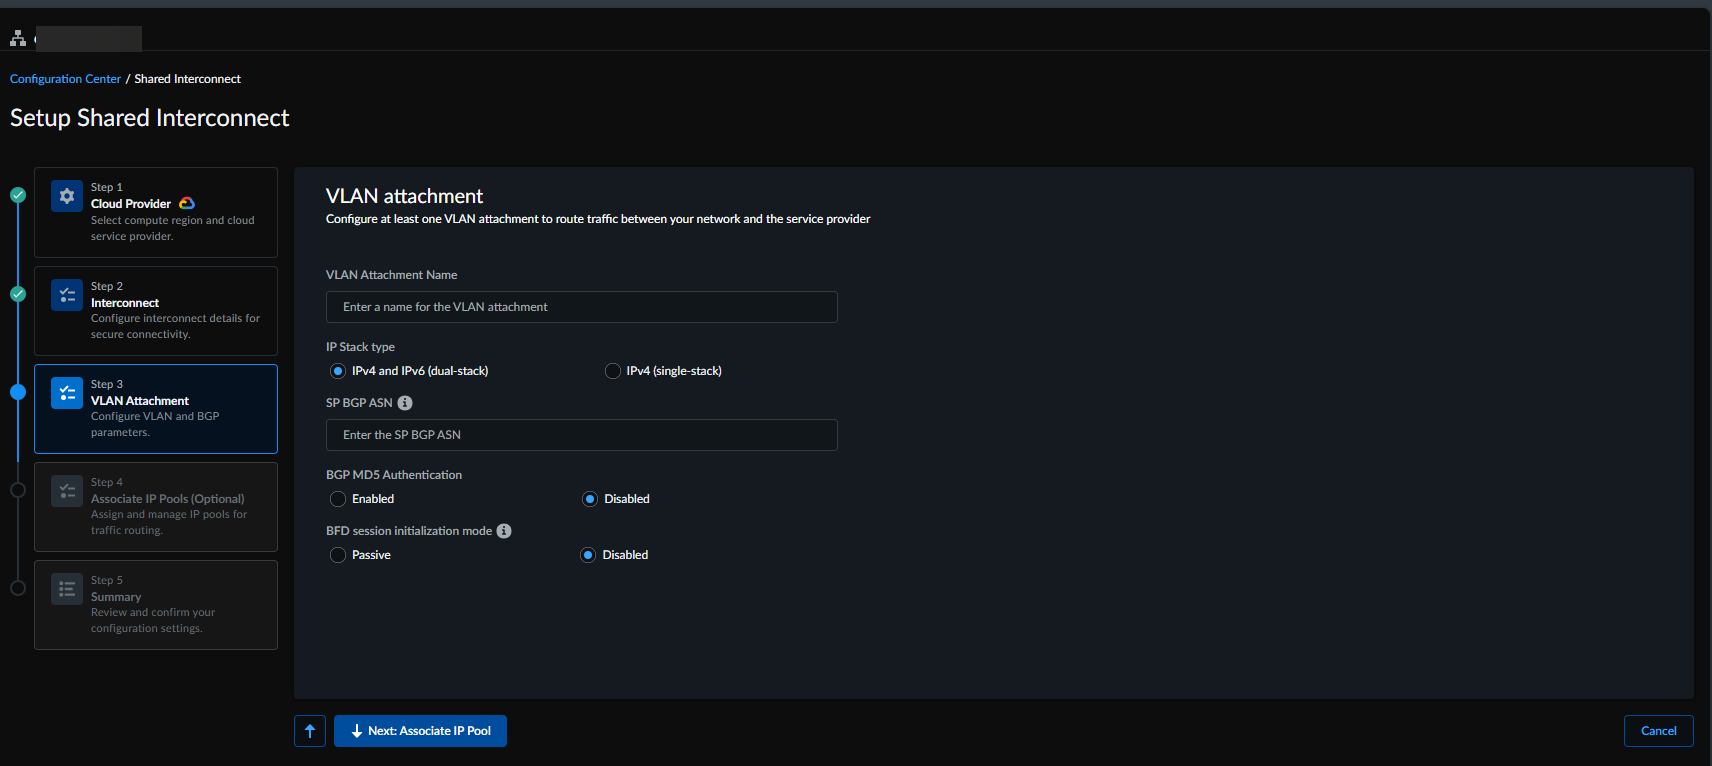
- For GCP, specify the following:
- Enter the VLAN Attachment Name.
- Select the IP Stack Type: IPv4(single-stack) or IPv4 and IPv6(dual-stack)
- Specify the public or private Border Gateway Protocol (BGP) Autonomous System Number (ASN) to establish peering for route exchange between the service provider network and the public cloud.
- Enable BGP MD5 Authentication to use the hash algorithm, or Disable it to use plain text authentication.
- BFD Session Initialization mode for BGP peer: Passive or Disabled.
- Passive: The cloud router will wait for the peer router to initiate the BFD session. For the router to wait, you must specify the BFD Transmission Interval, BFD Receive Interval, and BFD Multiplier.
- Disabled: BFD will be disabled for this BGP peer.
![]()
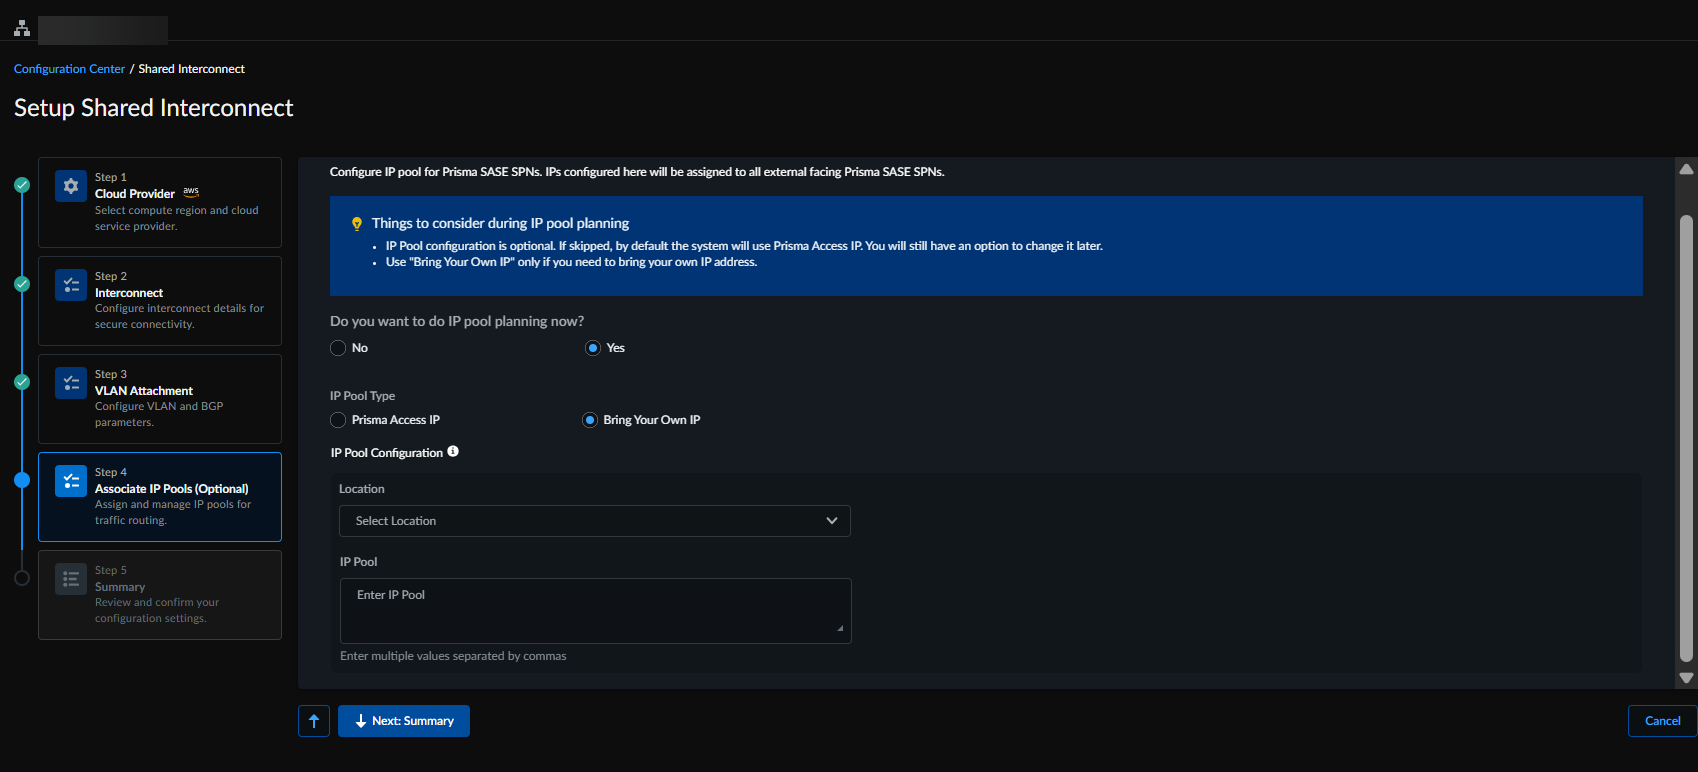
(Optional) Configure IP Pools.You can configure the IP Pool either now or later.- Select Yes to configure the IP Pool, and provide the following details:
- Prisma Access IP: Select this option to use a Prisma Access-assigned IP.
- Bring Your Own IP: Select this option to configure the Ingress and Egress IP Pool.
- Select No to configure the IP Pool later. Until then, Prisma Access will use its own assigned IP.
![]() Review the configuration summary and Create Interconnect.
Review the configuration summary and Create Interconnect.