Configure Prisma SASE 5G
Table of Contents
Configure Prisma SASE 5G
This section explains hoe to configure Prisma SASE 5G
| Where Can I Use This? | What Do I Need? |
|---|---|
|
|
Prisma SASE 5G setup involves configuring core components across both the root and
child tenants to enable identity-driven policy enforcement for 5G deployments. To
configure Prisma SASE 5G, perform the following:
- Configure the data plane and control plane on the root tenant, ensuring the foundational SASE infrastructure is in place.
- Set up the Cloud Identity Engine for each child tenant to enable centralized identity management.
- Add 5G Identities and 5G Identity Groups on all child tenants to support granular policy control and secure traffic processing for 5G users and devices.
Configure the Data and Control Plane
Before you begin configuring Prisma SASE 5G, ensure that
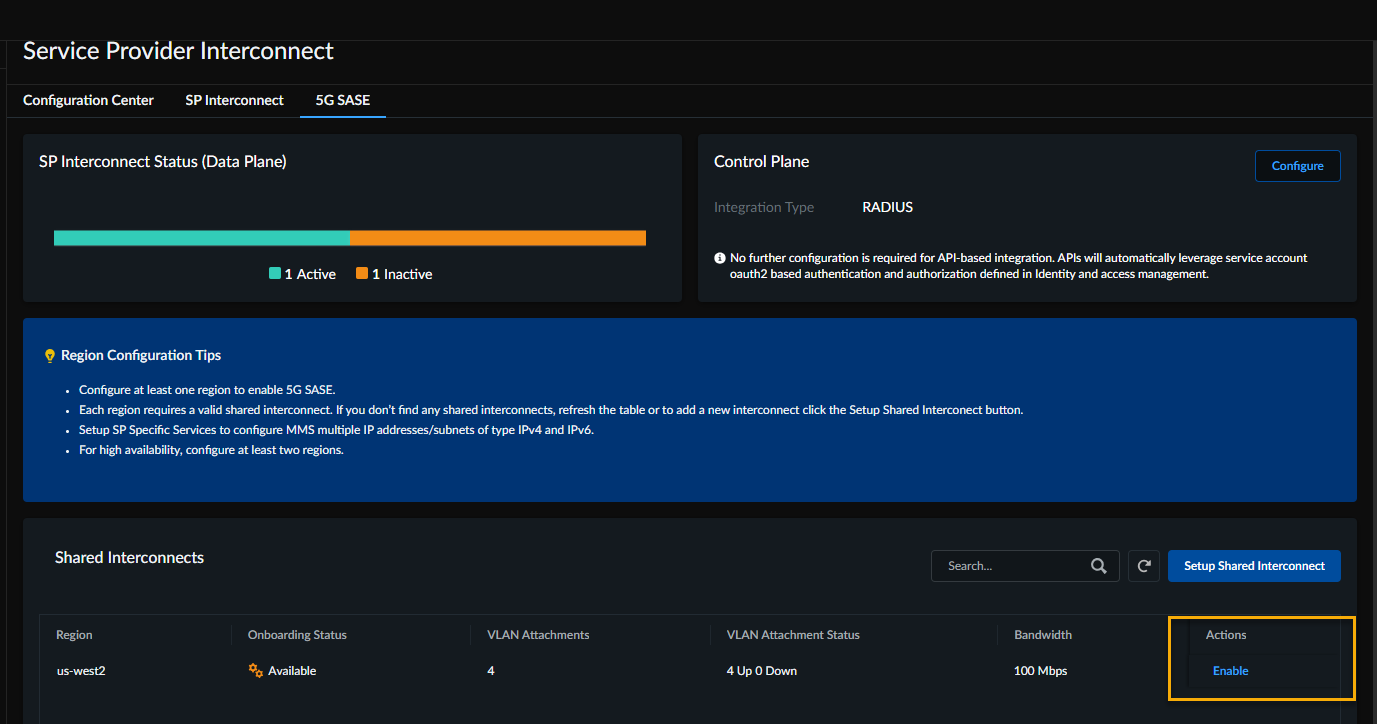
- You have a shared interconnect configured.
- You are a root tenant.
To configure Prisma SASE 5G, perform the following on the root tenant:
- Access the Strata Multitenant Cloud Manager and select orConfigure the control plane.Choose the integration type:
- API: For API based integration, there is no configuration required. APIs will automatically integrate into the authentication system to process the UE registration data.
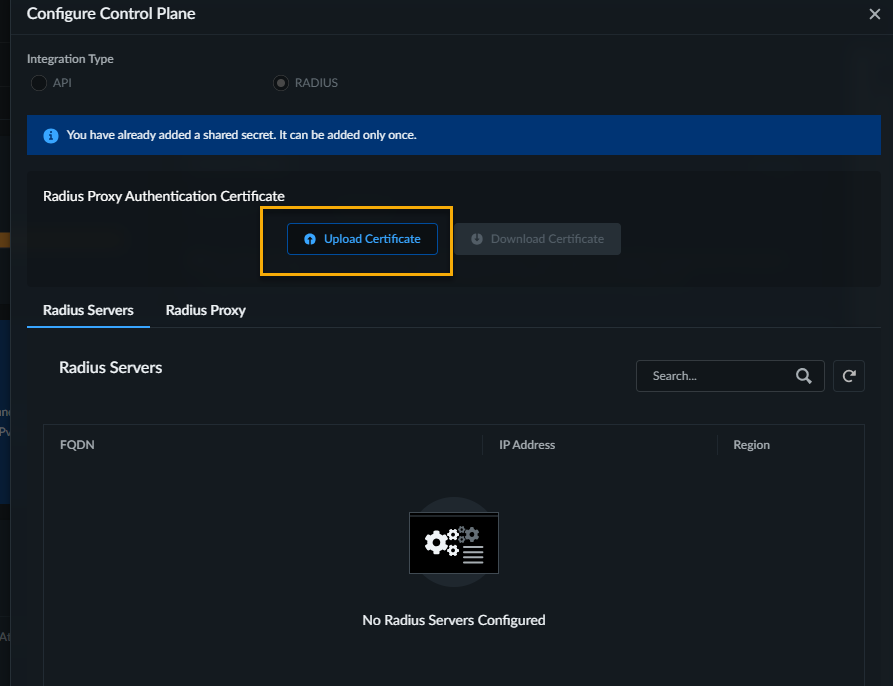
- RADIUS: For RADIUS-based integration, proceed with the next step.Prisma SASE 5G relies on specific RADIUS attributes to uniquely identify user equipment and enforce security policies. Ensure that the required attributes are correctly configured in the RADIUS messages to enable proper health monitoring and policy enforcement.
You cannot modify the integration type once it is configured.Add Shared Secret. Shared Secret can be added only once and cannot be changed after it is added.Configure Radius Proxy Authentication Certificate:- Download Certificate and save it locally.This certificate is a mutual TLS (mTLS) certificate, used when both the RADIUS server and Prisma Access require a certificate for authentication.Prisma SASE 5G integrates with the 5G authentication system using RADIUS. For secure communications, Prisma SASE 5G uses a Mutual TLS authentication. For successful authentication, you download the root certificate of the Prisma SASE RADIUS server.
- On each of your RADIUS proxies, install this root certificate in your certificate authority store.
- To upload the certificate from the RADIUS server, download the RADIUS server's certificate, and then select it.Import the root certificate with the public key that signs the RADIUS proxy client certificate, and Upload Certificate to the Strata Multitenant Cloud Manager.You use this certificate to authenticate the RADIUS proxy server's identity. After you upload it and you enable the connection, you can't change it.
![]() Add a proxy server connection.
Add a proxy server connection.- Select Radius
- Enter a unique Proxy Name for the RADIUS proxyand the IP address used for the proxy and Save your changes when complete.
From the Shared Interconnects, Enable the shared interconnect you created.![]() Proceed with setting up Cloud Identity Engine for Child Tenants.
Proceed with setting up Cloud Identity Engine for Child Tenants.Setup Cloud Identity Engine for Child Tenants
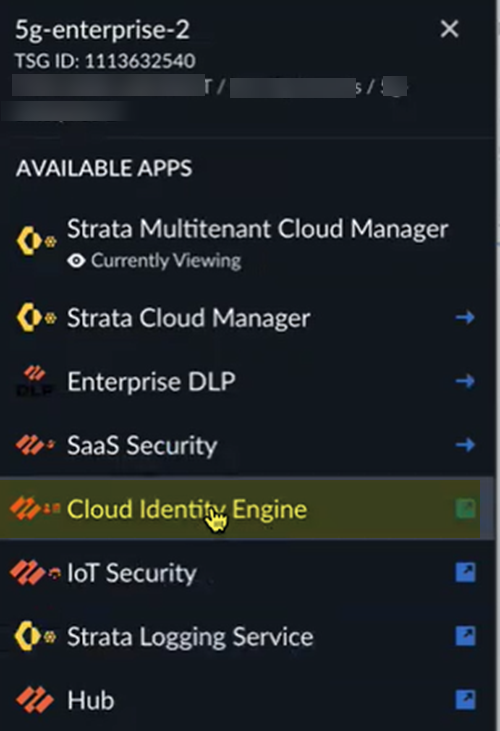
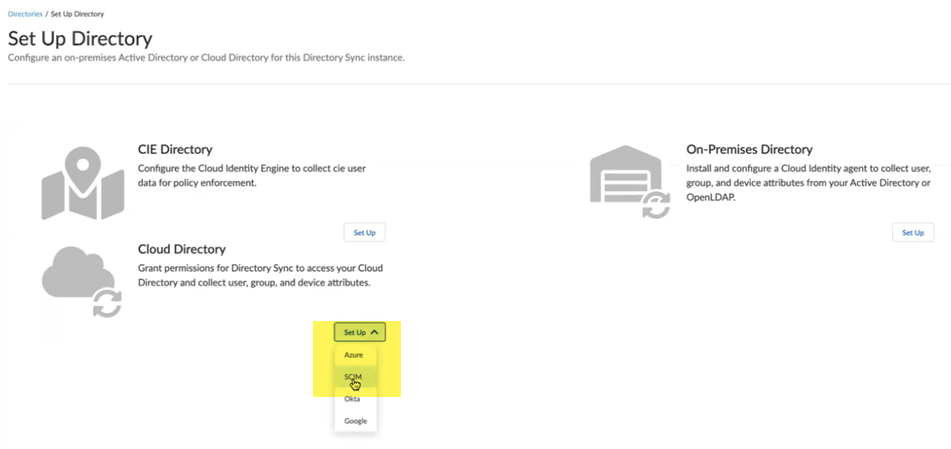
You set up the Cloud Identity Engine before you add identities and identity groups. Configuring the Cloud Identity Engine allows Prisma SASE 5G to populate the 5G identities you configure throughout Strata Cloud Manager. - From the child tenant of the root-level tenant, go to Cloud Identity Engine.
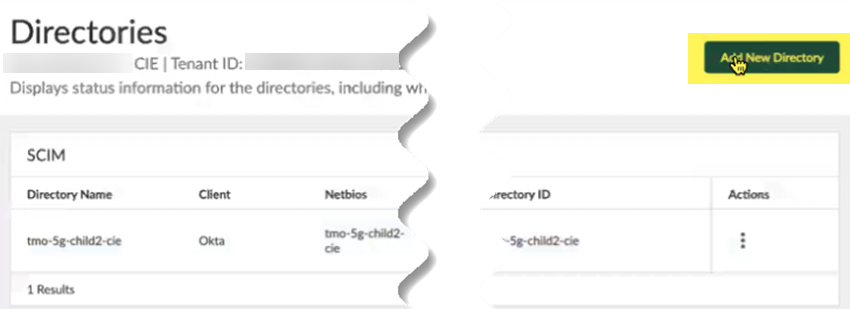
![]() Add New Directory.
Add New Directory.![]() Create a new SCIM directory by selecting .
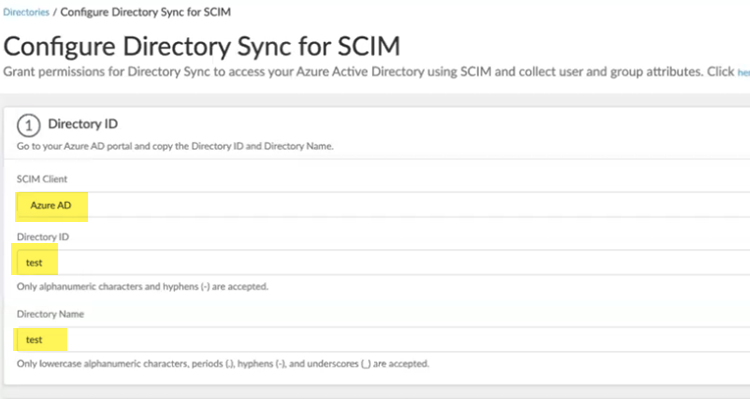
Create a new SCIM directory by selecting .![]() Choose a SCIM Client and enter a unique Directory ID and Directory Name.
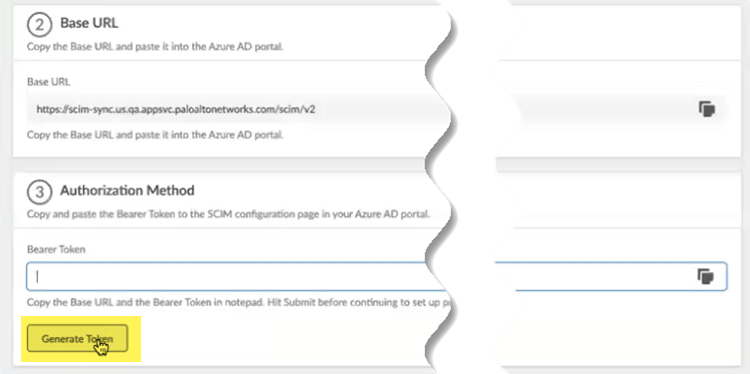
Choose a SCIM Client and enter a unique Directory ID and Directory Name.![]() Make a note of the Directory Name and the BASE URL.You use this URL to configure the Cloud Management Engine in Strata Multitenant Cloud Manager.Generate Token.
Make a note of the Directory Name and the BASE URL.You use this URL to configure the Cloud Management Engine in Strata Multitenant Cloud Manager.Generate Token.![]() Copy the token by clicking the copy icon on the right.
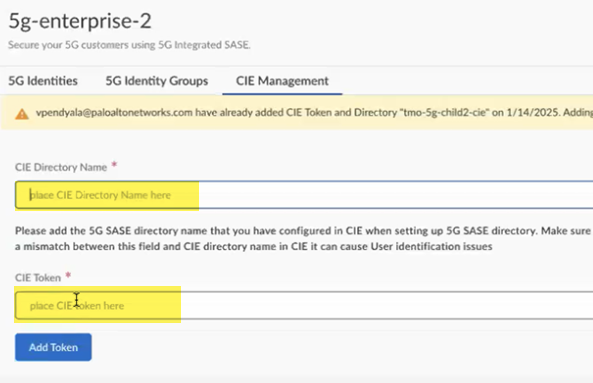
Copy the token by clicking the copy icon on the right.![]() Return to the Strata Multitenant Cloud Manager select .Enter the CIE Directory Name, using the same name you configured in the Cloud Identity Engine, and paste in the CIE Token you copied during Cloud Identity Engine setup.
Return to the Strata Multitenant Cloud Manager select .Enter the CIE Directory Name, using the same name you configured in the Cloud Identity Engine, and paste in the CIE Token you copied during Cloud Identity Engine setup.![]() Continue with Add 5G Identities.
Continue with Add 5G Identities.Add 5G Identities
You can either upload identities one at a time in the web interface, or in bulk using a .csv file.If you use a .csv file:- A maximum of 500 records is supported for each .csv file.
- You can upload multiple .csv files; however, upload the .csv files one at a time and wait until you get a message that the records have been successfully added before uploading the next file.
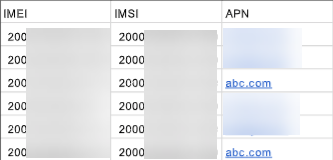
- Make sure that the records are in this order:
- IMEI
- IMSI
- APN
![]()
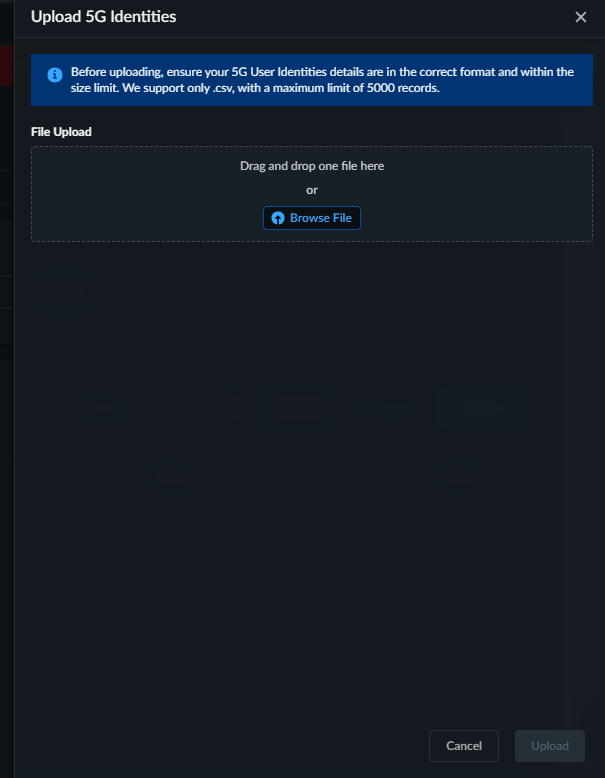
To add your mobile user identities, switch to the child tenant and perform the following:- Go to .Specify the Enterprise Domain, which is the CIE directory.You can either upload identities one at a time in the web interface, or in bulk using a .csv file.
- To add identities from a .csv file:
- Upload the .csv file that has the 5G identities.
- Drag and drop the file, or Browse File, and upload the file.If the upload fails, a message displays that indicates the line that failed.
![]()
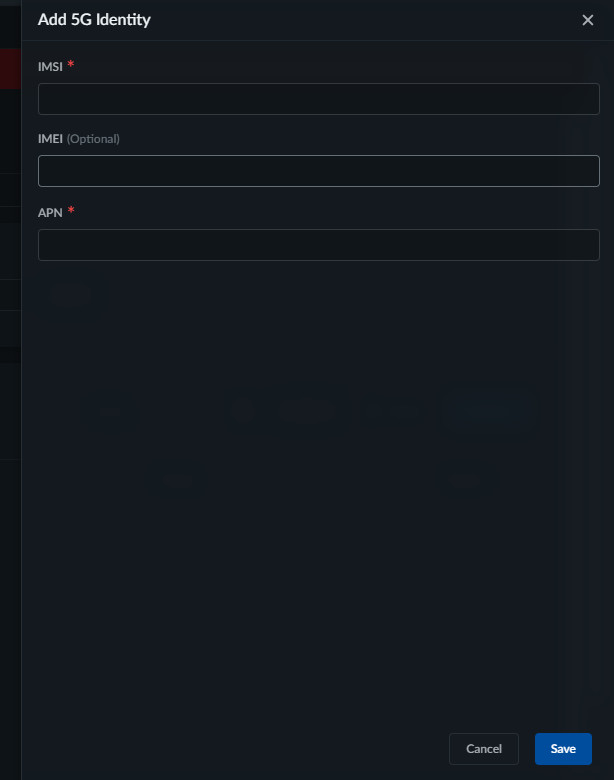
- To add identities one at a time from the UI:
- Add New identities.
- Specify the IMSI, IMEI, and APN numbers.
- Save your changes.
![]()
Proceed with Add 5G Identity Groups.Add 5G Identity Groups
Use these groups in Security policy rules to allow or block the access of public and private apps.To add 5G identity groups, switch to the child tenant and perform the following:- Go to .Specify a unique Name for the group.Select the 5G identities to add to the group and Save your changes.