Prisma SD-WAN
Configure a Static Route
Table of Contents
Configure a Static Route
Learn more about Prisma SD-WAN Static route.You can configure a static
route for a branch site or a data center site.
| Where Can I Use This? | What Do I Need? |
|---|---|
|
|
You can configure a static route for a branch
site or a data center site. Starting from release 6.0.1, we are supporting
global and link-local IPv6 addresses.
- Select .
- Click +Static Route to create a new static route.

- For VRF, by default Global will be selected. VRF Global is enabled only when the associated device supports VRF.In ION Device version 6.2.3, Global VRF supports IPv6 address.
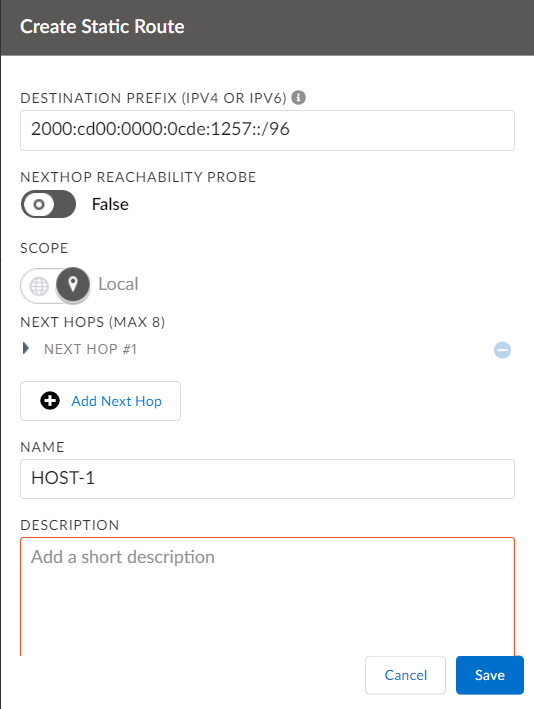
- Enter an IPv4 or IPv6 address mask for next hop Destination Prefix (IPv4 or IPv6).The following IPv6 addressing formats are supported:
- Unique local addresses (ULA) use prefix: fc00::/7. The first bit following the prefix indicates, if set, that the address is locally assigned. This splits the address block in two equally sized halves, fc00::/8 and fd00::/8link local routes: fe80::
- Eight groups of four hexadecimal digits: xxxx:xxxx:xxxx:xxxx:xxxx:xxxx:xxxx:xxxx
- Suppressed leading zeros in each 16-bit field: xxxx:xxx::x:x represents xxxx:xxxx::xxxx:xxxx
- Two colons to represent longest sequence of consecutive all-zero fields: xxxx:xxx::x:x:x:x represents xxxx:xxx:x:x:x:x:x:x
As part of release 6.0.1, global IPv6 address is supported. - Optional Enable NextHop Reachability Probe for the device to probe the next hop.By enabling the NextHop reachability probe, the device checks if the next hop configured on the static route is reachable via ICMP probes.
- Toggle Scope as Local or Global.
- If scope is local, the device does not advertise the route to other sites.
- If scope is global, the device advertises the route to other sites.
When you configure a global static route, the device advertises the destination IP/prefix to other sites automatically. - Enter the next hop IPv4 or IPv6 Address for the traffic.You can configure next hop as Global IPv6 address or as Link-Local address along with required interface on the ION device.
- Enter the Admin Distance for this specific route.The default value for Admin Distance is 1.
- To configure a list of next hops, specify the IP address with the administrative distance for the next hop, or specify the interface. The reachability check for the next hop is performed through ICMP echo requests and for IPv6 the next hop is performed through ICMP6 echo requests.
- When you specify more than one next hop with different administrative (admin) distances, the device prefers a next hop with a lower admin distance over that with a higher admin distance.
- When you specify more than one next hop with the same admin distance, and they are all reachable, the device forwards traffic to only one of the next hops.
- When a next hop fails, alternate next hops if available, will be used for new and existing flows to the destination prefixes. When the last next hop to a set of prefixes fails, existing and new flows will be dropped.
- Flows dropped due to a next hop being unreachable are indicated in the analytics charts.
- Select an Interface.You can select an interface on the ION device with a defined IP address or a bypass pair interface that contains attached LAN networks, since these interfaces can forward packets to a next hop. When you specify an interface without a gateway as the next hop, the device generates an ARP entry for the destination IP directly on the specified interface.You may configure either a next hop IPv4 address or an interface, but not both.
- For Self, select True to indicate that traffic is destined for the ION device.By default, Self is set to False.
- Enter a name and optionally enter tags and description for the static route and Save.