Configure Service Provider IP Address Pools Through the Strata Multitenant Cloud Manager
Table of Contents
Configure Service Provider IP Address Pools Through the Strata Multitenant Cloud Manager
Learn how to configure Service Provider IP address pools through the Strata Multitenant Cloud Manager
| Where Can I Use This? | What Do I Need? |
|---|---|
|
|
After you activate a Service Provider license for
your top-most, root-level, parent tenant, add Service Provider (SP) Backbones and
connections, you can configure IP address
pools. Service Provider Backbones enable service providers to offer granular
Prisma Access egress traffic routes to their customers through public
cloud providers for network backbone traffic. Alternatively, you can add a specific
IP address pool to leverage your own IP addresses for egress traffic instead.
General steps follow for configuring a Prisma Access IP address pool or
configuring your own IP address pool.
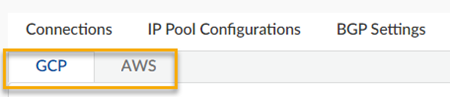
- Access the Prisma SASE Multitenant Portal and select .Navigate to the IP Pool Configurations tab, where you have the choice of GCP or AWS tabs.
![]() Select Add IP pool.Enter an IP Pool Name.Select a Compute Region.(GCP only) Select a Backup Region.Choose an IP Pool Type of Prisma Access IP or Bring your own IP and complete based on the steps that follow for your scenario.
Select Add IP pool.Enter an IP Pool Name.Select a Compute Region.(GCP only) Select a Backup Region.Choose an IP Pool Type of Prisma Access IP or Bring your own IP and complete based on the steps that follow for your scenario.Configure a Prisma Access IP Address Pool
Offer granular Prisma Access egress traffic routes to your customers through public cloud providers for network backbone traffic.- Complete the preceding general configuration steps.Enter an SP Partner Email address.This is the email address where a Palo Alto Networks SRE will contact you with information about the IP addresses that you have been assigned.
Configure Your Own IP Address Pool
Offer granular Prisma Access egress traffic routes to your customers through your own IP address pool for network backbone traffic.- Complete the preceding general configuration steps.Select an edge Location.Enter an IP Pool. Enter multiple values separated by commas (no spaces) or enter an address with a subnet mask of a minimum of /29 to a maximum of /24.
- (Optional) You can add another by selecting +Location / IP Pool.
- The maximum limit is 10 subnets per region.
- After the IP subnet is consumed, you can't change it.
Submit.View IP Configuration Status
After you configure an IP address pool, this page offers the following table: TitleDescriptionIP Pool NameThe name you assigned to the IP address pool.IP ProviderCompute RegionThe region you assigned to the IP address pool.Backup Region (GCP only)The backup region you assigned to the IP address pool.LocationThe location you assigned to the IP address pool.IP Pool Subnets The IP address pool you added. For a Palo Alto Networks IP address pool, this displays "N/A" before assignment and it displays "PANW Assigned IP" after assignment. Status- Active — The backbone has at least one active connection, so is considered active.
- Pending — The SP must do the configurations for BGP peering and work with the Palo Alto Networks SRE.
- Error — Edit or delete the connection details and try again.
Assign to RegionThis begins as a button. After you configure an IP pool, you can assign the pool to a region. After you assign the pool to a region, the button changes to a status. ActionsCan’t use the actions while the status is pending.- Delete — You need to have at least one address pool. If you have configured multiple pools, you can't delete them all.
- Edit — Once an IP subnet is consumed, it cannot be changed. But you can add more.