Prisma SD-WAN
Configure SNMP
Table of Contents
Expand All
|
Collapse All
Prisma SD-WAN Docs
-
-
- New Features Guide
-
- CloudBlade Integrations
- CloudBlades Integration with Prisma Access
-
-
-
-
- 6.5
- 6.4
- 6.3
- 6.2
- 6.1
- 5.6
- New Features Guide
- On-Premises Controller
- Prisma SD-WAN CloudBlades
- Prisma Access CloudBlade Cloud Managed
- Prisma Access CloudBlade Panorama Managed
Configure SNMP
Simple Network Management Protocol (SNMP), we have SNMP Agents and Traps in
Prisma SD-WAN.
| Where Can I Use This? | What Do I Need? |
|---|---|
|
|
SNMP Agents and Traps are disabled by default. To enable and configure
SNMP Agent and Traps:
In 6.x.x, the ifIndex is not persistent across
datapath process restarts or reboots. Statistics should instead be
referenced using the interface name (ifName).
On lower-end platforms, the total interface
count should not exceed 40–45 to prevent timeouts and performance
degradation. For more information, see SNMP Monitoring Performance and Interface Density.
- Select ConfigurationPrisma SD-WANION DevicesClaimed, select the device you want to configure.From the device configuration screen, select SNMP Config.The Agents/Traps screen displays.Configure an SNMP Agent. An SNMP Agent has read-only access.
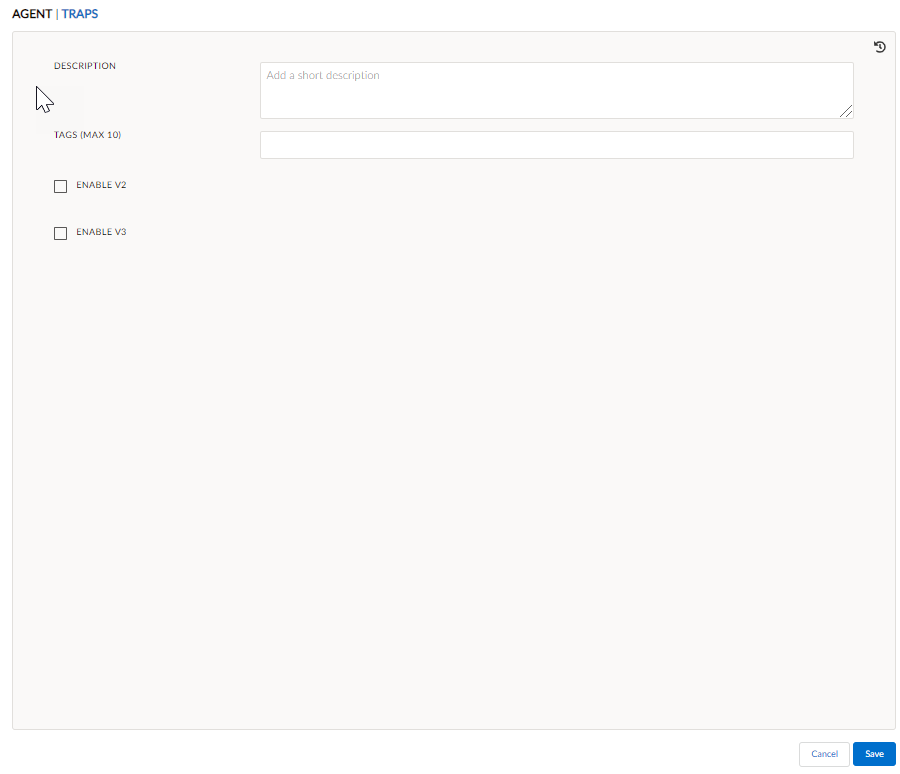
- Click the Agent tab.Enter a Description and add (Optional) Tags.Select Enable V2 or Enable V3.Both may be enabled, but at least one must be enabled.Select Enable V2 to configure Community.If V2 is enabled, community can be configured. If community is not configured, then public will be set as the default community.Select Enable V3 to configure the User. If V3 is enabled, use the Add User option to add a user and define the user attributes.Enter a Username (Optional) Engine ID to identify the device, and select a Security Level from the drop-down.The security level NOAUTH indicates that no authentication is required, AUTH indicates the authentication type, and Private indicates the security level.Auth Type may be MD5, SHA, or None. If you select an authentication type, enter an authentication phrase of 8 to 25 characters. Encryption Type may be AES, DES, or None. If you select an encryption type, enter an encryption phrase of 8 to 25 characters.
![]() Click Save.Configure SNMP Traps.
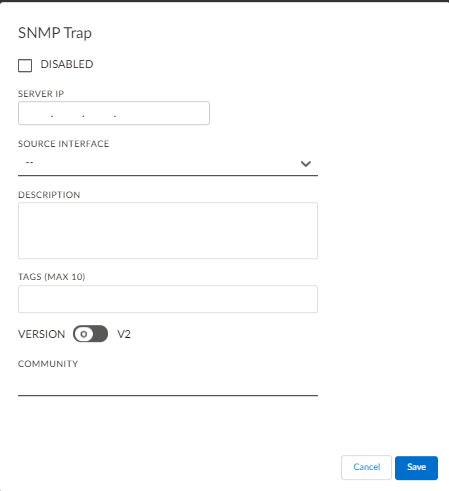
Click Save.Configure SNMP Traps.- Click on the Traps tab and select Add Trap.To enable SNMP Trap, make sure the Disabled option is unchecked.Enter the SNMP server or manager’s IP address.Select a Source Interface from the drop-down. You can now select associated VRF (global or custom).Enter a Description and add (Optional) Tags.Toggle Version to enable V2 for community or V3 for users.One of the options must be enabled at all times. V2 is enabled by default. A maximum of 16 unique servers may be configured per version (V2 and V3).If V2 is enabled, Community may be configured. If community is not configured, then public is set as the default community. If V3 is enabled, user attributes can be defined, including the Name, Engine ID, and the Security Level.Select Author Private as the security level and enter the authentication type and phrase.


