Deploy the Palo Alto Networks NGFW Service
Table of Contents
Deploy the Palo Alto Networks NGFW Service
Use the following steps to automate the process
of deploying an instance of the VM-Series firewall for NSX-V on
each ESXi host in the specified cluster.
- Select .
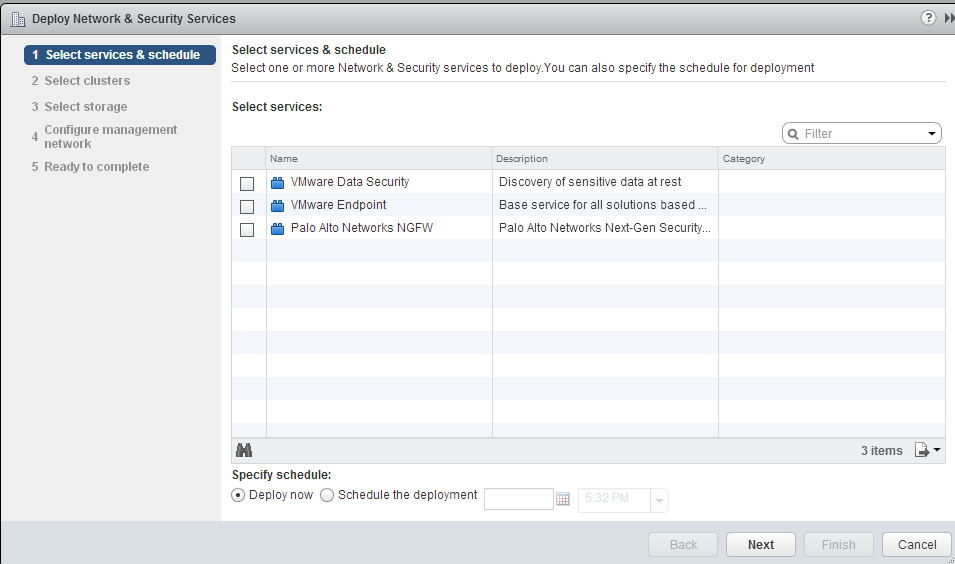
- Click New Service Deployment (green
plus icon), and select the service definition for the Palo Alto
Networks next generation firewall you want to deploy, Palo
Alto Networks NGFW service in this example. Click Next.
![]()
- Select the Datacenter and the cluster(s) on which the service will be deployed. One instance of the firewall will be deployed on each host in the selected cluster(s).
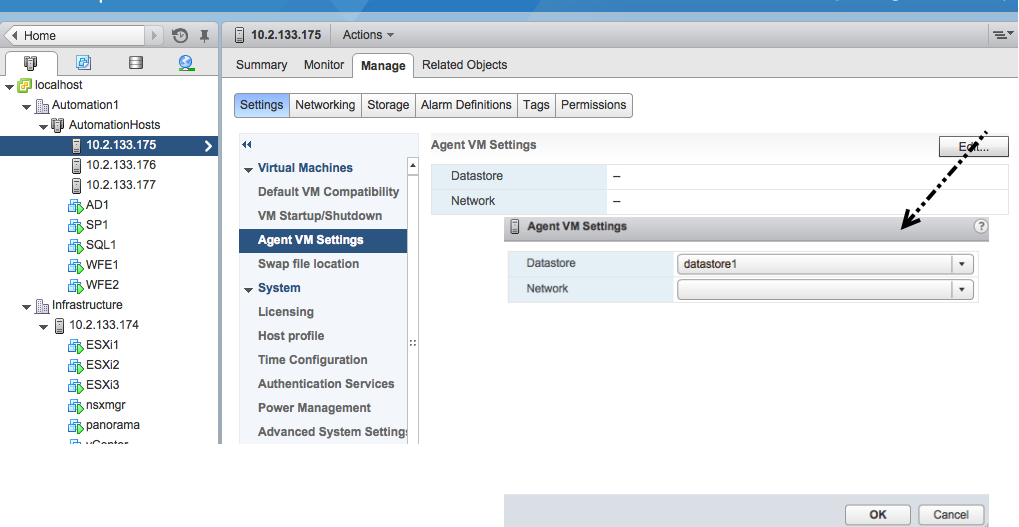
- Select the datastore from which to allocate disk space
for the firewall. Select one of the following options depending
on your deployment:
- If you have allocated shared storage for the cluster, select an available shared datastore.
- If you have not allocated shared storage for the cluster, select the Specified-on-host option. Be sure to select the storage on each ESXi host in the cluster. Also select the network that will be used for the management traffic on the VM-Series firewall.
![]()
- Select the port group that provides management network traffic access to the firewall.
- Select the IP address pool assignment.
- Use IP Pool (Define an IP Address Pool) from which to assign a management IP address for each firewall when it is being deployed.
- Use DHCP on the management interface.
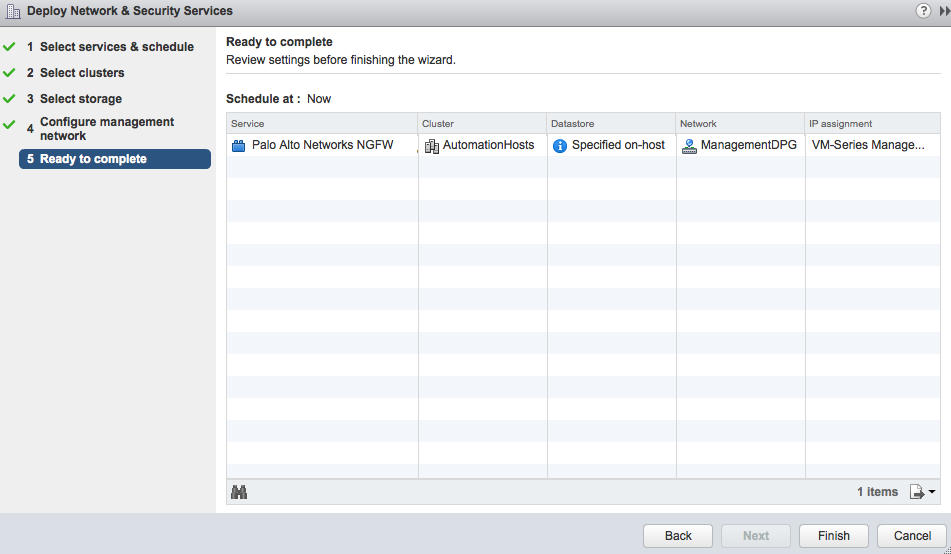
If you use an IP pool, on deployment, the display name for the VM-Series firewall on Panorama includes the hostname of the ESXi host. For example: PA-VM:10.5.1.120.If you use DHCP, the display name for the VM-Series firewall does not include the name of the ESXi host. - Review the configuration and click Finish.
![]()
- Verify that the NSX-V Manager reports the Installation
Status as Successful. This process
can take a while; click the More tasks link
on vCenter to monitor the progress of the installation.
![]() If the installation of VM-Series fails, the error message is displayed on the Installation Status column. You can also use the Tasks tab and the Log Browser on the NSX-V Manager to view the details for the failure and refer to the VMware documentation for troubleshooting steps.
If the installation of VM-Series fails, the error message is displayed on the Installation Status column. You can also use the Tasks tab and the Log Browser on the NSX-V Manager to view the details for the failure and refer to the VMware documentation for troubleshooting steps. - Verify that the firewall is successfully deployed.
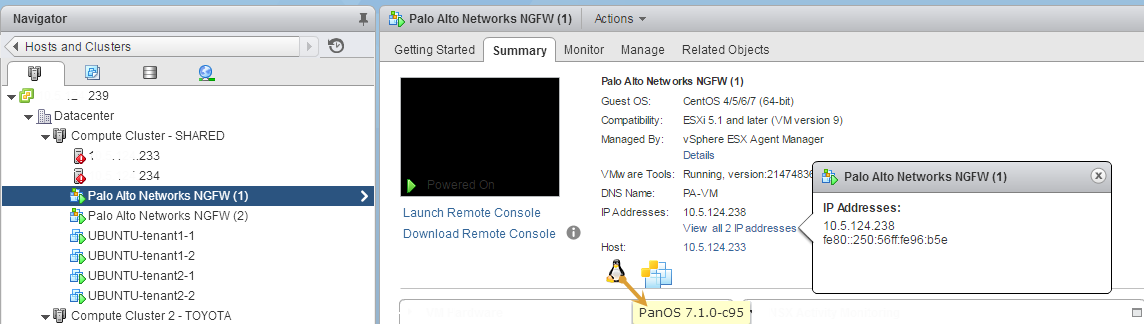
- On the vCenter server, select Hosts and Clusters to check that every host in the cluster(s) has one instance of the firewall.
- View the management IP address(es) and the PAN-OS
version running on the firewall directly from vCenter server. VMware Tools
is bundled with the PAN-OS software image and is automatically enabled
when you launch the VM-Series firewall.With VMware Tools, you can view resource utilization metrics on hard disk, memory, and CPU, and use these metrics to enable alarms or actions on the vCenter server. The heartbeats allow you to verify that the firewall is live and trigger actions to ensure high availability. You can also perform a graceful shutdown and restart of the firewall using the power off function on vCenter.
![]()
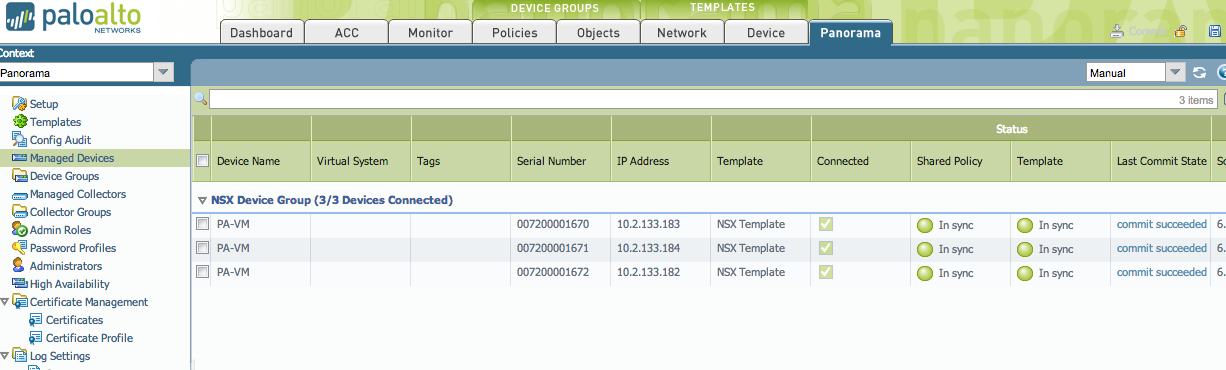
- Access the Panorama web interface to make sure that the
VM-Series firewalls are connected and synchronized with Panorama.
- Select to verify that
the firewalls are connected and synchronized.If the firewall gets its IP address from an IP Pool, the Display Name for the firewall includes the hostname of the ESXi server on which it is deployed, for example PA-VM:ESX1.Sydney. If the firewall gets a DHCP assigned IP address, the hostname of the ESXi server does not display.If the ESXi server hostname is longer than 32 characters, the hostname will not be displayed in Panorama. Instead, only PA-VM is displayed.
![]()
- Click Commit, and select Commit Type as Panorama.A periodic Panorama commit is required to ensure that Panorama saves the device serial numbers to configuration. If you reboot Panorama without committing the changes, the managed devices will not connect back to Panorama; although the Device Group will display the list of devices, the devices will not display in .
- Select to verify that
the firewalls are connected and synchronized.
- Verify that the capacity license is applied and apply
any additional licenses that you have purchased. At a minimum, you
must activate the support license on each firewall.When Panorama does not have internet access (Offline), you must manually license each firewall, and then add the serial number of the firewall to Panorama so that it is registered as a managed device, and can receive the template stack and device group settings from Panorama. See Activate the License for the VM-Series Firewall for VMware NSX for more information.
- Select to
verify that the VM-Series capacity license is applied.
![]()
- To apply additional licenses on the VM-Series firewalls:
- Click Activate on .
- Find or filter for the firewall, and in the Auth Code column, enter the authorization code for the license to activate. Only one authorization code can be entered at a time, for each firewall.
![]()
- Click Activate, and verify that the result of the license activation was successful.
- Select to
verify that the VM-Series capacity license is applied.
- (Optional) Upgrade the PAN-OS version on the VM-Series firewalls, see Upgrade the PAN-OS Software Version (VM-Series for NSX).
- Add guest VMs to the right security groups for traffic
from those VMs to be redirected to the VM-Series firewall.
- Log in to vCenter.
- Select .
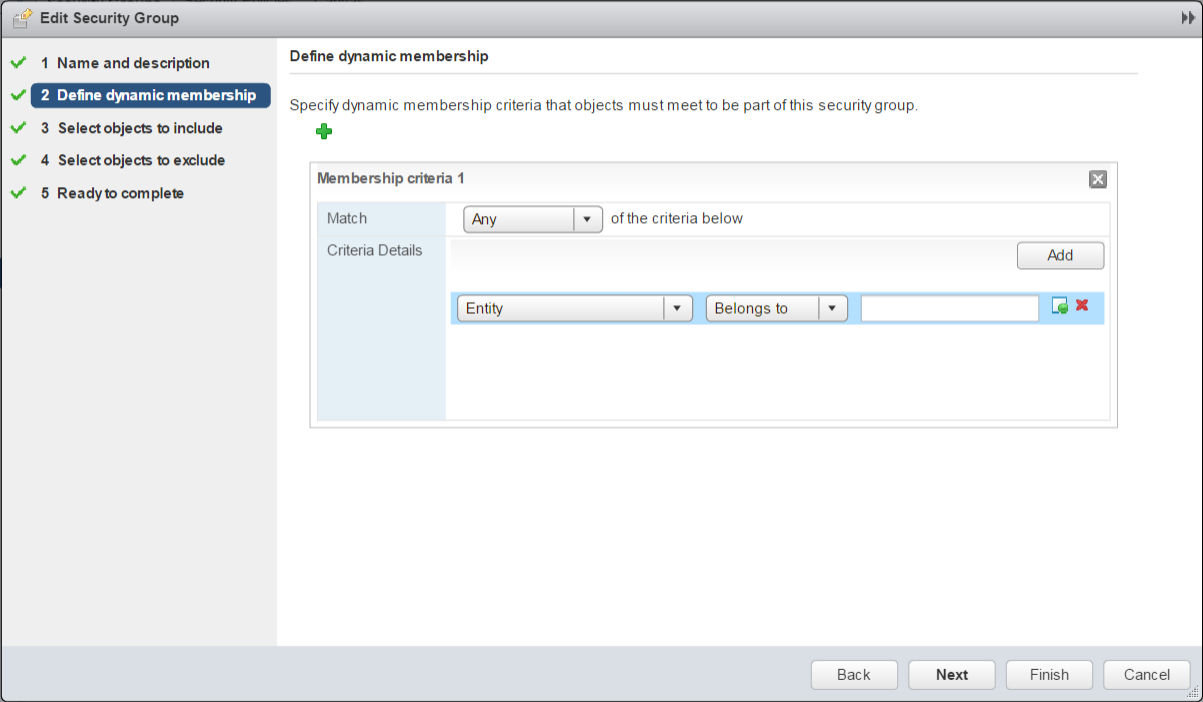
- Highlight the security group to which you want to assign guest VMs and click the Edit Security Group icon.
- Select Define dynamic membership and click the + icon.
- Click Add.
- Define the dynamic membership criteria that the guest
VMs must meet to be part of the selected security group. The criteria you
use depends on your network deployment. For example, you might choose
to group VMs by an Entity such as Logical Switch or Distributed
Port Group.
![]()
- Click Finish.
- Repeat this procedure for each security group that should have its traffic redirected to the VM-Series firewall.