Deploy the VM-Series Firewall on Azure Stack
Table of Contents
Deploy the VM-Series Firewall on Azure Stack
Azure Stack is Microsoft’s Azure cloud within your own
datacenter. Deploy the firewall to secure your workloads in your
Azure Stack (on-premise) implementation and shift into the public
Azure cloud as needed.
You can deploy the VM-Series firewall on Azure
Stack to secure inter-subnet traffic between applications in a multi-tier
architecture and outbound traffic from servers within your Azure
Stack deployment. If you want to use the VM-Series firewall as a gateway
that secures inbound traffic destined to the servers within your
Azure Stack deployment, you must deploy a NAT appliance in front
of the firewall that receives inbound traffic and forwards it to
the firewall. The NAT appliance is required because on Azure Stack
you cannot assign a public IP address to a non-primary interface
of a virtual machine, such as the VM-Series firewall.
The
VM-Series firewall on Azure stack does not have support for bootstrapping,
Azure Application Insights, or the Azure Security Center integration.
Unlike
on public Azure, you do not have a solution template to deploy the
VM-Series firewall on Azure Stack. Therefore, you must use an ARM
template to deploy the VM-Series firewall. To get started, you can
use the community supported sample ARM template on GitHub, and then
develop your own ARM template for production deployments.
All VM-Series
firewall interfaces must be assigned an IPv4 address when deployed
in a public cloud environment. IPv6 addresses are not supported.
- Download marketplace items from Azure to AzureStack.To deploy the VM-Series firewall on Azure Stack, you need access to the BYOL offer of the VM-Series firewall PAN-OS image (8.1 or later). You can download the image directly from the Azure Marketplace to Azure Stack in a connected deployment.
- Access the Azure Stack portal.Your Azure Stack operator (either a service provider or an administrator in your organization), should provide the correct URL to access the portal.
- Deploy the VM-Series firewall.A solution template for the VM-Series firewall is not available on Azure Stack. Therefore, you must reference the image that you downloaded in the previous step, in an ARM template to deploy the VM-Series firewall. To get started, you can deploy the sample ARM template that is available on GitHub under the community supported policy:
- Get the sample Azure Stack GitHub template.
- Select azurestackdeploy.json to view the contents.
- Click Raw and copy the contents of the JSON file.
- Deploy the sample GitHub template.You can deploy the firewall in a existing resource group that is empty or into a new resource group. The default VNet in the template is 192.168.0.0/16, and it deploys a VM-Series firewall has three network interfaces, one management interface on 192.168.0.0/24 subnet and two dataplane interfaces on 192.168.1.0/24 and 192.168.2.0/24 subnets. You can customize these subnets to match your needs.
- Log in to the Azure Stack portal.
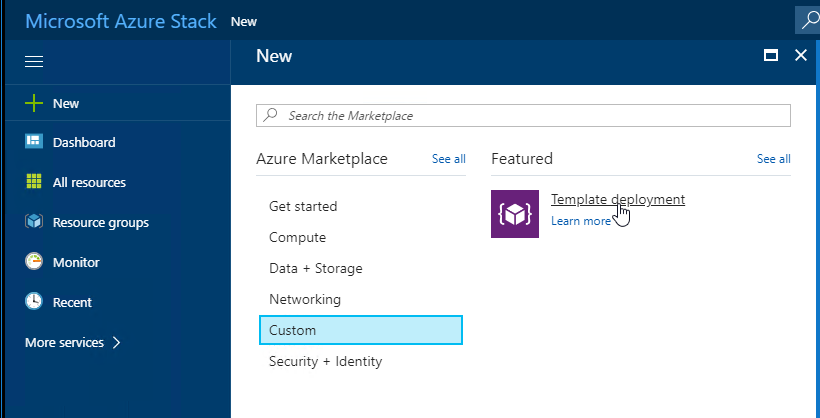
- Select .
![]()
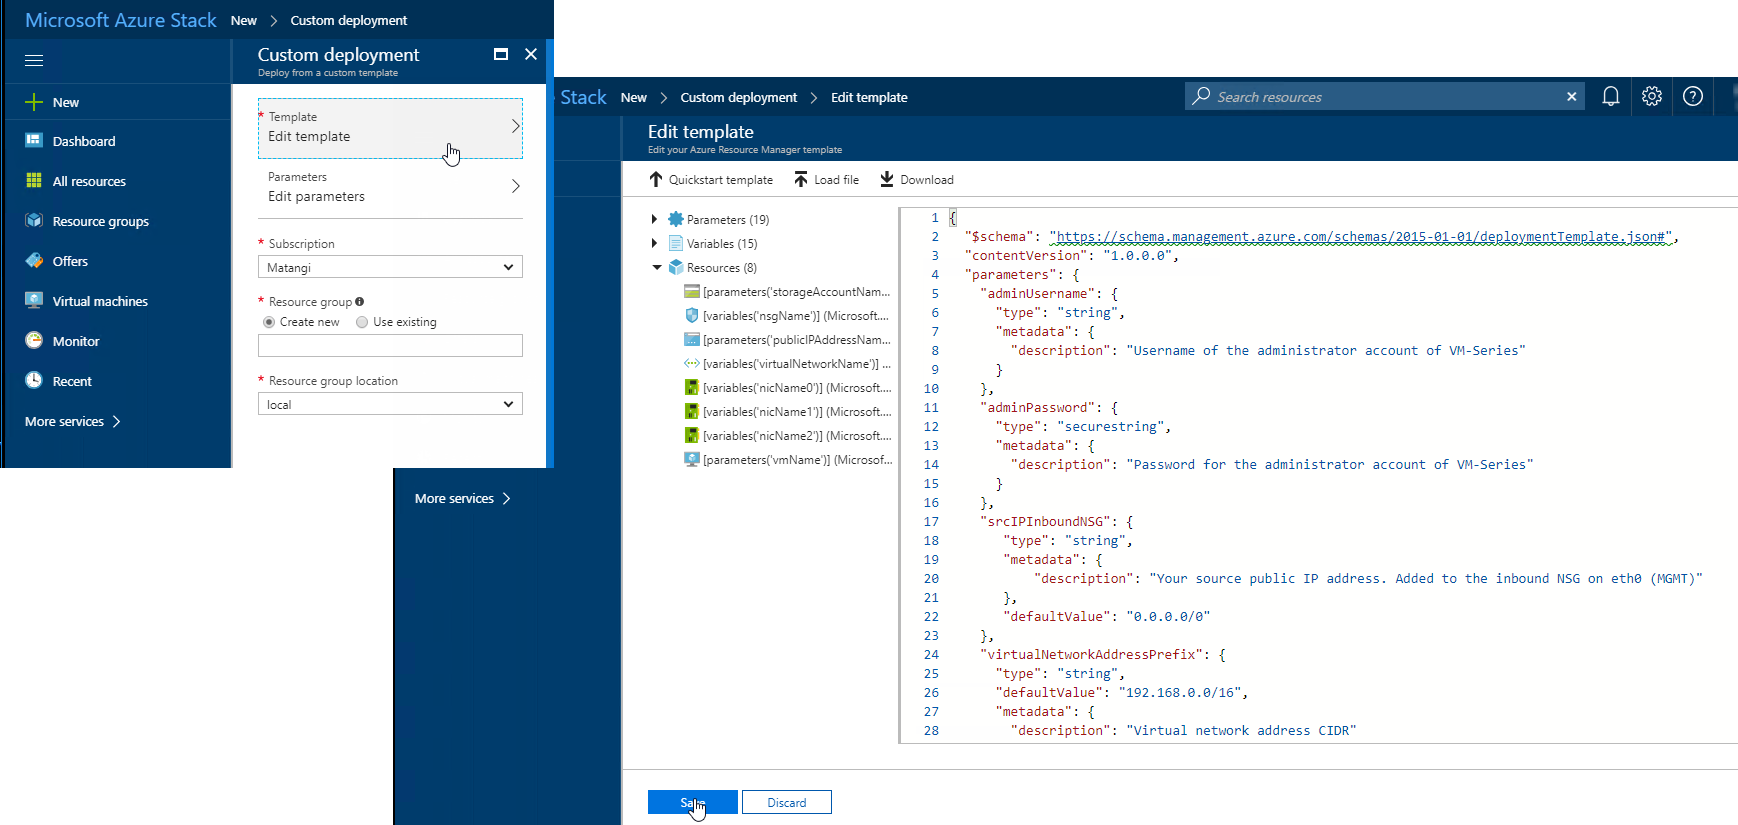
- Edit template, delete all existing content in the template, and paste the JSON template contents you copied earlier andSave.
![]()
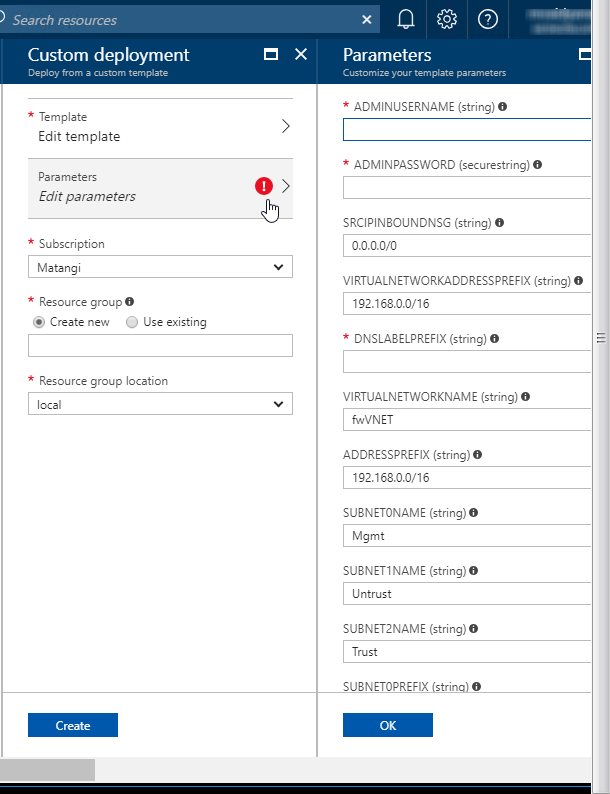
- Edit parameters, enter the values for the required parameters and modify the defaults if you need to, then click OK.
![]()
- Choose the Subscription you want to use, and then click OK.
- Choose an existing Resource Group that is empty or create a new one, and click OK.
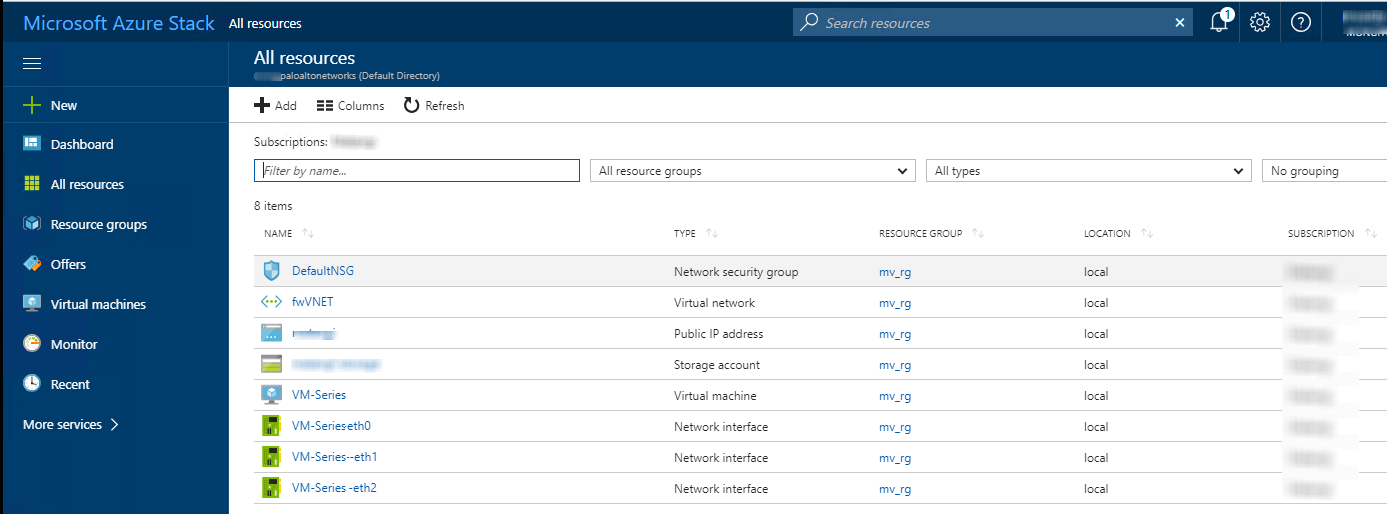
- Click Create. A new tile on the dashboard displays the progress of the template deployment.
![]()
- Get the sample Azure Stack GitHub template.
- Next Steps:
- Log in to the web interface of the firewall.Using a secure connection (https) from your web browser, log in to the DNS name for the firewall. Enter the username/password you defined earlier. You will see a certificate warning; that is okay. Continue to the web page.
- Activate the licenses on the VM-Series firewall.
- On the firewall web interface, select and select Activate feature using authentication code.
- Enter the capacity auth-code that you registered on the support portal. The firewall will connect to the update server (updates.paloaltonetworks.com), and download the license and reboot automatically.
- Log back in to the web interface on the Dashboard, confirm that a valid Serial# displays.The VM Mode displays as Microsoft Azure.If the term Unknown displays, it means the device is not licensed. To view traffic logs on the firewall, you must install a valid capacity license.
- Log in to the web interface of the firewall.
- Configure the dataplane network interfaces as Layer 3 interfaces on the firewall.