Prisma Access Agent
Set Up the Infrastructure for Prisma Access Agents (NGFW Deployment)
Table of Contents
Set Up the Infrastructure for Prisma Access Agents (NGFW Deployment)
Onboard your users in NGFW deployments by configuring the infrastructure and
selecting Prisma Access locations in Panorama.
For Panorama managed NGFW deployments, set up the infrastructure settings that are
specific to the Prisma Access Agent to provision your mobile user
environment.
You will configure the infrastructure settings using a configuration app accessible
through Strata Cloud Manager.
Before you begin, ensure that you have the following information:
- Certificates that are generated and managed on the gateway on Panorama.
Because using authentication override cookie certificate is the only method for gateway authentication, you need to use the same authentication override cookie certificate on the gateway, portal, and Prisma Access Agent management plane (EPM). Only when all the certificates match can the gateway authenticate the user using the existing cookie that the portal generated. In addition, certificates are needed for HIP checks.
- The FQDN or IP address for internal or external gateways managed on Panorama that you want your users to access.
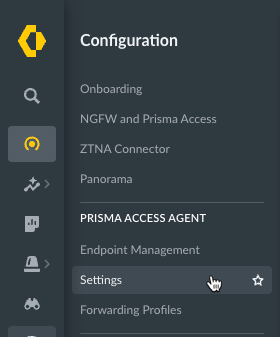
- Log in to Strata Cloud Manager as the administrator.To configure the infrastructure settings in the configuration app in Strata Cloud Manager, select ConfigurationPrisma Access AgentSettings.
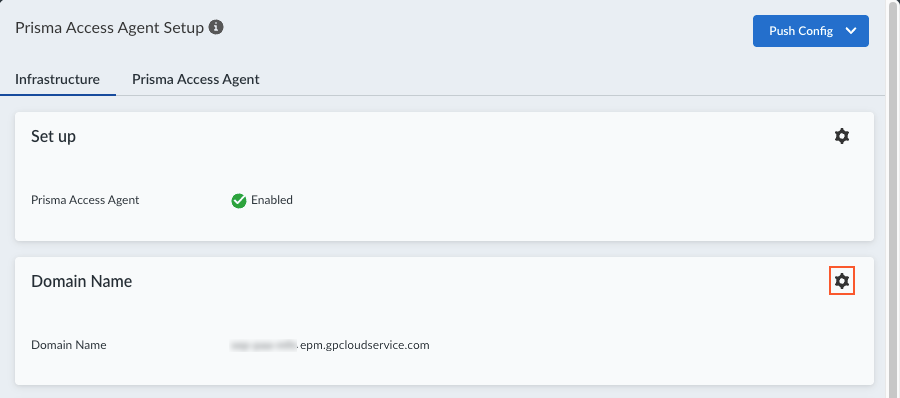
![]() Select Infrastructure.Configure the Prisma Access Agent domain FQDN. This is similar to the GlobalProtect portal FQDN.
Select Infrastructure.Configure the Prisma Access Agent domain FQDN. This is similar to the GlobalProtect portal FQDN.- Edit the Domain Name settings.
![]() Add a hostname to the Domain Name for the service (Endpoint Manager) that the Prisma Access Agent connects to.By default, users can access the service using an FQDN based on your hostname and the .epm.gpcloudservice.com domain. This FQDN will be published to the public domain name servers.
Add a hostname to the Domain Name for the service (Endpoint Manager) that the Prisma Access Agent connects to.By default, users can access the service using an FQDN based on your hostname and the .epm.gpcloudservice.com domain. This FQDN will be published to the public domain name servers.![]() Save your domain name setting.Import the authentication override cookie certificates that are used for gateway authentication.
Save your domain name setting.Import the authentication override cookie certificates that are used for gateway authentication.- Click Add Certificate.
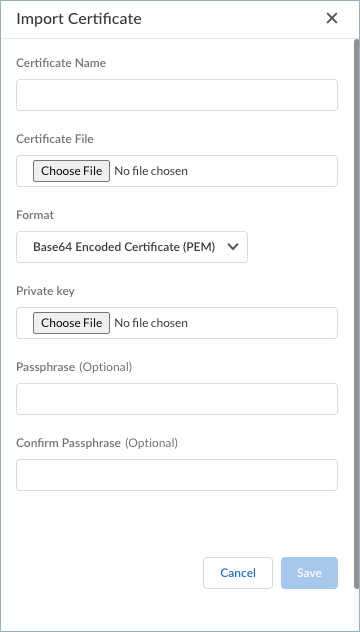
![]() Enter the Certificate Name.Choose File to select and upload the certificate file. This certificate file was generated and managed by the gateway.Select the Format for the certificate and choose the file for the Private key.(Optional) Enter and confirm a Passphrase.Save the certificate settings.
Enter the Certificate Name.Choose File to select and upload the certificate file. This certificate file was generated and managed by the gateway.Select the Format for the certificate and choose the file for the Private key.(Optional) Enter and confirm a Passphrase.Save the certificate settings.![]() Create certificate profiles based on the certificates that you imported in the previous step. These certificate profiles will be used for the authentication override cookie settings and for HIP matches.
Create certificate profiles based on the certificates that you imported in the previous step. These certificate profiles will be used for the authentication override cookie settings and for HIP matches.- Click Add Certificate Profile.
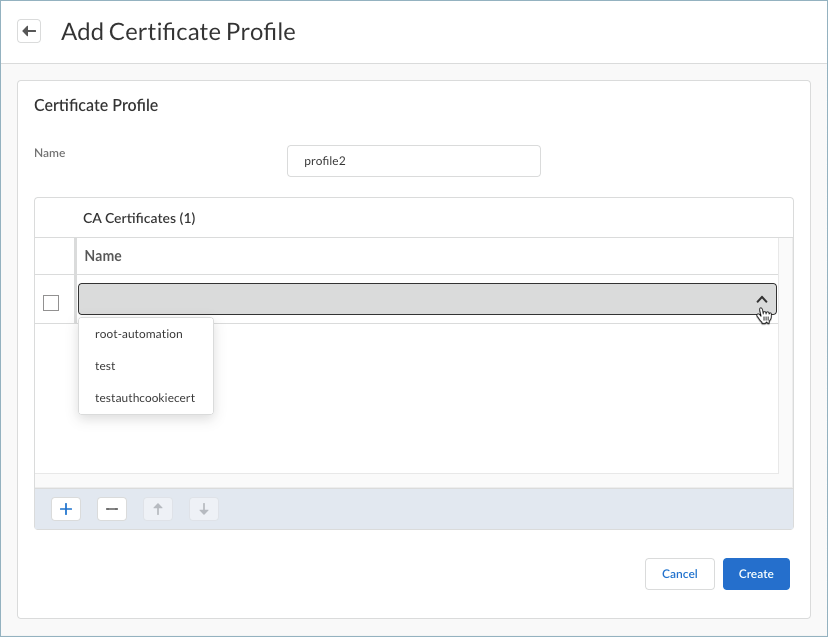
![]() Enter a Name for the certificate profile.Click the + sign and open the drop-down to show the list of certificates that you imported in the previous step.Select a certificate from the list. You can add one or more certificates to the profile.Create the certificate profile.
Enter a Name for the certificate profile.Click the + sign and open the drop-down to show the list of certificates that you imported in the previous step.Select a certificate from the list. You can add one or more certificates to the profile.Create the certificate profile.![]() Add the internal and external gateways that you want your users to access. The gateways are configured on the NGFW firewall but you need to add the same details (gateway FQDN or IP address) here.
Add the internal and external gateways that you want your users to access. The gateways are configured on the NGFW firewall but you need to add the same details (gateway FQDN or IP address) here.- Add a gateway.
- For internal gateways, select Add GatewayInternal Gateway.
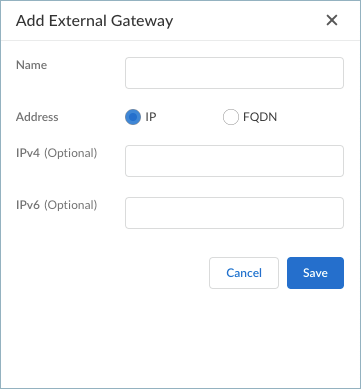
- For external gateways, select Add GatewayExternal Gateway.
![]() Enter the Name for the gateway.Enter the IP address or FQDN for the gateway.
Enter the Name for the gateway.Enter the IP address or FQDN for the gateway.- For IP address, select IP and enter the IPv4 or IPv6 address for the gateway.
- For FQDN, select FQDN and enter the FQDN for the gateway.
![]() Save your gateway settings.
Save your gateway settings.

