GlobalProtect
Collect Application and Process Data From Endpoints
Table of Contents
Collect Application and Process Data From Endpoints
Enable custom checks to collect application and process data from endpoints and use
it for security policy matching.
The Windows Registry, macOS plist, and Linux
process list can be used to configure and store settings for Windows
and macOS operating systems, respectively. You can create a custom
check that allows you to determine whether an application is installed
(has a corresponding registry or plist key) or is running (has a
corresponding running process) on a Windows, macOS, or Linux endpoint.
Enabling custom checks instructs the GlobalProtect app to collect
specific registry information (Registry Keys and Registry Key Values
from Windows endpoints) or preference list (plist) information (plist
and plist keys from macOS endpoints) or has a corresponding process
(name of the process from Linux endpoints). The data that you define
to be collected in a custom check is included in the raw Host
Information data collected by the GlobalProtect app and then
submitted to the GlobalProtect gateway when the app authenticates
and connects to the gateway. For more information on defining app
settings directly from the Windows Registry, the global macOS plist,
or the Linux pre-deployment configuration, see Deploy
App Settings Transparently.
To monitor the data collected
with custom checks, you can create a HIP object. You can then add
the HIP object to a HIP profile to use the collected data to match to
endpoint traffic and enforce security rules. The gateway uses the
HIP object (which matches to the data defined in the custom check)
to filter the raw host information submitted by the app. When the
gateway matches the endpoint data to a HIP object, a HIP Match log
entry is generated for the data. The HIP profile also allows the
gateway to match the collected data to a security rule. If the HIP
profile is used as criteria for a security policy rule, the gateway
enforces that security rule on the matching traffic.
Use the
following steps to enable custom checks to collect data from Windows macOS,
or Linux endpoints. This workflow also includes optional steps to
create a HIP object and HIP profile for a custom check, which allows
you to use endpoint data as matching criteria for security policies
to monitor, identify, and act on traffic.
On Windows,
macOS, and Linux devices, when you configure Custom Checks such
as to collect registry or plist entries, GlobalProtect hides this
information in the Host Profile summary of the GlobalProtect app.
- Enable the GlobalProtect app to collect Windows Registry information from Windows endpoints, plist information from macOS endpoints, or process list information from Linux endpoints. The type of information collected can include whether or not an application is installed on the endpoint, or specific attributes or properties of that application.Collect data from a Windows endpoint:
- Select .
- Select an existing portal configuration or Add a new one.
- On the Agent tab, select the agent configuration that you want to modify or Add a new one.
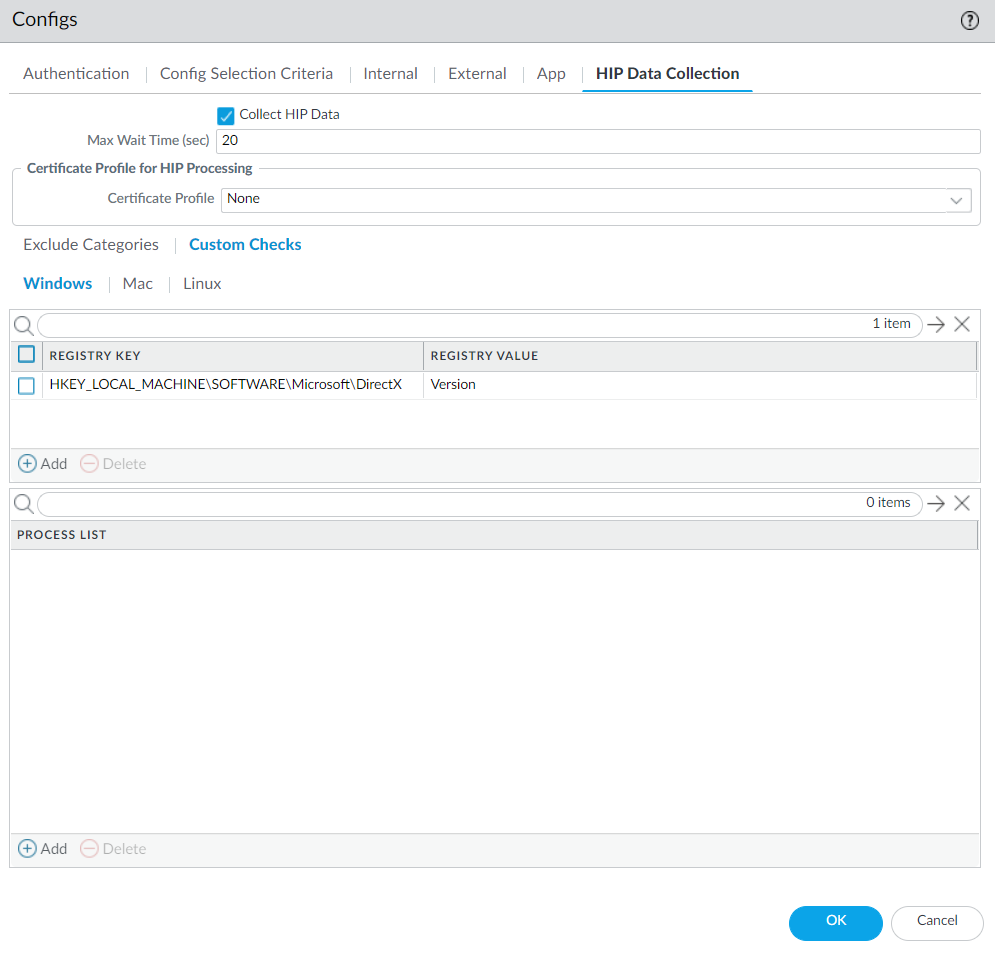
- Select HIP Data Collection.
- Enable the GlobalProtect app to Collect HIP Data.
- Select , and then Add the Registry Key that you want to collect information about. If you want to restrict data collection to a value contained within that Registry Key, add the corresponding Registry Value.

Collect data from a macOS endpoint:- Select .
- Select an existing portal configuration or Add a new one.
- On the Agent tab, select the agent configuration that you want to modify or Add a new one.
- Select HIP Data Collection.
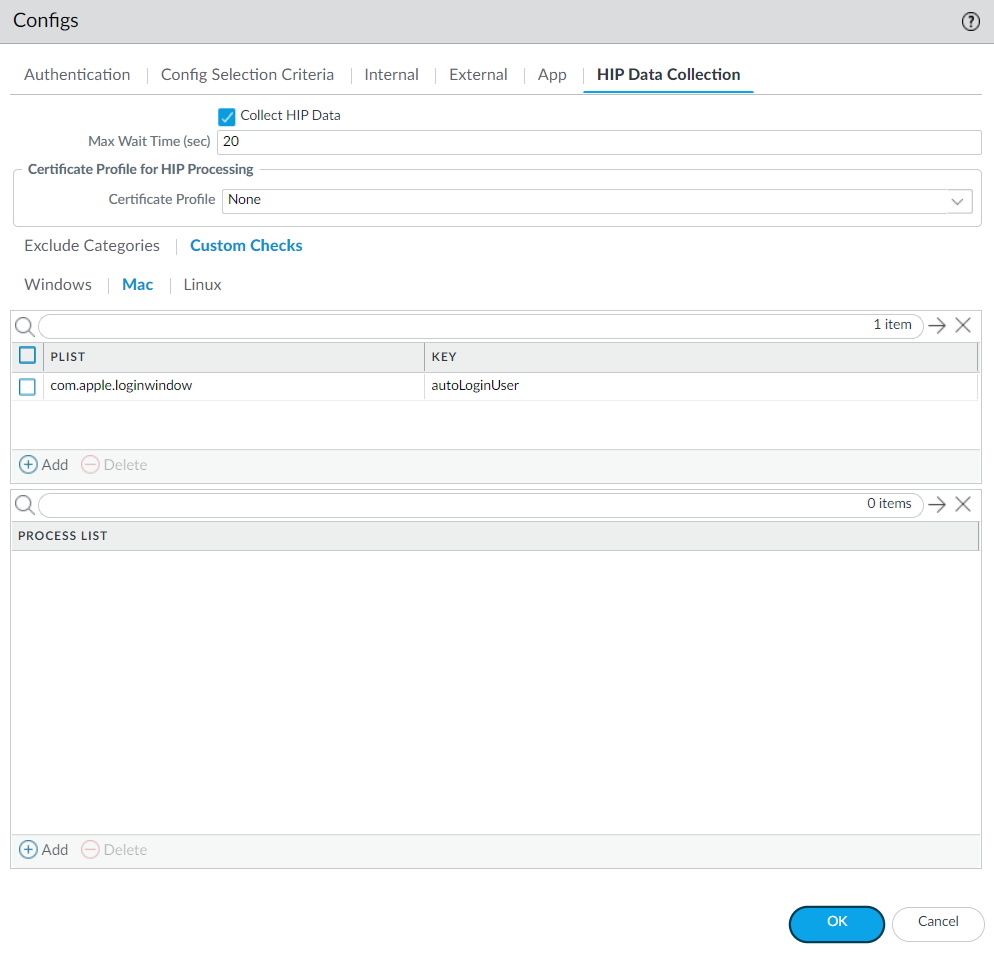
- Enable the GlobalProtect app to Collect HIP Data
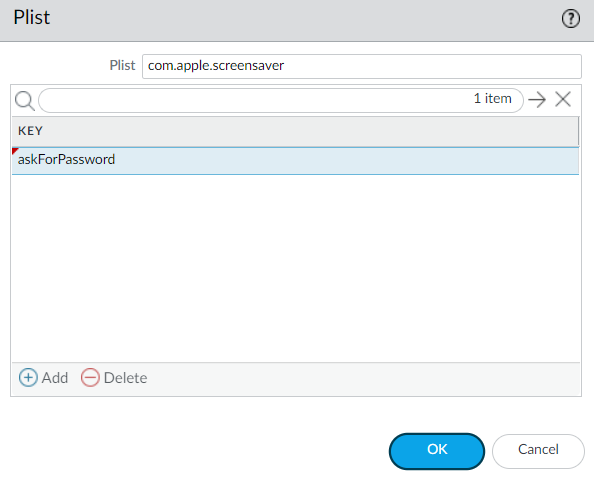
- Select , and then Add the Plist that you want to collect information about and the corresponding plist Key to determine if the application is installed.
For example, Add the Plist com.apple.screensaver and the Key askForPassword to collect information on whether a password is required to wake the macOS endpoint after the screen saver begins:
Collect data from a Linux endpoint:- Select .
- Select an existing portal configuration or Add a new one.
- On the Agent tab, select the agent configuration that you want to modify or Add a new one.
- Select HIP Data Collection.
- Enable the GlobalProtect app to Collect HIP Data.
- Select , and then Add the Process List that you want to collect information about.
- (Optional) Check if a specific process is running on the endpoint.
- Select .
- Select an existing portal configuration or Add a new one.
- On the Agent tab, select the agent configuration that you want to modify or Add a new one.
- Select HIP Data Collection.
- Enable the GlobalProtect app to Collect HIP Data
- Select , Mac, or Linux.
- Add the name of the process that you want to collect information about to the Process List.
- Save the custom check.Click OK and Commit the changes.
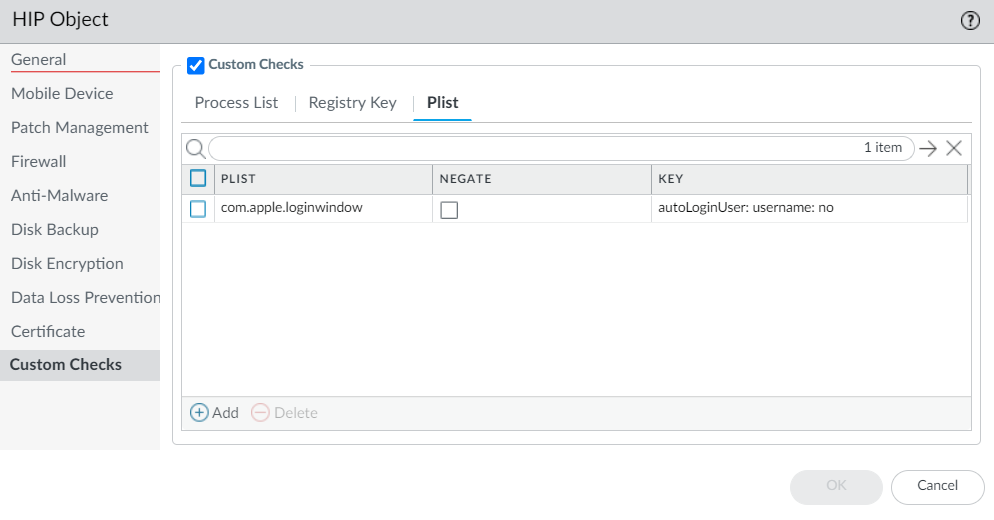
- (Optional) Create a HIP Object to match to a Registry Key (Windows), plist (macOS), or process list (Linux), which allows you to filter the raw host information collected from the GlobalProtect app to monitor the data for the custom check.With a HIP object defined for the custom check data, the gateway matches the raw data submitted from the app to the HIP object, and a HIP Match log entry is generated for the data ().For Windows, macOS, and Linux endpoints:
- Select .
- Select an existing HIP object or Add a new one.
- On the Custom Checks tab, select the check box to enable Custom Checks.
For Windows endpoints only:- To check Windows endpoints for a specific registry key, select , and then Add the registry key to match. When prompted, enter the Registry Key and then configure one of the following options:
- To match on the default value data for the registry key, enter the (Default) Value Data.
- To match endpoints that do not have the specified registry key, select Key does not exist or match the specified value data.
Do not configure both the (Default) Value Data and Key does not exist or match the specified value data options simultaneously. - To match on specific values within the registry key, select , and then Add the registry key to match. When prompted, enter the Registry Key. Click Add and then configure one of the following options:
- To match on specific values within the registry key, enter the Registry Value and corresponding Value Data.
- To match endpoints that do not have a specified registry value, enter the Registry Value and then select the Negate check box.To use this option, do not enter any Value Data for your Registry Key.
If you add more than one registry value to your registry key, the GlobalProtect gateway checks endpoints for all specified registry values.
- Click OK to save the HIP object. You can Commit the changes to view the data in the HIP Match logs at the next device check-in or continue to step 6.
For macOS endpoints only:- To check macOS endpoints for a specific plist, select Plist, and then Add the plist for which you to want to check. When prompted, enter the name of the Plist. If you want to match macOS endpoints that do not have the specified plist, enable the Plist does not exist option.
- To match on a specific key-value pair within a plist, select Plist, and then Add the plist for which you to want to check. When prompted, enter the name of the Plist and then Add a Key and corresponding Value to match. Alternatively, if you want to identify endpoints that do not have a specific key and value, you can select Negate after you add the Key and Value.
- Click OK to save the HIP object. You can Commit the changes to view the data in the HIP Match logs at the next device check-in or continue to step 6.
For Linux endpoints only:- To check if a specific process is running on the Linux endpoint, select Process List, and then Add the corresponding process for which you to want to check. When prompted, enter the name of the Process List.
- Click OK to save the HIP object. You can Commit the changes to view the data in the HIP Match logs at the next device check-in or continue to step 6.
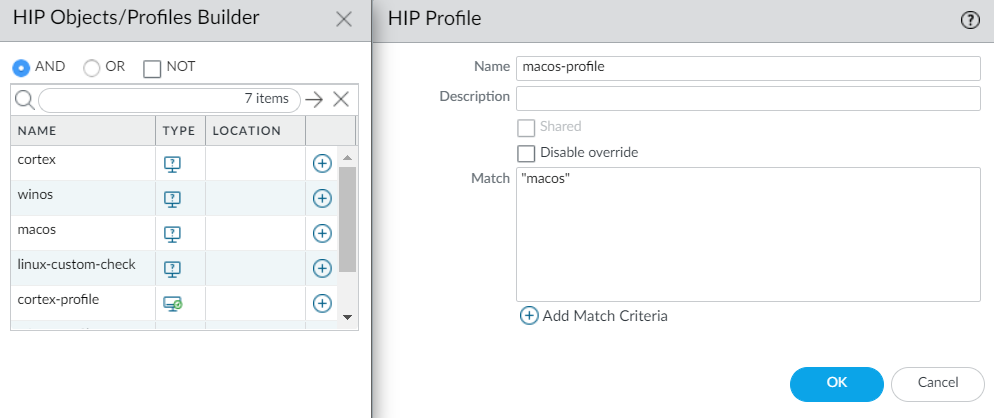
- (Optional) Create a HIP profile to allow the HIP object to be evaluated against traffic.The HIP profile can be added to a security policy as an additional check for traffic matching that policy. When the traffic is matched to the HIP profile, the security policy rule is enforced on the traffic.For more details on creating a HIP profiles, see Configure HIP-Based Policy Enforcement.
- Select .
- Select an existing HIP profile or Add a new one.
- Click Add Match Criteria to open the HIP Objects/Profile Builder.
- Select the HIP object that you want to use as match criteria, and then click the add () icon to move it to the Match area of the HIP Profile.
- After you add the objects to the new HIP profile, click OK, and then Commit the changes.
- Add the HIP profile to a security policy so the data collected with the custom check can be used to match to and act on traffic.Select , and then select an existing security policy or Add a new one. On the User tab, Add the HIP Profiles to the policy. For more details on security policies components and using security policies to match to and act on traffic, see Security Policy.