Device Security
Perform a Vulnerability Scan Using Tenable
Table of Contents
Perform a Vulnerability Scan Using Tenable
Use Device Security integration with Tenable to perform a vulnerability scan.
| Where Can I Use This? | What Do I Need? |
|---|---|
|
One of the following subscriptions:
One of the following Cortex XSOAR setups:
|
Because active scanning can be disruptive
to the services running on a scanned device, only account owners
have permission to perform vulnerability scans by default. Owners
can also set scanning permissions per administrator account, thereby
delegating it to just a few individuals.
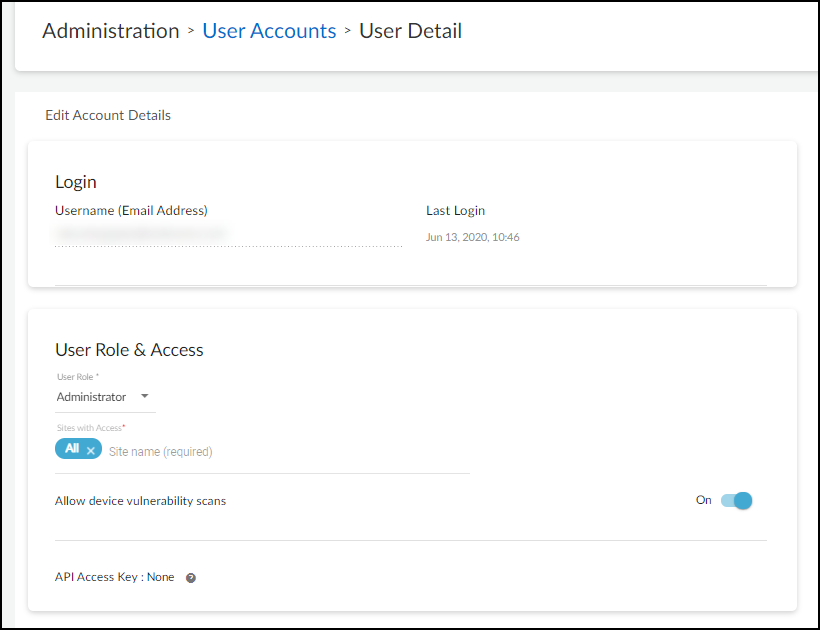
By default, vulnerability
scanning is disabled for new administrator accounts. To enable it,
log in to the Device Security portal as an owner, click ,
and then click the email address (username) of an administrator
for whom you want to enable vulnerability scanning. Slide the Allow
device vulnerability scans toggle from Off to On and
then Save.
The
ability to do vulnerability scanning is only available to owners
and administrators. There is no option to enable vulnerability scanning
for deployment and read-only users.
- Prepare to initiate a Tenable vulnerability scan from Device Security.
- Log in as an owner or administrator who has vulnerability scanning enabled.
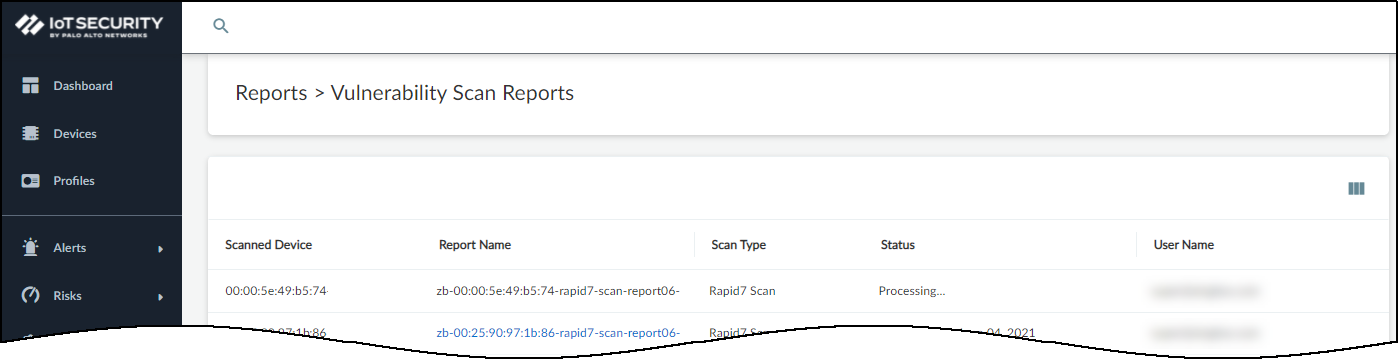
- Because Device Security only supports one vulnerability scan of a device at a time, make sure no other scans of this device are currently in progress.Click and check the Status column. If you see Processing... for the device you want to scan, wait until the current scan finishes before starting a new one.
![]() When you see that the device isn’t already being scanned, you can continue with a new scan.Only initiate a scan of a device that’s not currently active (and will remain inactive until the scan completes).
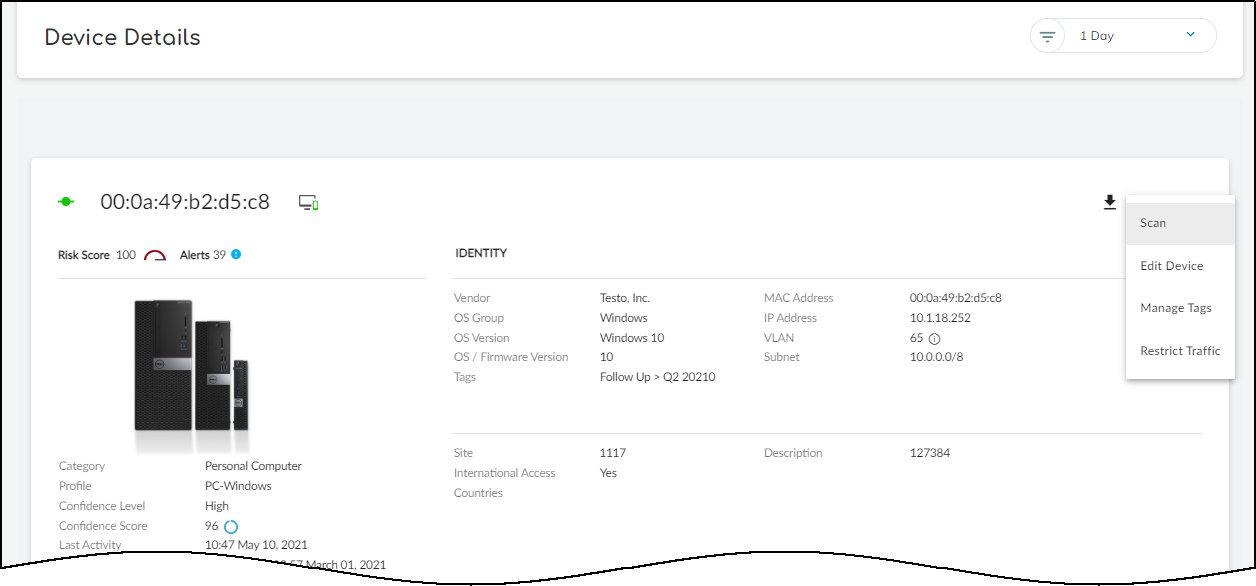
When you see that the device isn’t already being scanned, you can continue with a new scan.Only initiate a scan of a device that’s not currently active (and will remain inactive until the scan completes). - Click Devices and then click the entry in the Device Name column for the device you want to scan.
- At the top of the Device Details page, click the Action menu (three vertical dots) and then click Scan.
![]()
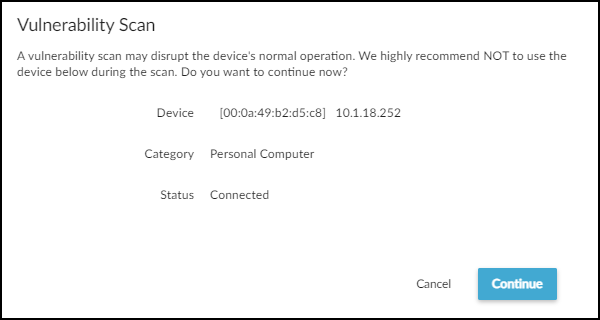
- Read the caution about scanning active devices and, if the device is currently inactive, Continue.
![]()
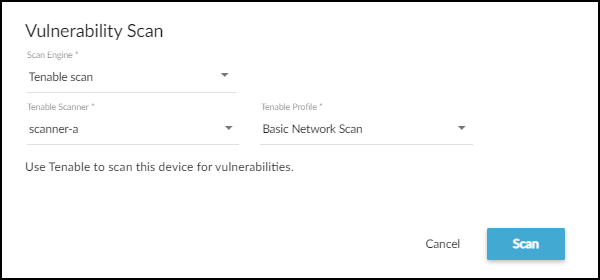
Set parameters for the scan that you want Tenable to perform.Scan Engine: Tenable scanTenable Scanner: Choose one of the scanners to scan the selected device.Tenable Profile: Choose a profile to define the type of scan to run.![]() Click Scan.Depending on the type of scan you choose, it can take anywhere from a few minutes to half an hour, and sometimes even longer. However, it’s common for scans to take 20-30 minutes. If there is an issue, such as the scanner being unable to reach the target device, the effort eventually times out after two hours.After Tenable completes the scan, it reports results back to Device Security. If there are any discovered Common Vulnerabilities and Exposures (CVEs), Device Security adds them to the Risks section on the Device Details page and to the page. Device Security learns the vulnerability CVE ID number, severity level (CVSS), and service port number from Tenable. Device Security retrieves a description for the vulnerability from the NIST page for the CVE.After the scan completes, view the results.You have two options to view the report:Click Devices > device_name and then click the Vulnerability Report Ready icon at the top of the page.
Click Scan.Depending on the type of scan you choose, it can take anywhere from a few minutes to half an hour, and sometimes even longer. However, it’s common for scans to take 20-30 minutes. If there is an issue, such as the scanner being unable to reach the target device, the effort eventually times out after two hours.After Tenable completes the scan, it reports results back to Device Security. If there are any discovered Common Vulnerabilities and Exposures (CVEs), Device Security adds them to the Risks section on the Device Details page and to the page. Device Security learns the vulnerability CVE ID number, severity level (CVSS), and service port number from Tenable. Device Security retrieves a description for the vulnerability from the NIST page for the CVE.After the scan completes, view the results.You have two options to view the report:Click Devices > device_name and then click the Vulnerability Report Ready icon at the top of the page.![]() orClick and then click the link in the Report Name column for the scanned device whose report you want to see.This downloads the report as a PDF to your computer where you can open it in a PDF viewer.
orClick and then click the link in the Report Name column for the scanned device whose report you want to see.This downloads the report as a PDF to your computer where you can open it in a PDF viewer.