Configure Anti-Ransomware Protection
Table of Contents
Expand all | Collapse all
-
- Set Up the Endpoint Infrastructure
- Activate Traps Licenses
-
- Endpoint Infrastructure Installation Considerations
- TLS/SSL Encryption for Traps Components
- Configure the MS-SQL Server Database
- Install the Endpoint Security Manager Server Software
- Install the Endpoint Security Manager Console Software
- Manage Proxy Communication with the Endpoint Security Manager
- Load Balance Traffic to ESM Servers
-
- Malware Protection Policy Best Practices
- Malware Protection Flow
- Manage Trusted Signers
-
- Remove an Endpoint from the Health Page
- Install an End-of-Life Traps Agent Version
-
-
- Traps Troubleshooting Resources
- Traps and Endpoint Security Manager Processes
- ESM Tech Support File
-
- Access Cytool
- View the Status of the Agent Using Cytool
- View Processes Currently Protected by Traps Using Cytool
- Manage Logging of Traps Components Using Cytool
- Restore a Quarantined File Using Cytool
- View Statistics for a Protected Process Using Cytool
- View Details About the Traps Local Analysis Module Using Cy...
- View Hash Details About a File Using Cytool
Configure Anti-Ransomware Protection
The Anti-Ransomware Protection MPM provides
additional protection against ransomware. The module targets encryption-based
activity associated with ransomware with the ability to analyze
and halt ransomware activity before any data loss occurs.
In
a ransomware attack, typically the attacker uses DLLs, macros, shellscripts
and other methods to encrypt important data and holds the data hostage
until the user pays a ransom to unlock the data. To combat these
attacks, Traps detects the behavior and prevents the ransomware
from encrypting and holding files hostage.
Like other MPMs,
you can configure the module to operate in either notification or prevention
mode. When you configure the module to operate in prevention mode,
Traps blocks the process exhibiting ransomware behavior. When you
configure this module in notification mode, Traps logs a security
event for each process once per minute. This means that if the same
process exhibits ransomware behavior within a minute of the first attempt,
Traps ignores the event. This prevents the Traps agent from logging
and reporting an excessive number of events.
The Anti-Ransomware
Protection module is enabled by default on Windows endpoints that
use the following file system formats: NTFS, FAT, and exFAT.
To disable or change your anti-ransomware
protection policy, use the following workflow:
- From the ESM Console, select PoliciesMalwareProtection Modules.
- Select the Windows tab.
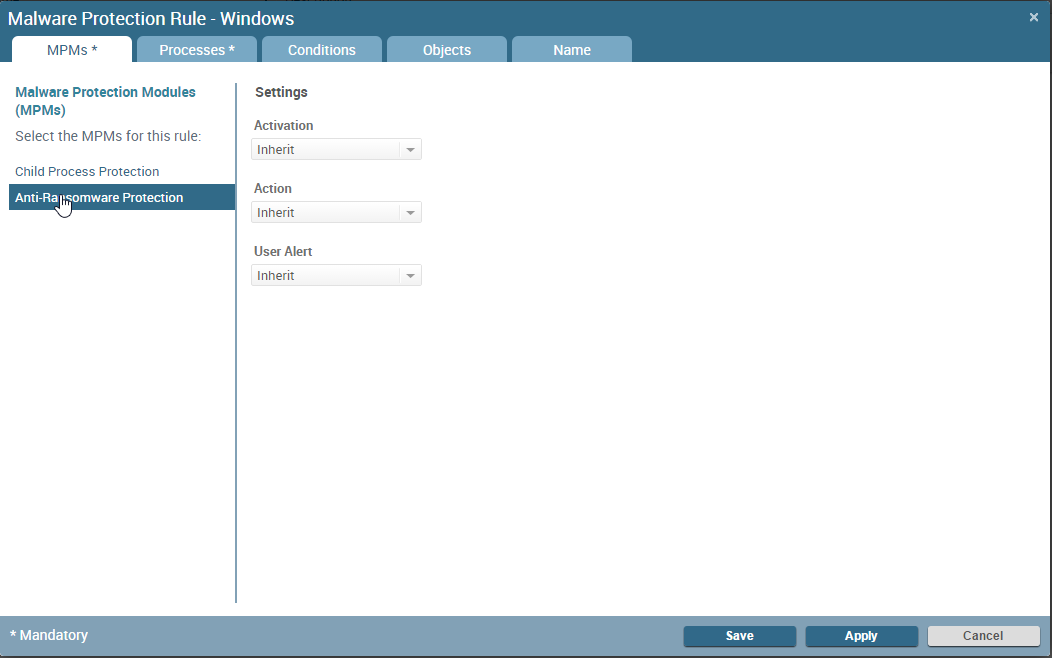
- Select AddAnti-Ransomware Protection and then configure the rule settings.
![]()
![]()
- Activation—Select On to enable anti-ransomware protection or Off to disable protection. In situations where disk encryption software must encrypt files, consider configuring a rule to disable protection on that process.
- Action—Select the action to take when Traps detects an attempt to encrypt protected files: Select Prevention (recommended) to block the process from encrypting the files. To permit a specific process (such as disk encryption software) to encrypt files, select Notification. In notification mode, Traps logs the issue but does not block the encryption activity. Alternatively, you can choose to Inherit the behavior from the preceding rule in the rule hierarchy.
- User Alert—Specify the notification behavior when a process attempts to encrypt files, either On to notify the user, or Off to suppress notifications. Alternatively, you can choose to Inherit the behavior from the preceding rule in the rule hierarchy.
- Select the Processes tab and Add one
or more source processes to which Traps will apply anti-ransomware
process protection.As you type, the ESM Console provides auto-completion based the list of processes defined in the ESM Console.If you do not specify a process, the rule applies to all processes.
- (Optional)
Add Conditions to
the rule. By default, a new rule does not contain any conditions.To specify a condition, select the Conditions tab, select the condition in the Conditions list, and then Add it to the Selected Conditions list. Repeat this step to add more conditions, as needed. You can also define new Conditions.
- (Optional)
Define the Target
Objects to which to apply the rule.To define a smaller subset of target objects, select the Objects tab, and then enter one or more AD Users, AD Computers, AD Groups, AD Organizational Unit, Existing Endpoints, or Existing Groups in the Include or Exclude areas. The Endpoint Security Manager queries Active Directory to verify the users, computers, groups, or organizational units. The ESM Console also offers autocompletion as you type for existing endpoints and existing virtual groups.
- (Optional)
Review the rule name and description. The ESM Console automatically
generates the rule name and description based on the rule details
but permits you to change these fields, if needed.To override the autogenerated name, select the Name tab, clear the Activate automatic description option, and then enter a rule name and description of your choice.
- To save the rule, do either of the following:
- Save the rule and Activate it later from the rule management page.
- Apply the rule to activate it immediately. The ESM Server distributes the rule at the next heartbeat communication with the agent.
After saving or applying a rule, you can return to the PoliciesMalwareProtection Modules page at any time to Delete or Deactivate the rule. - To view security events triggered by the Anti-Ransomware
Protection MPM, see the Malware Modules pages:
- Prevention events—Security EventsPreventionsMalware Modules.
- Notification-only events—Security EventsNotificationsMalware Modules.
Each security event identifies the source process and the location of the target file.

