Configure the MS-SQL Server Database
Table of Contents
Expand all | Collapse all
-
- Set Up the Endpoint Infrastructure
- Activate Traps Licenses
-
- Endpoint Infrastructure Installation Considerations
- TLS/SSL Encryption for Traps Components
- Configure the MS-SQL Server Database
- Install the Endpoint Security Manager Server Software
- Install the Endpoint Security Manager Console Software
- Manage Proxy Communication with the Endpoint Security Manager
- Load Balance Traffic to ESM Servers
-
- Malware Protection Policy Best Practices
- Malware Protection Flow
- Manage Trusted Signers
-
- Remove an Endpoint from the Health Page
- Install an End-of-Life Traps Agent Version
-
-
- Traps Troubleshooting Resources
- Traps and Endpoint Security Manager Processes
- ESM Tech Support File
-
- Access Cytool
- View the Status of the Agent Using Cytool
- View Processes Currently Protected by Traps Using Cytool
- Manage Logging of Traps Components Using Cytool
- Restore a Quarantined File Using Cytool
- View Statistics for a Protected Process Using Cytool
- View Details About the Traps Local Analysis Module Using Cy...
- View Hash Details About a File Using Cytool
Configure the MS-SQL Server Database
The Endpoint Security Manager requires a database
that is managed over the SQL Server platform (for supported SQL
Server versions, see Database
Software Requirements). The Endpoint Security Manager uses
the database to store administrative information, security policy
rules, information about security events, and other information.
Before
installing the Endpoint Security Manager, configure the SQL database
with the required permissions. When using Windows Authentication
as the user authentication method, the owner must have rights to Log
on as a service and be a local administrator on the ESM Server.
The
following procedure is recommended as a best practice for creating
and configuring the MS-SQL Server database.
- Create a new database.
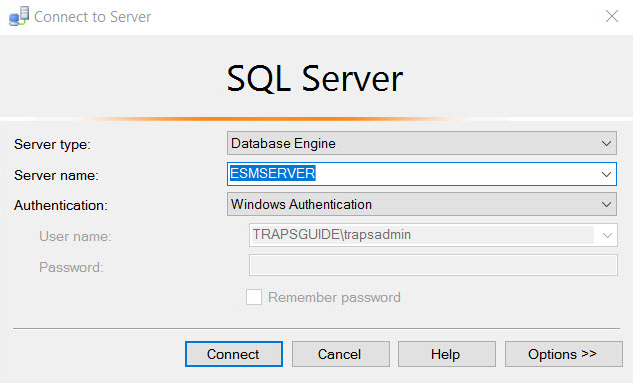
- Select SQL Server Management Studio from the Start menu.
- Click Connect to open Microsoft
SQL Server Management Studio.
![]()
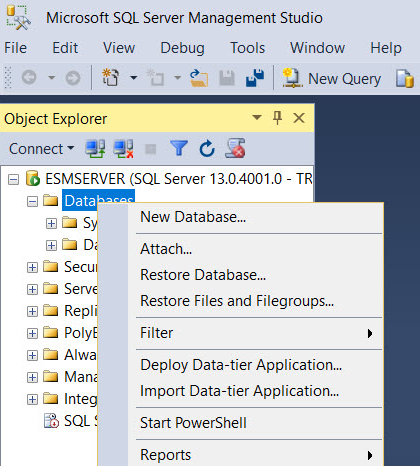
- Right-click Databases and then
select New Database.
![]()
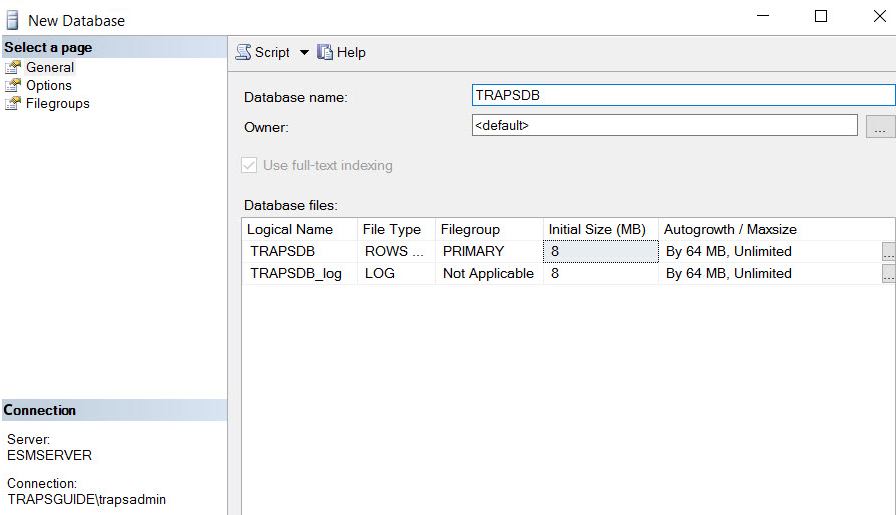
- Configure the database settings.The database owner that you specify must already exist as a local or domain administrator.
![]()
- Enter the Database name.
- Select the database Owner:
- Click the ellipsis () button.
![]()
- Enter the object name in the format [domain\user] or Browse to an object name.
- Select Check Names to validate the database owner.
- Click OK and then click OK again.
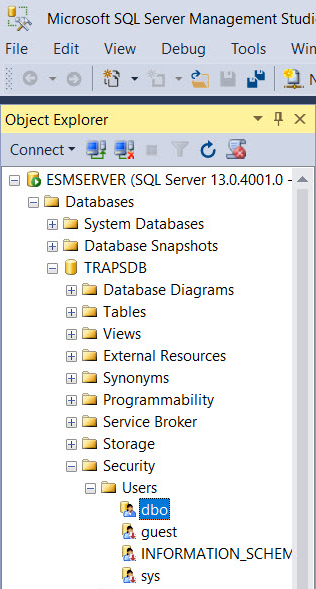
- Verify the database owner privileges.
- Expand the database you created and then select SecurityUsers.
- Double-click dbo.
![]()
- Select the Owned Schemas page and then select db_owner.
- Select the Membership page and then select db_owner.
- Click OK.


