Install the PA-7080 Firewall in the Mid-Mount Position
Table of Contents
Install the PA-7080 Firewall in the Mid-Mount Position
The following procedures describe how to install
the PA-7080 firewall in a mid-mount position. Both rack‑mount bracket
types (mid-mount and front-mount) are preinstalled. For a mid-mount
install, you must remove the front-mount brackets.
The
PA-7080 chassis and the front slot cards (SMC, LPC or LFC, NPC) ship
in separate boxes and it is recommended that you install the cards
after the chassis is rack mounted. This will prevent any damage
to the cards that could occur during rack mounting and will reduce
the weight of the chassis.
- Read PA-7000 Series Firewall Rack Install Safety Information.Remove eight screws from each front-mount bracket (one left and one right) and then remove the brackets.
![]() (Optional) Install the upper and lower cable management brackets using the provided screws (8 upper bracket screws and 4 lower bracket screws). The upper bracket is designed for Ethernet cables and the console cable and the lower bracket is designed for fiber optic cables. To access the screw holes on the lower bracket, open the door located at the front of the bracket as shown in the following image.
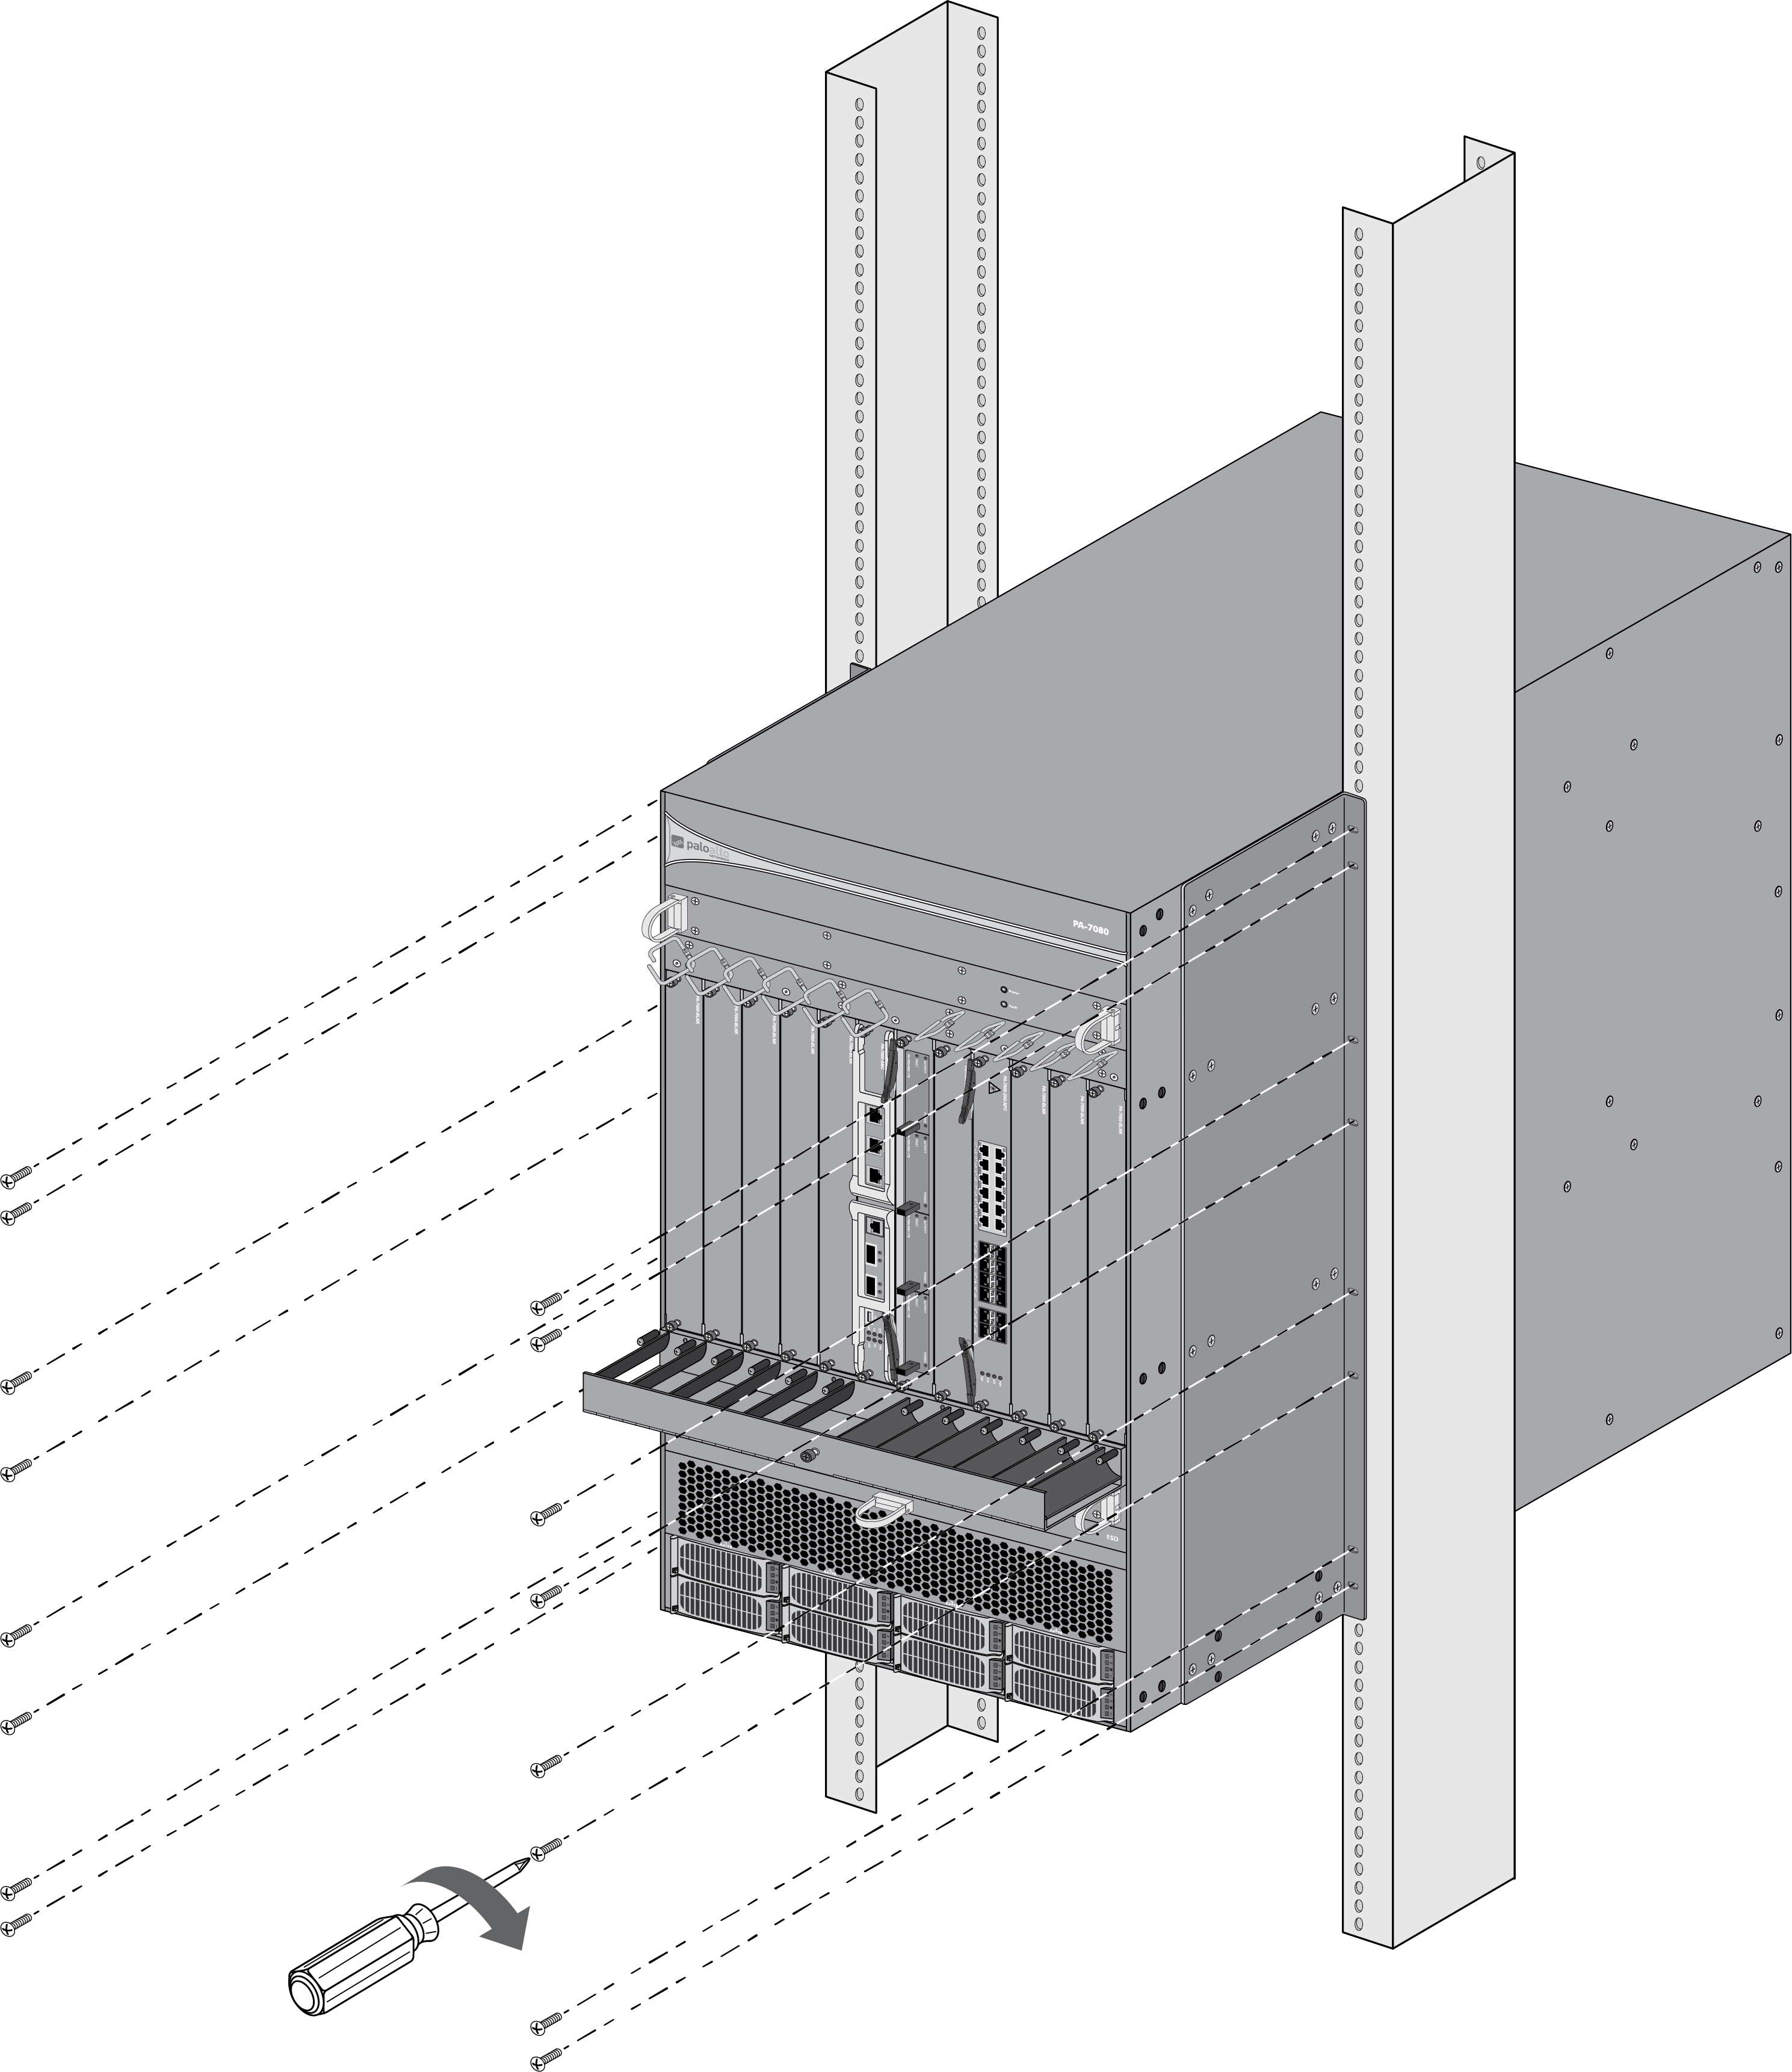
(Optional) Install the upper and lower cable management brackets using the provided screws (8 upper bracket screws and 4 lower bracket screws). The upper bracket is designed for Ethernet cables and the console cable and the lower bracket is designed for fiber optic cables. To access the screw holes on the lower bracket, open the door located at the front of the bracket as shown in the following image.![]() Position the chassis into the rack using two or more people and if available, use a mechanical equipment lift.Align the rack-mount bracket mounting holes on each side of the chassis with the holes on the rack rail, ensuring that the chassis is level. Secure the chassis to the rack using eight rack‑mount screws (not included) on each side of the chassis and tighten with a Phillips-head screwdriver.
Position the chassis into the rack using two or more people and if available, use a mechanical equipment lift.Align the rack-mount bracket mounting holes on each side of the chassis with the holes on the rack rail, ensuring that the chassis is level. Secure the chassis to the rack using eight rack‑mount screws (not included) on each side of the chassis and tighten with a Phillips-head screwdriver.![]()