Install a PA-7000 Series Firewall NPC in a Single Chassis
Table of Contents
Install a PA-7000 Series Firewall NPC in a Single Chassis
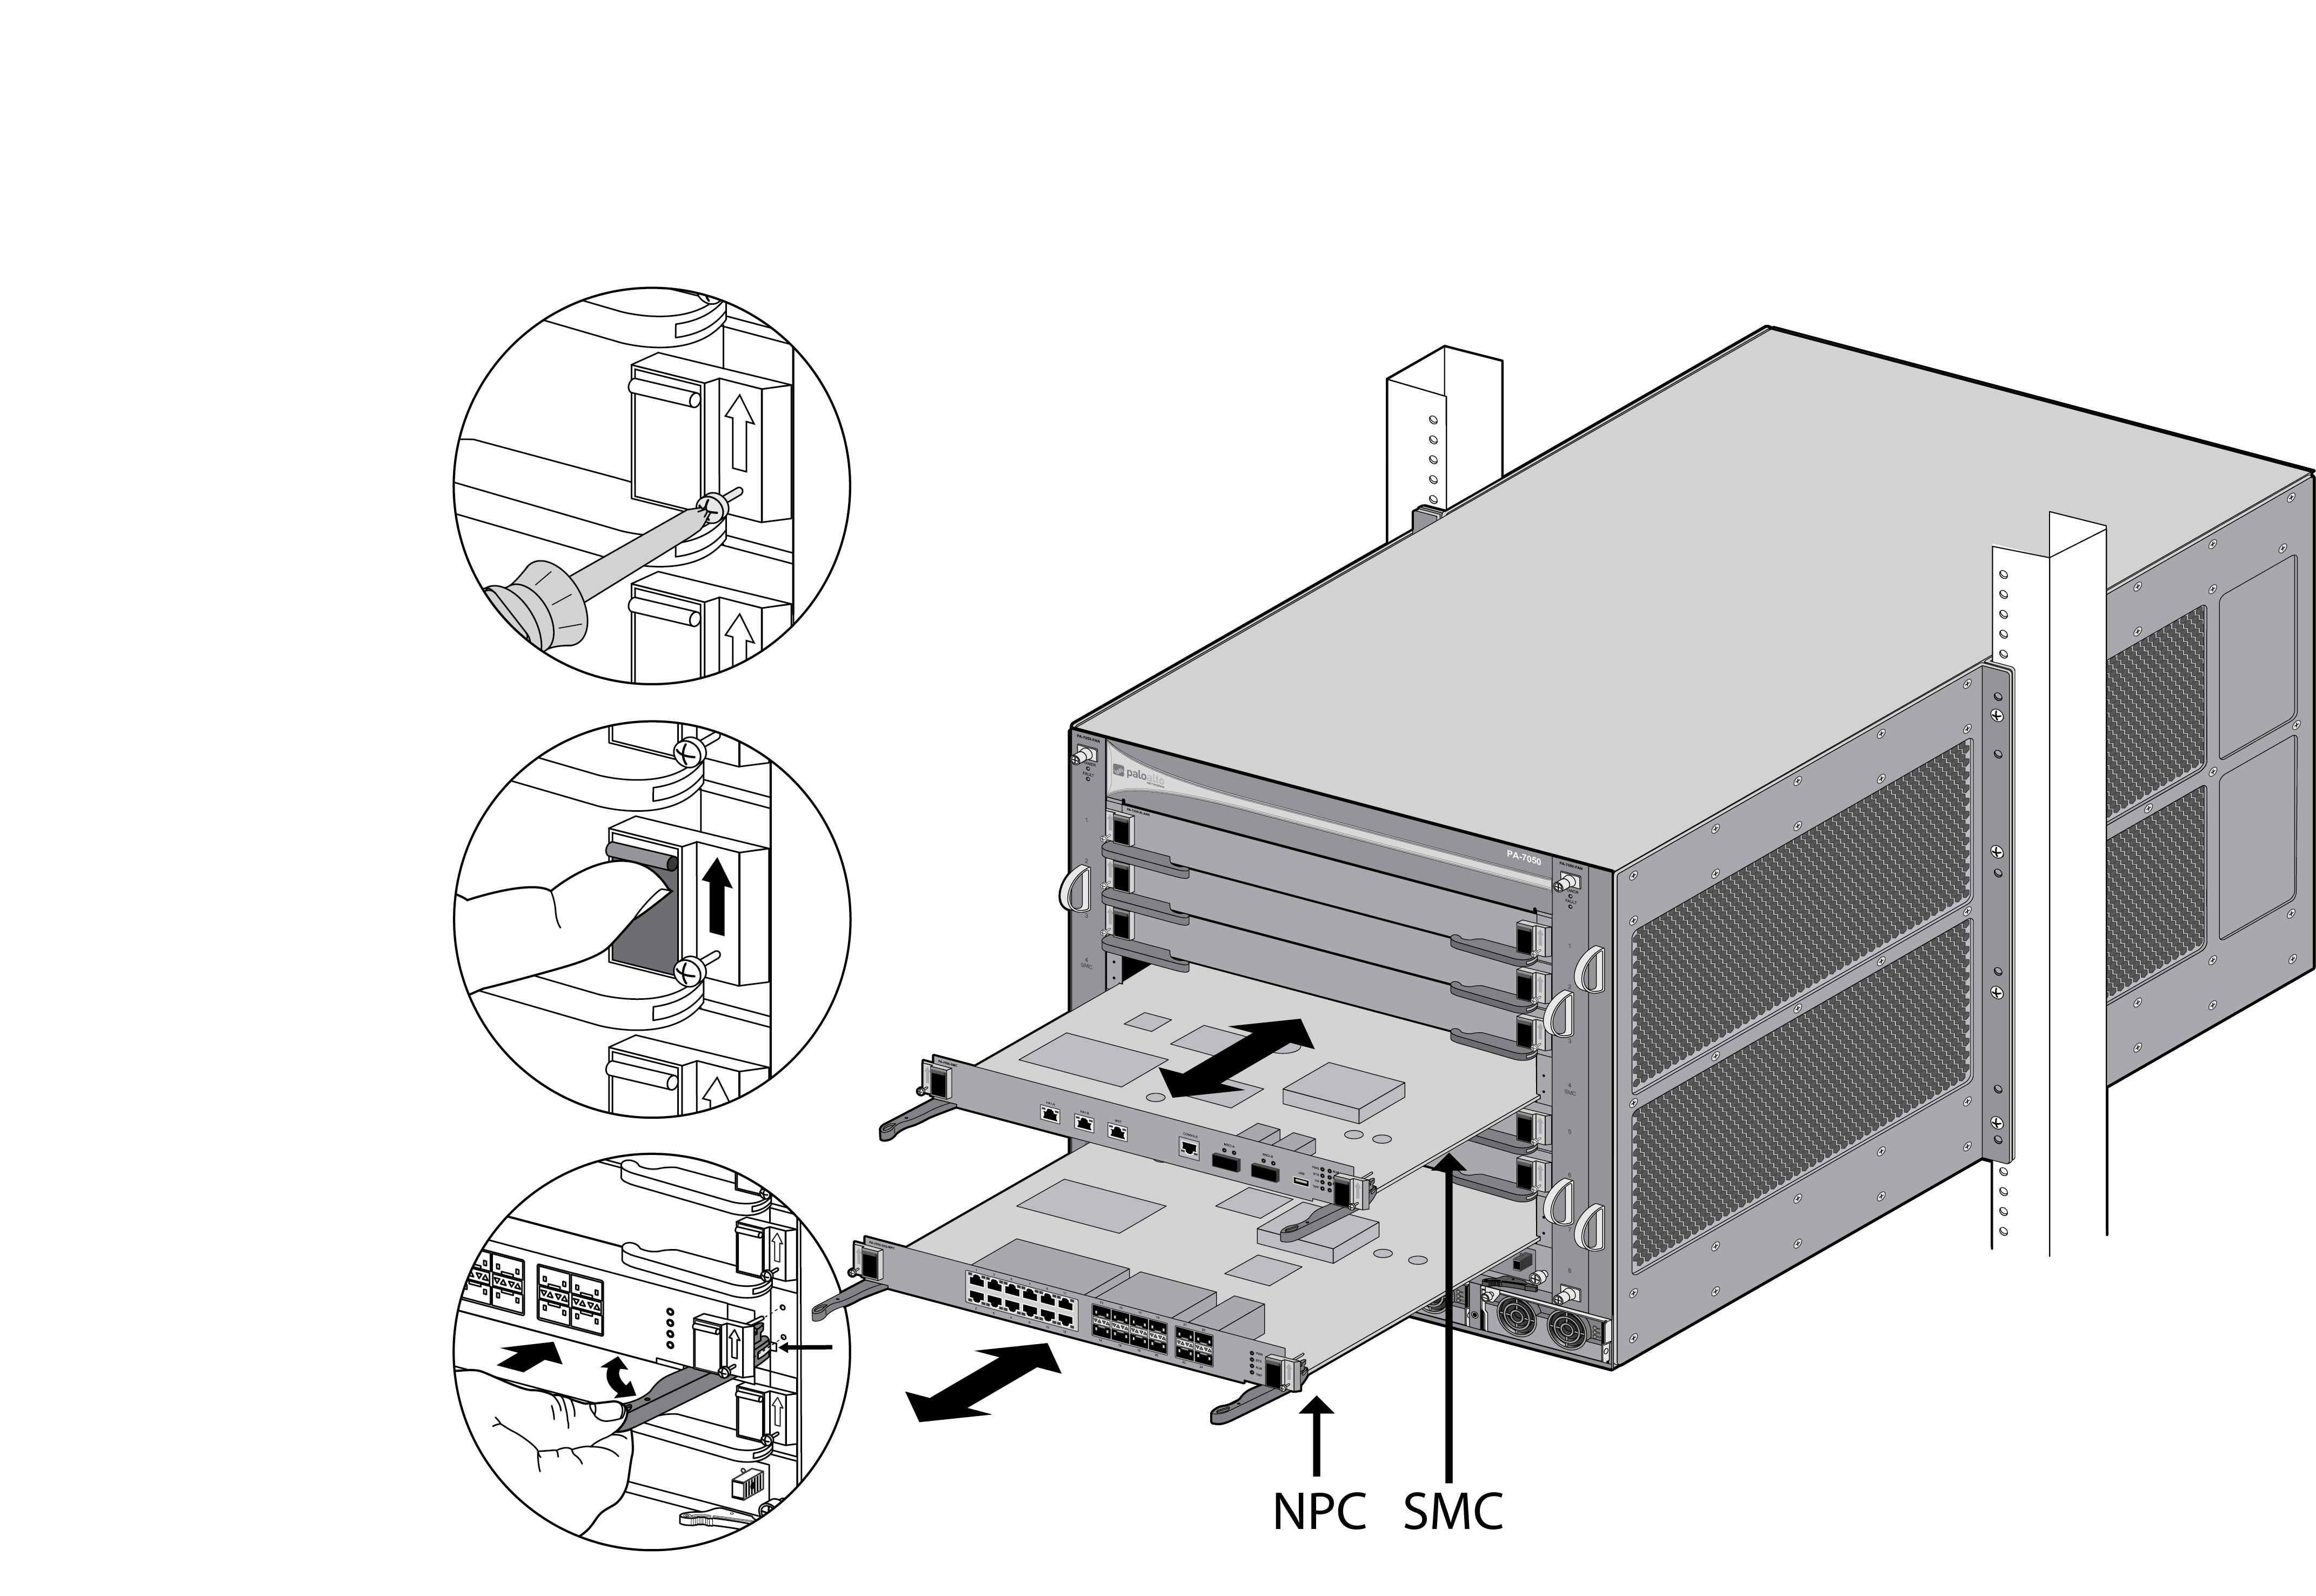
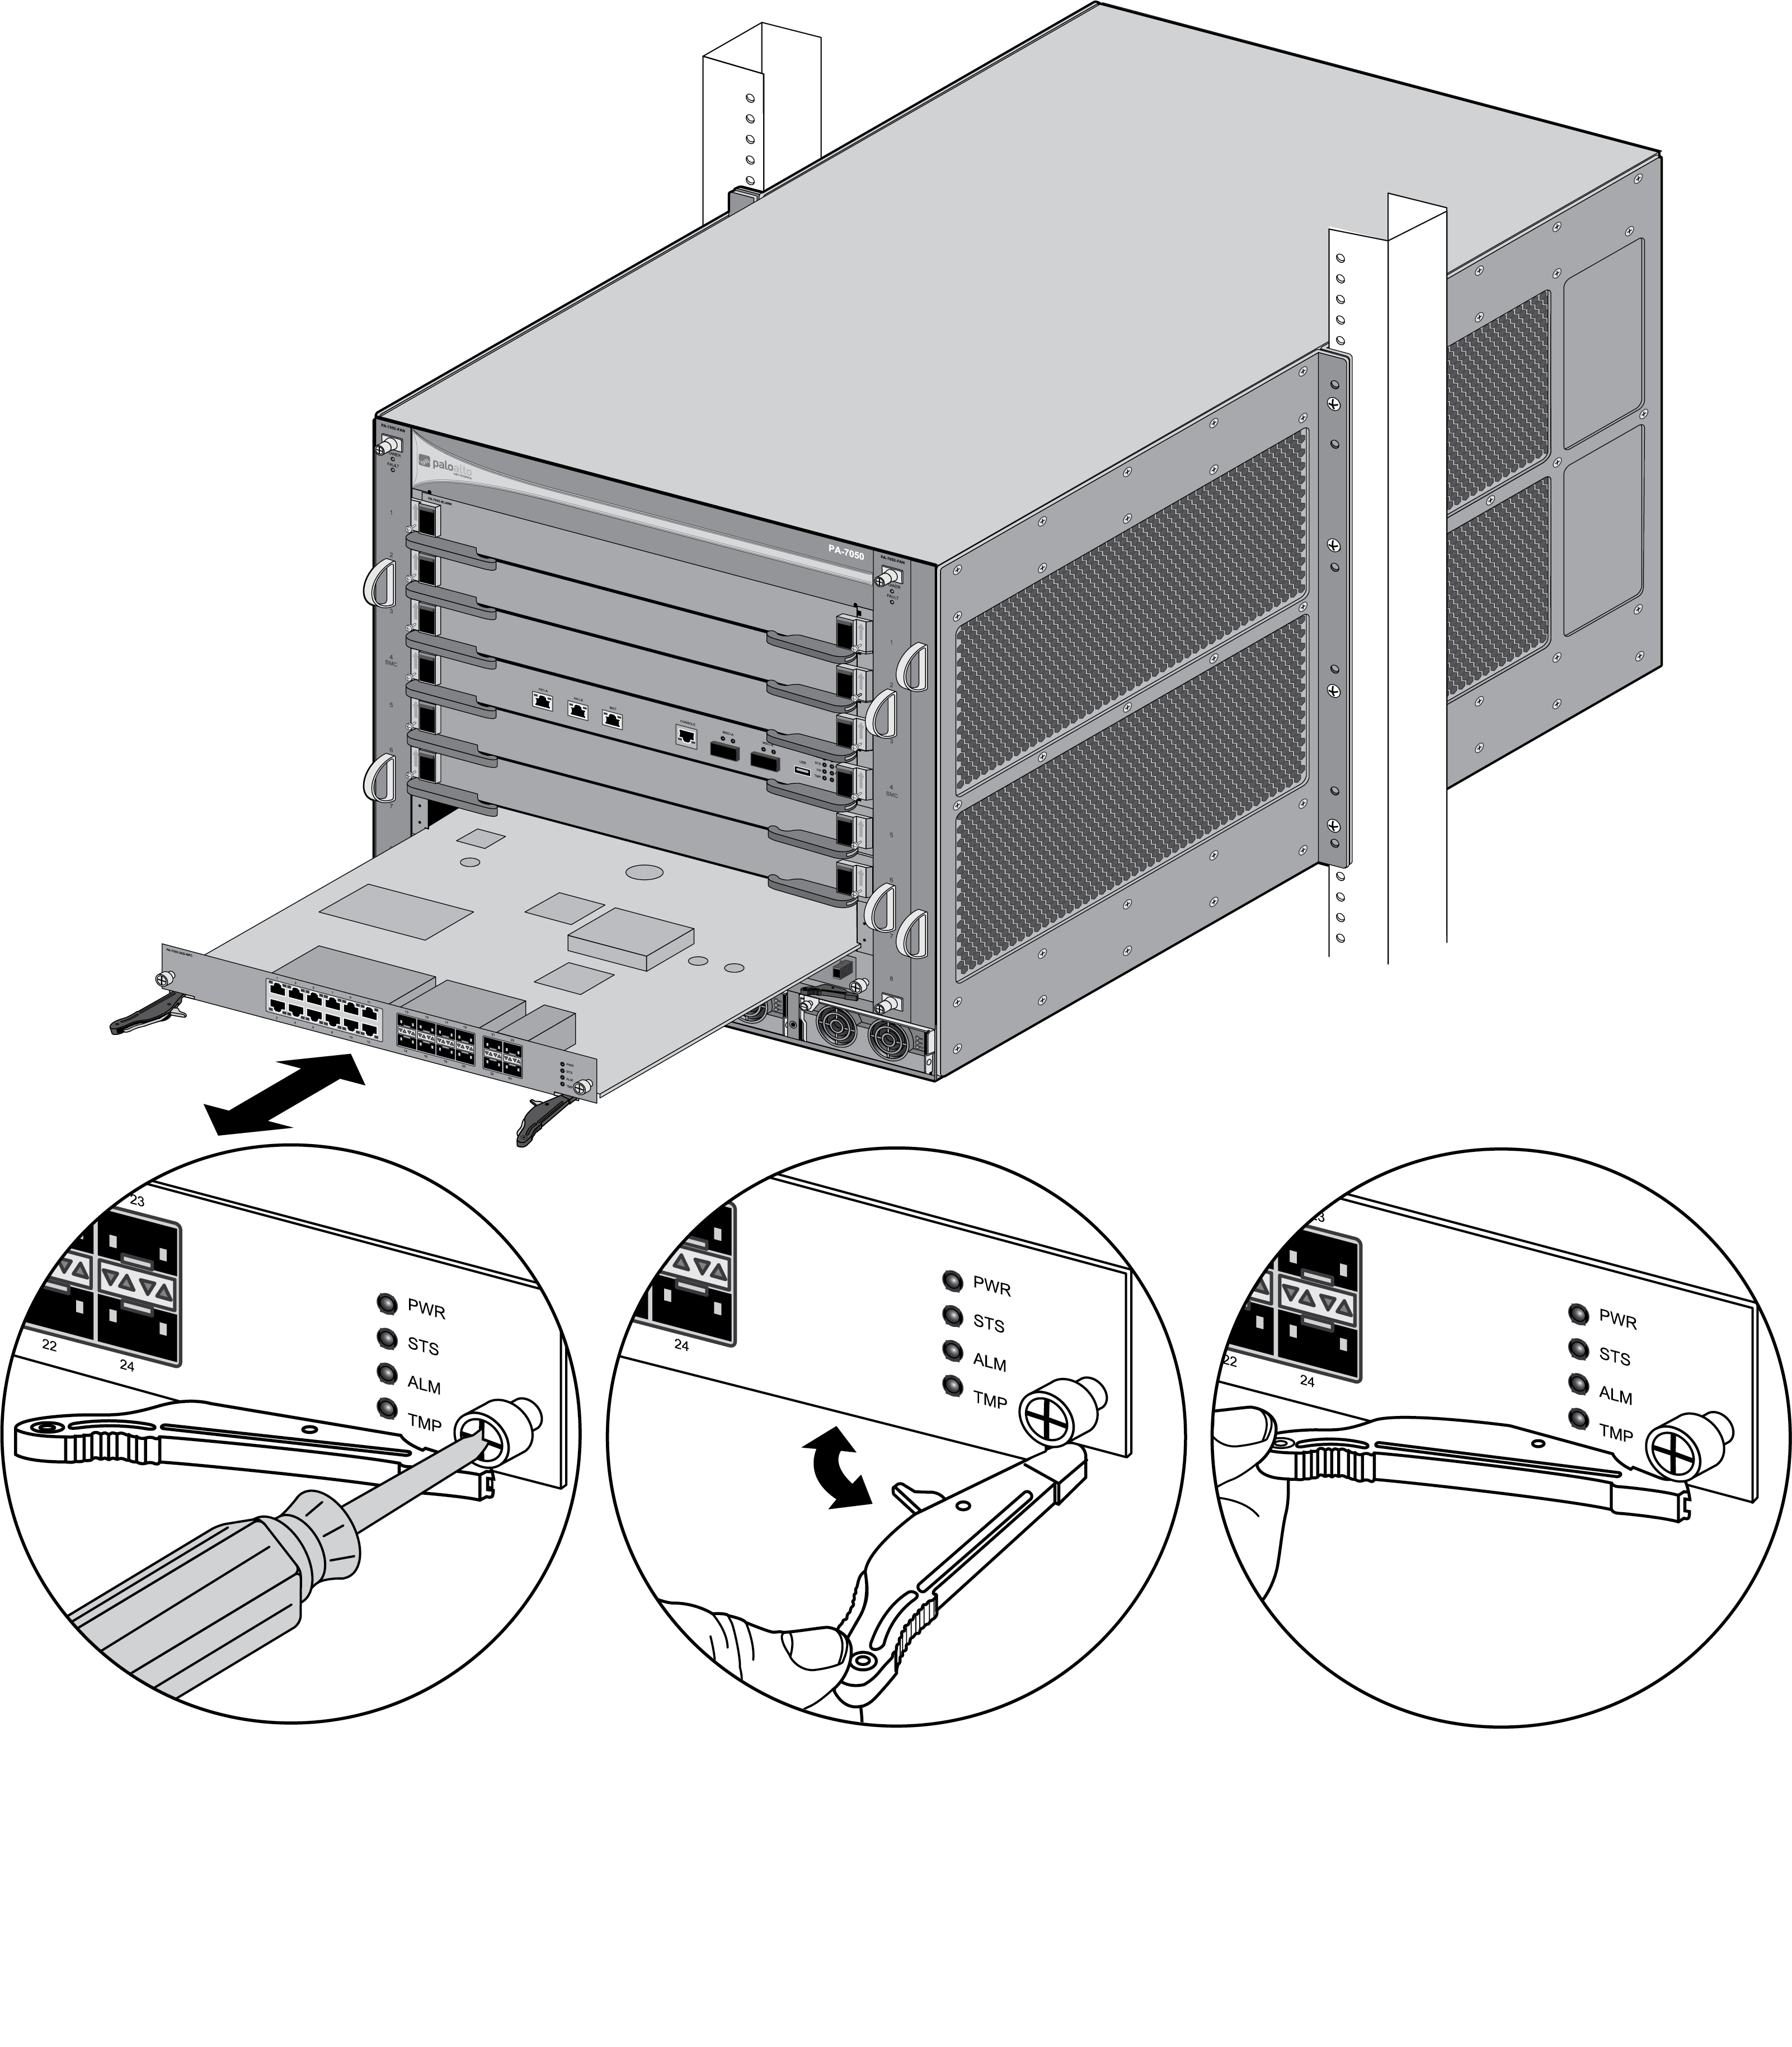
- Put the provided ESD wrist strap on your wrist ensuring that the metal contact is touching your skin. Then attach (snap) one end of the ground cable to the wrist strap and remove the alligator clip from the banana clip on the other end of the ESD grounding cable. Plug the banana clip end into one of the ESD ports located on the front of the chassis before handling ESD sensitive hardware. For details on the ESD port location, see PA-7050 Front Panel (AC) or PA-7080 Front Panel (AC).Remove the NPC from the antistatic bag and partially slide it into any of the available NPC slots, ensuring that the handles are in the open position. When the card is about 1/4-inch from being fully inserted, adjust the levers to align with the chassis and then close the levers to seat the card in place. The following images show how to install NPCs.
![]()
![]()
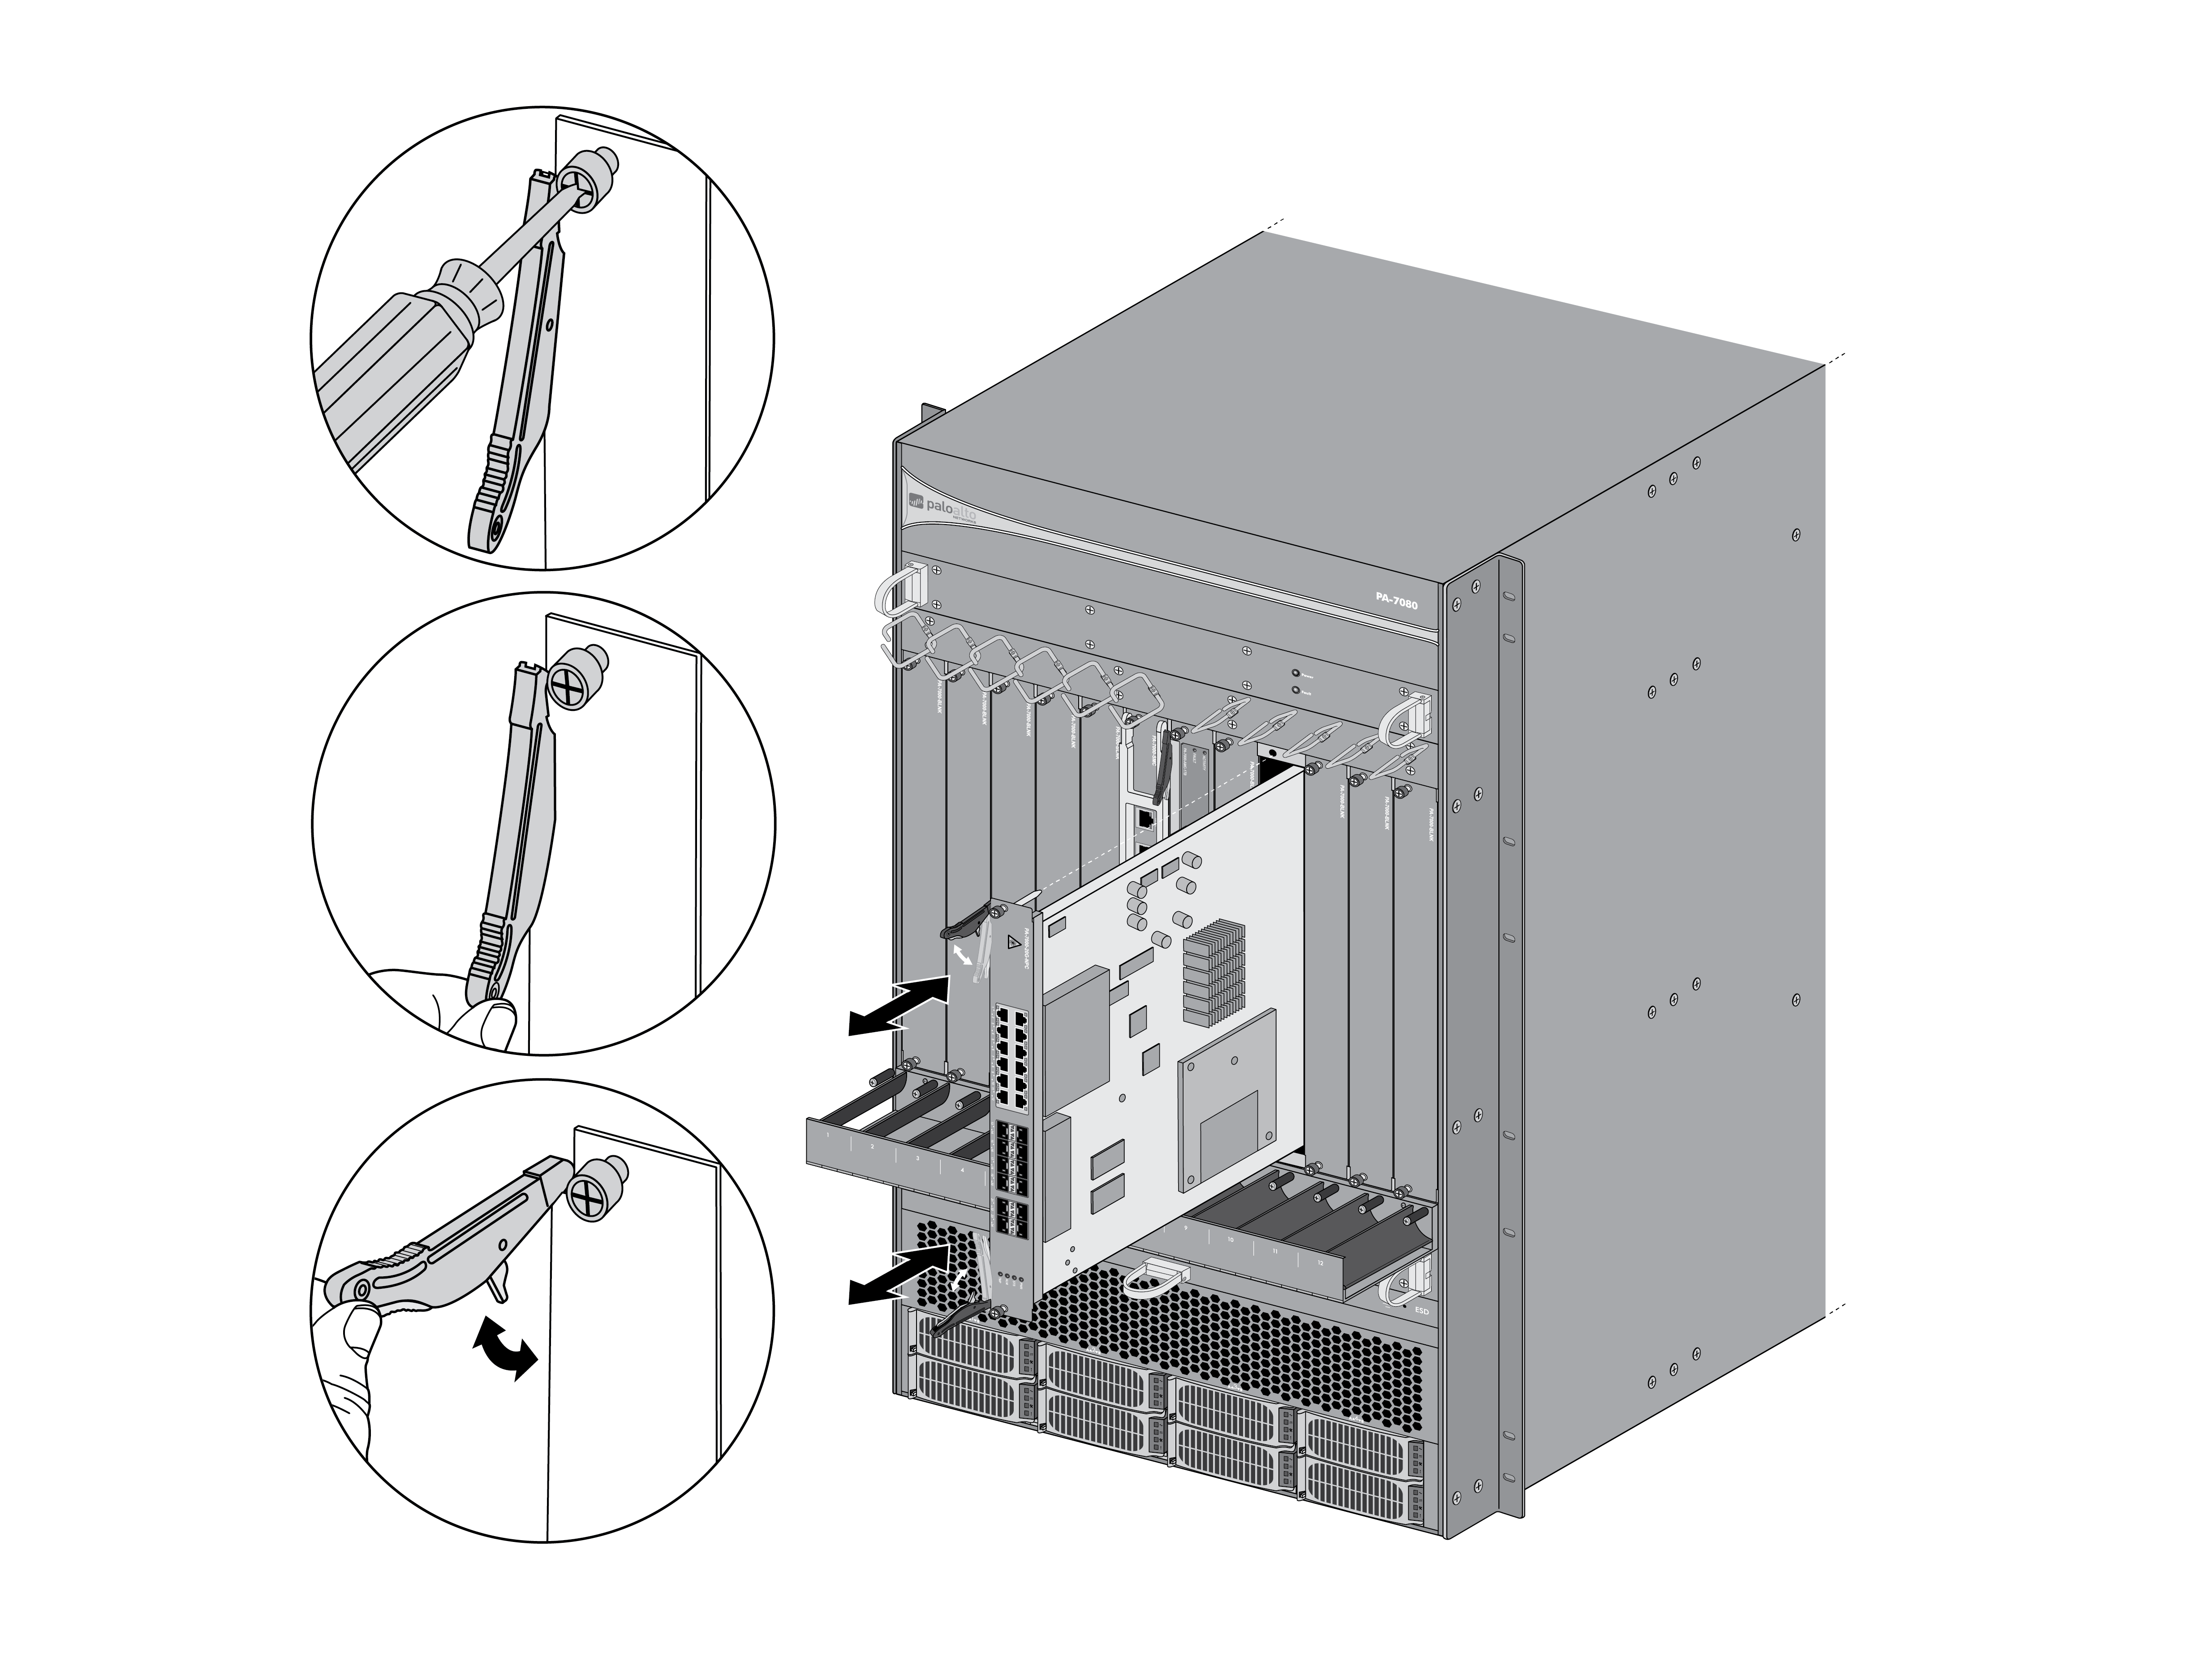
![]() Tighten the screws on each side of the card to secure the card to the chassis. The version 1 NPC has a standard Phillips-head screw and the version 2 NPC has a thumb screw that you can also tighten with a Phillips-head screwdriver.Cover any empty slots with the provided blank slot covers. Each empty slot must be covered with the provided blank slot covers to ensure proper airflow and to prevent debris from entering the chassis. The number of blank slot covers that you will receive for a new order is based on the number of NPCs ordered. For example, if you order one NPC, you will receive enough blank covers to cover all empty slots.Connect the network cables and the NPCs are ready to process data traffic.Proceed to Connect Power to a PA-7000 Series Firewall. After the chassis is powered on, view the status of the NPCs by going to Verify the PA-7000 Series Firewall NPC Configuration.
Tighten the screws on each side of the card to secure the card to the chassis. The version 1 NPC has a standard Phillips-head screw and the version 2 NPC has a thumb screw that you can also tighten with a Phillips-head screwdriver.Cover any empty slots with the provided blank slot covers. Each empty slot must be covered with the provided blank slot covers to ensure proper airflow and to prevent debris from entering the chassis. The number of blank slot covers that you will receive for a new order is based on the number of NPCs ordered. For example, if you order one NPC, you will receive enough blank covers to cover all empty slots.Connect the network cables and the NPCs are ready to process data traffic.Proceed to Connect Power to a PA-7000 Series Firewall. After the chassis is powered on, view the status of the NPCs by going to Verify the PA-7000 Series Firewall NPC Configuration.