Replace a PA-7000 Series Firewall DPC in a High Availability (HA) Configuration
Table of Contents
Replace a PA-7000 Series Firewall DPC in a High Availability (HA) Configuration
Learn how to replace a Data Processing Card in a PA-7000 Series Firewall
chassis.
When HA is configured on the firewall, the firewall is designed to allow the
insertion of new Data Processing Cards (DPCs) without causing a failover. This is
accomplished by the system not allowing a new card to come up in one chassis until
an DPC is installed in the same slot on the second chassis. The cards stay in a
disabled state until you enable both cards simultaneously.
To identify the failed DPC, check the LEDs on the DPC or check the system logs. For
example, if slot 3 has a failed DPC in one of the chassis, the following error is
displayed in the log: Slot3 failure; moving to failure
state.
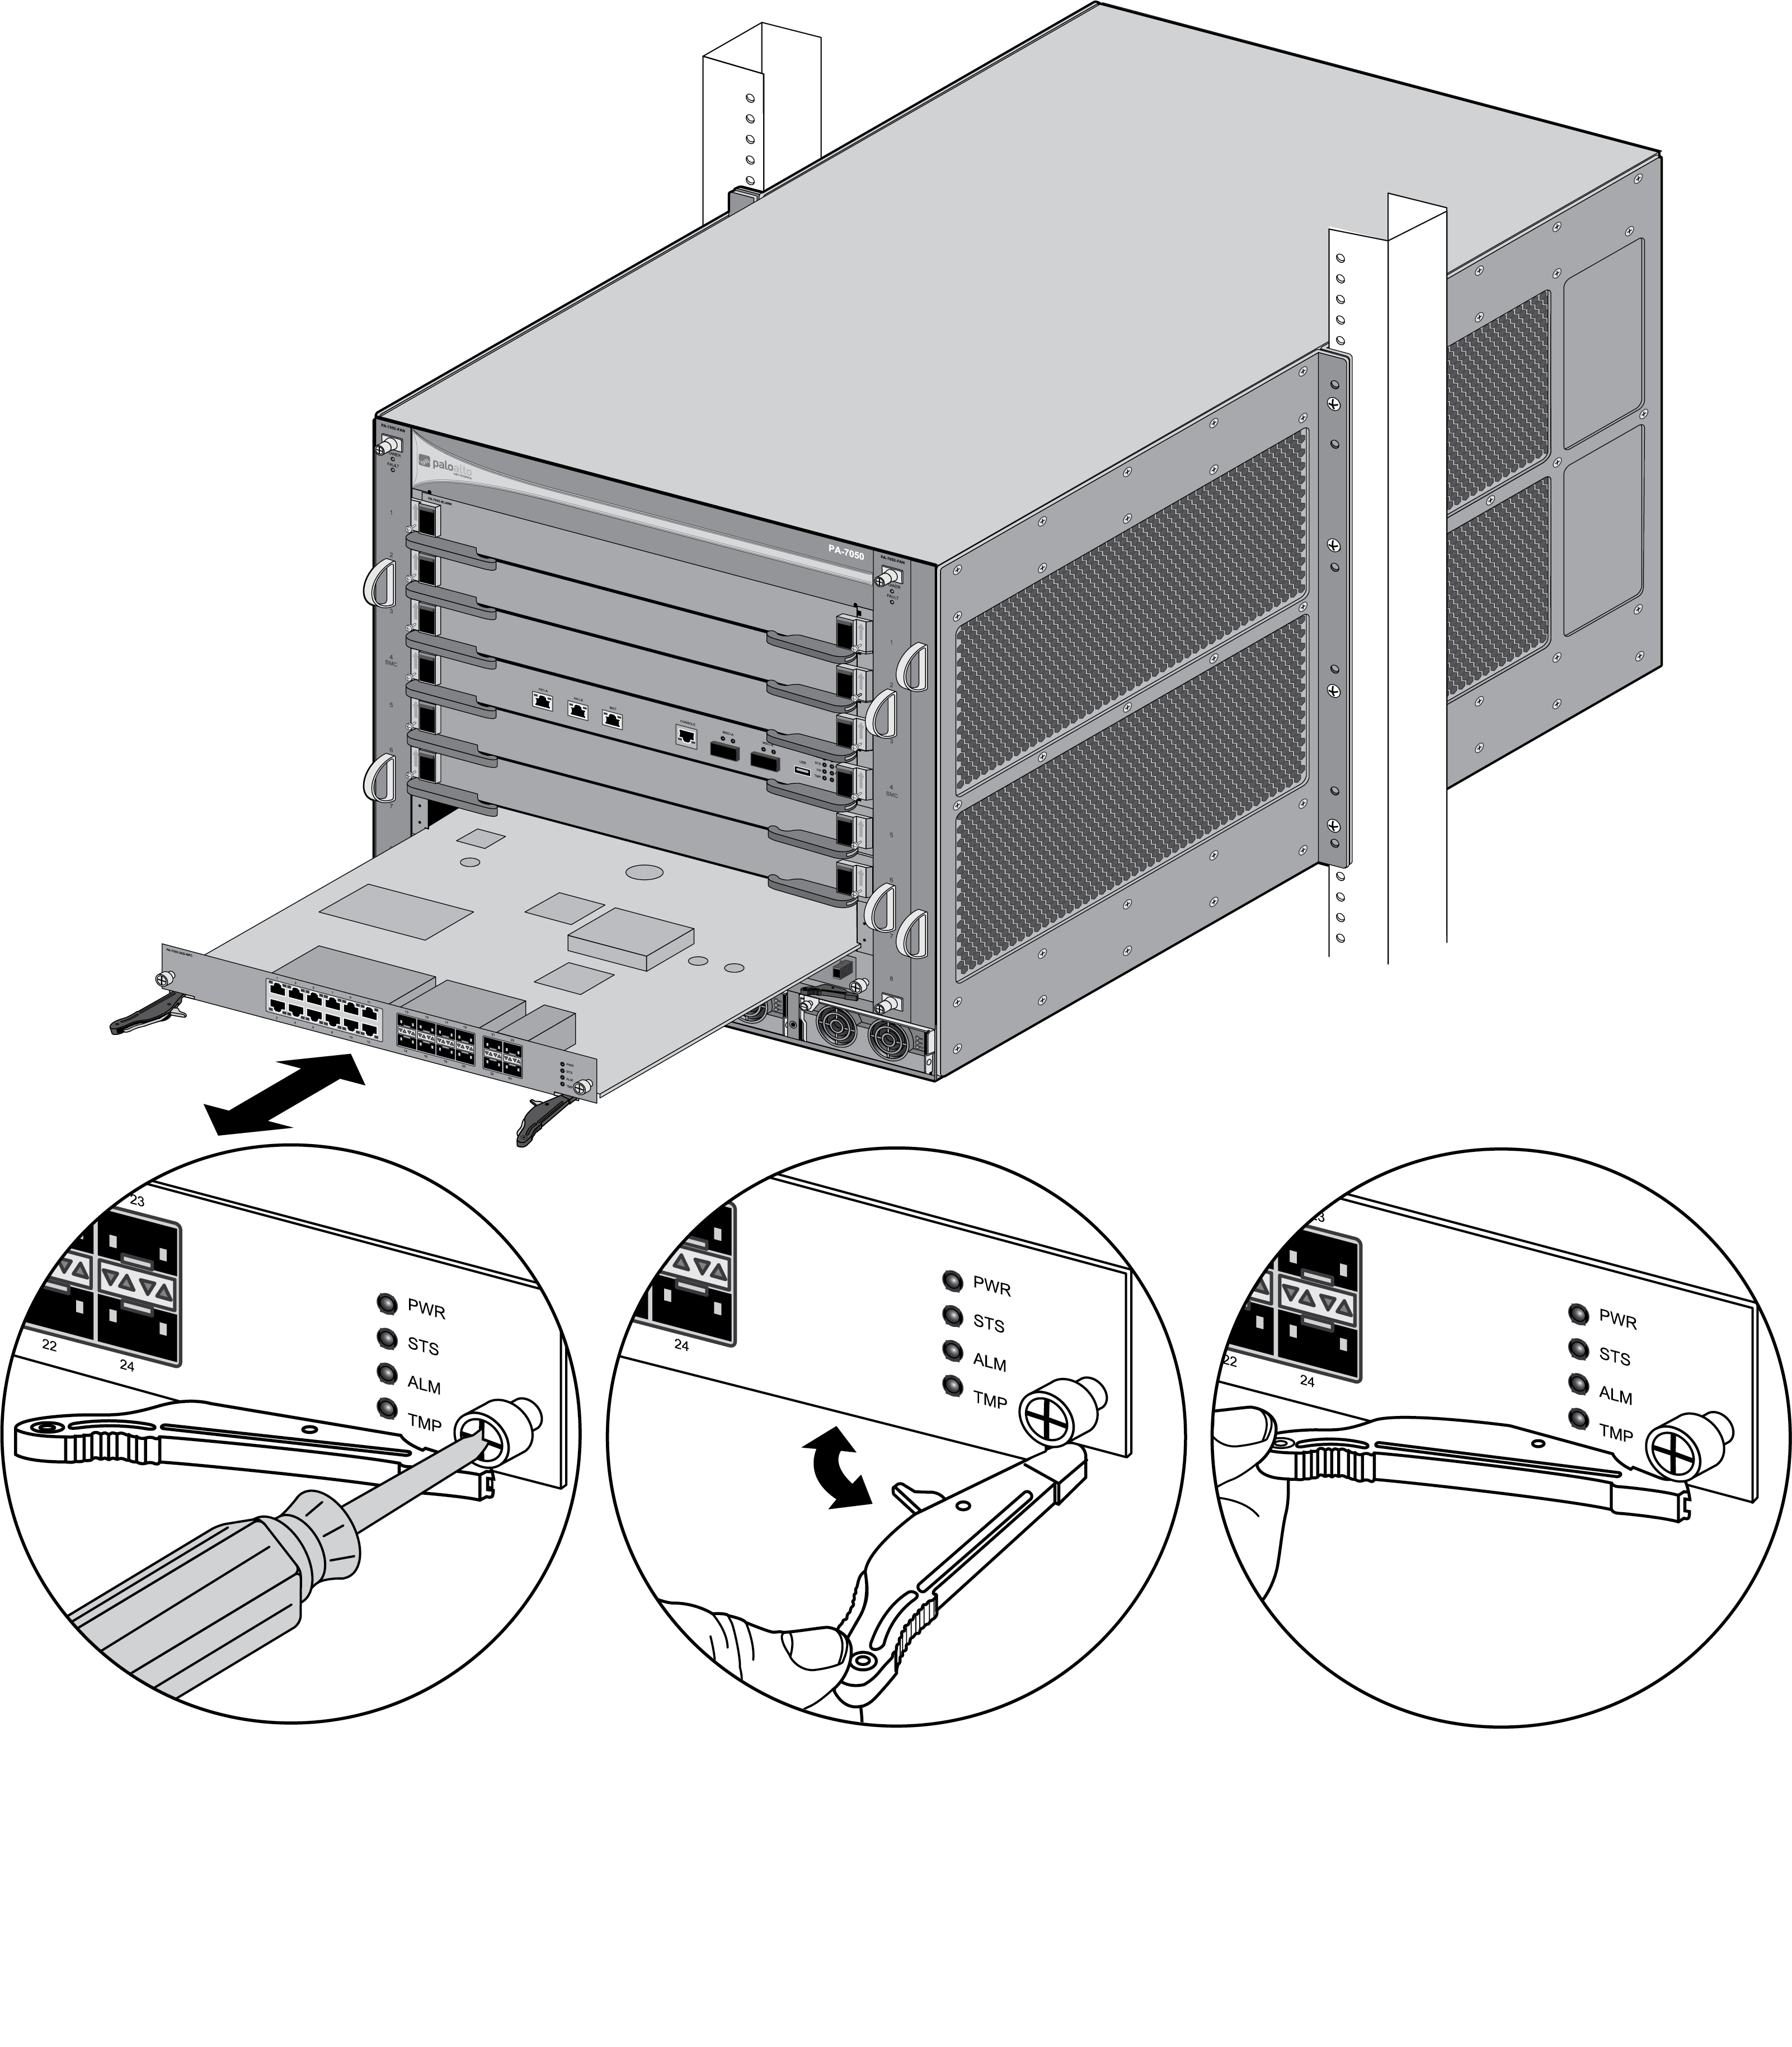
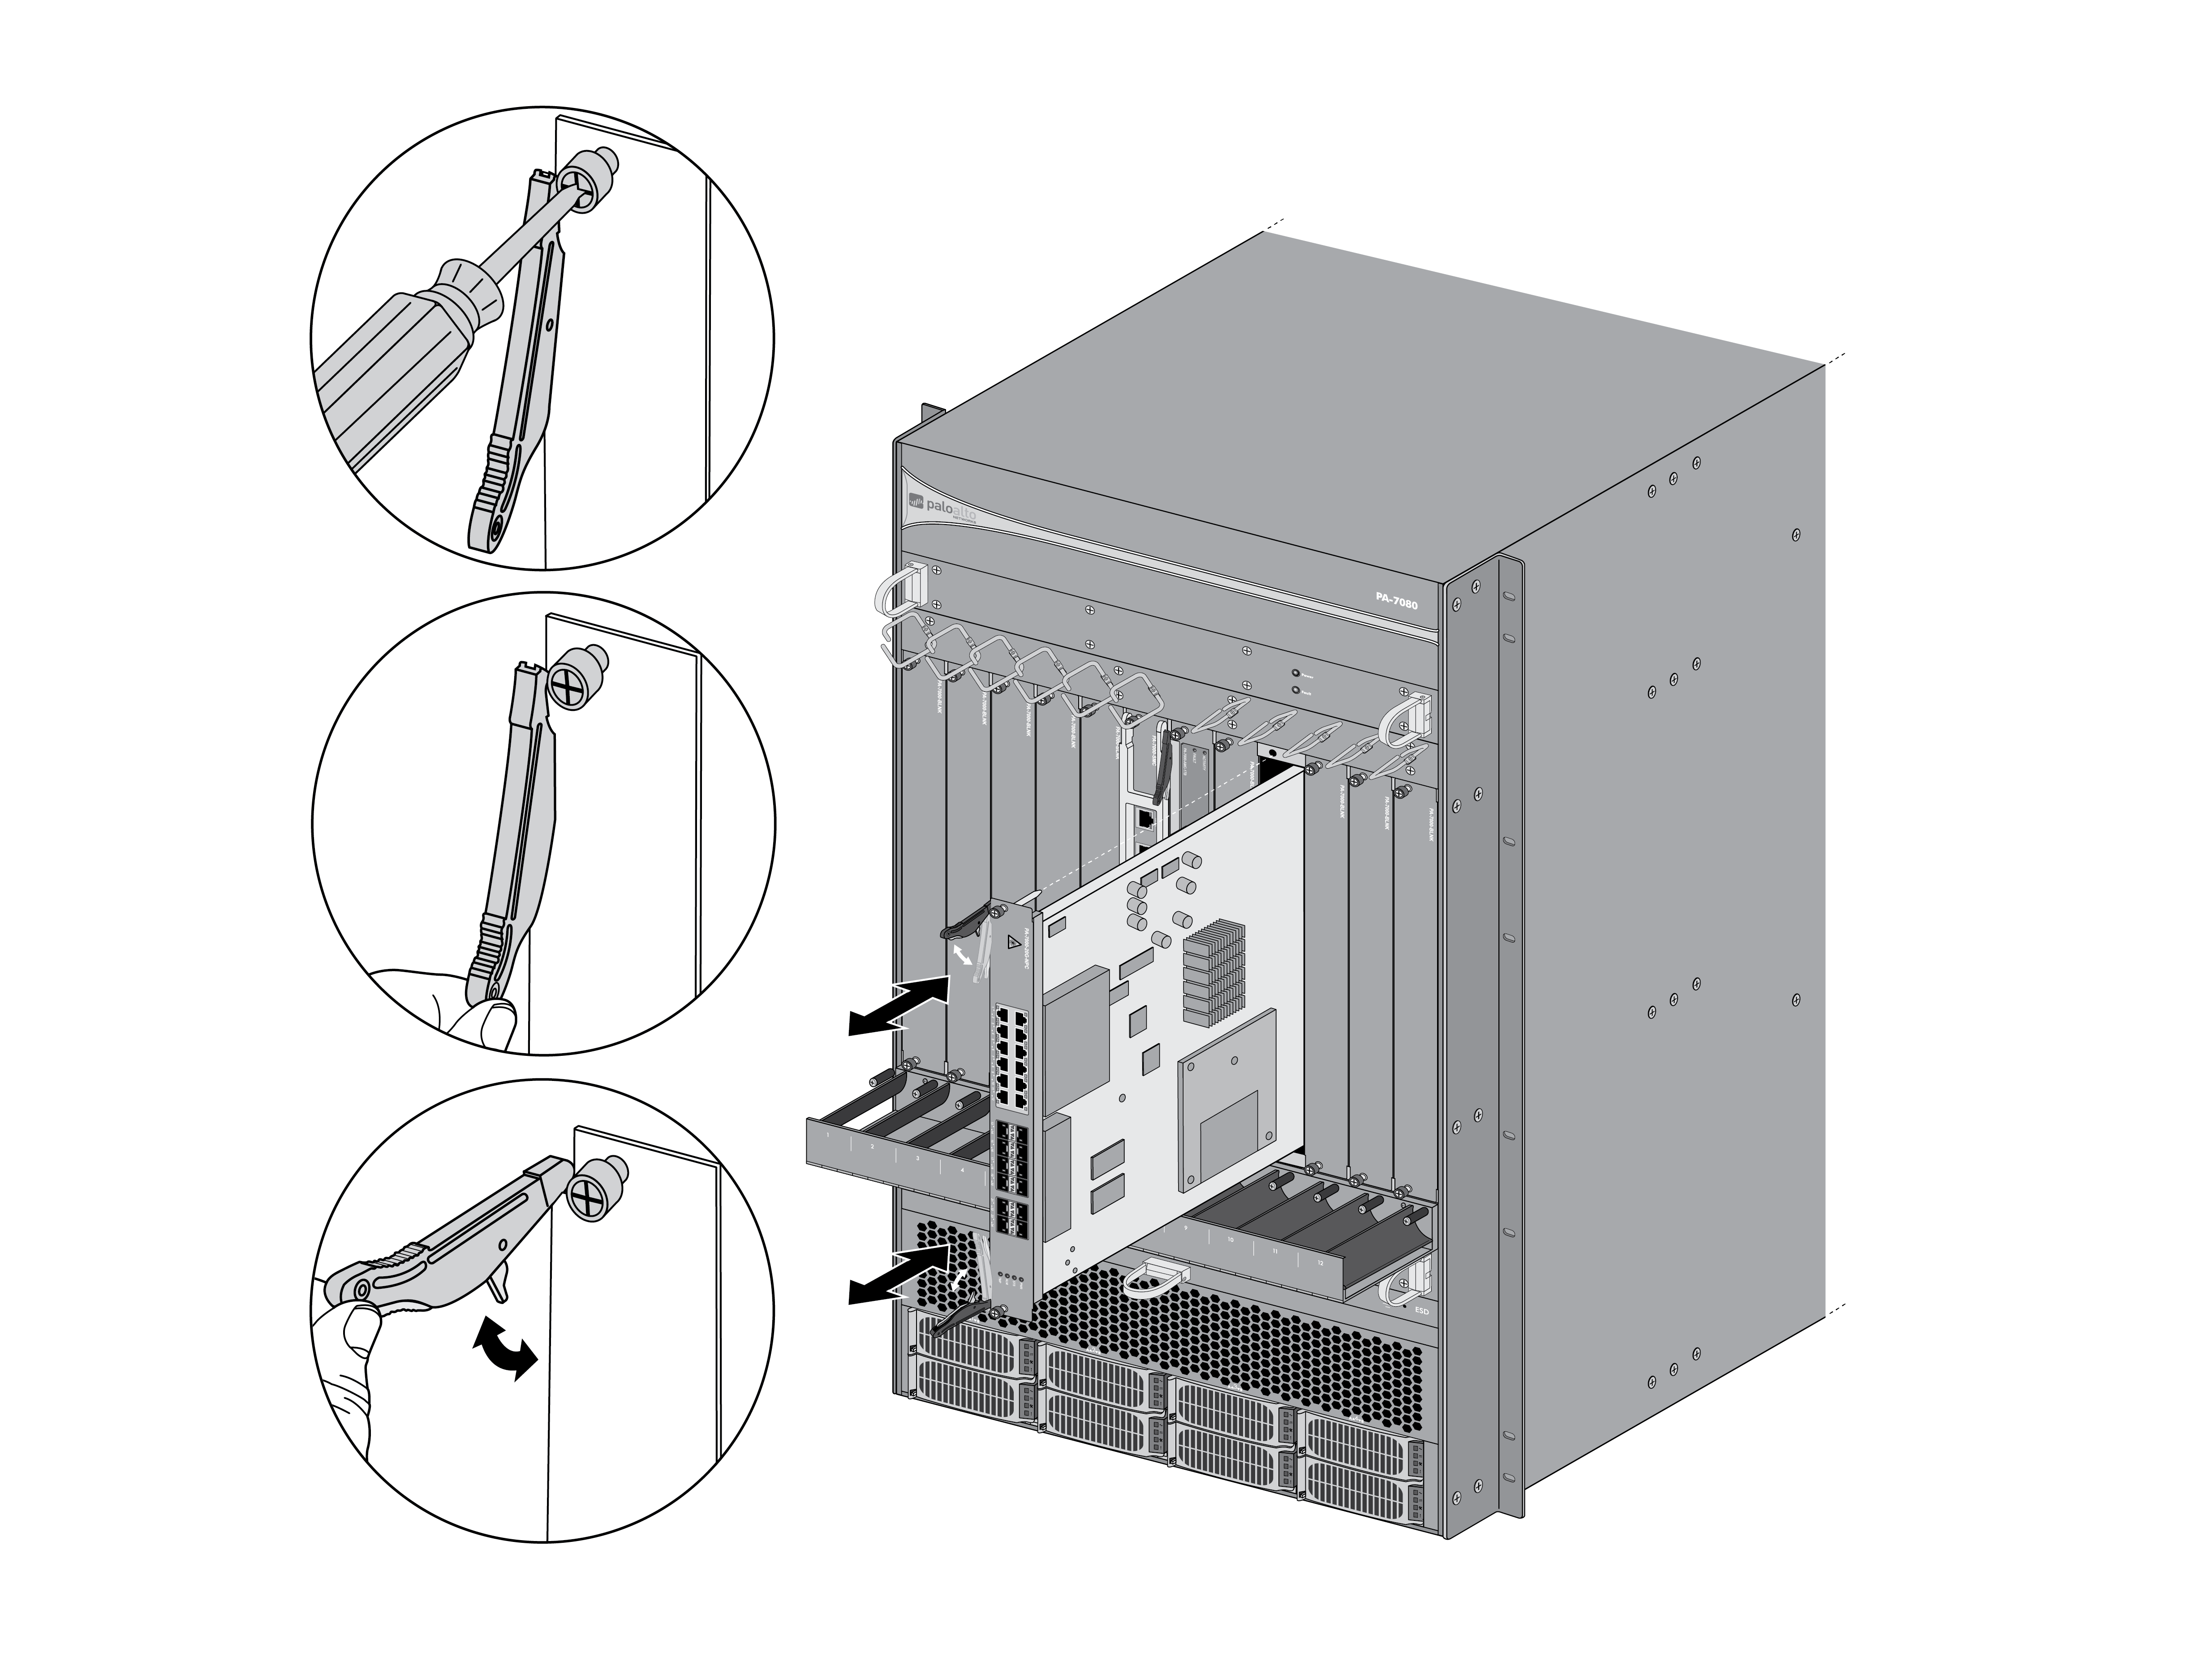
- Check the status of the DPC that is having a problem. You can do this from the web interface or from the CLI. In the web interface, navigate to to view status of each DPC slot.If the DPC failed due to a hardware problem, the status shows Failure.Put the provided ESD wrist strap on your wrist ensuring that the metal contact is touching your skin. Then attach (snap) one end of the ground cable to the wrist strap and remove the alligator clip from the banana clip on the other end of the ESD grounding cable. Plug the banana clip end into one of the ESD ports located on the front of the chassis before handling ESD sensitive hardware. For details on the ESD port location, see PA-7050 Front Panel (AC) or PA-7080 Front Panel (AC).Turn the card screws on each side of the card counterclockwise until loose and then gently pull the inner release lever to release the outer ejector levers. Wait for the green power LED to go off and then pull the release lever toward you to pull the card out of the chassis.Remove the DPC from the antistatic bag and partially slide it into any of the available DPC slots, ensuring that the handles are in the open position. When the card is about 1/4-inch from being fully inserted, adjust the levers to align with the chassis and then close the levers to seat the card in place.
![]()
![]() Tighten the thumb screws on each side of the card to secure the card to the chassis by hand or using a Phillips-head screwdriver.Enable the slots that contain the functioning DPC (in the second chassis) and the DPC that you just replaced.
Tighten the thumb screws on each side of the card to secure the card to the chassis by hand or using a Phillips-head screwdriver.Enable the slots that contain the functioning DPC (in the second chassis) and the DPC that you just replaced.admin@PA-7050> request chassis enable slot <slot-number>For example, run the following command to enable slot 3 on the firewall:admin@PA-7050> request chassis enable slot s3It is recommended that you observe the enabled card for about two minutes to check for internal path monitoring failures. If there is no failure, proceed to the next step.Power on the slots that contain the functioning DPC (in the second chassis) and the DPC that you just replaced.admin@PA-7050> request chassis power-on slot <slot-number>For example, run the following command to enable slot 3 on the firewall:admin@PA-7050> request chassis power-on slot s3It is recommended that you observe the enabled card for about two minutes to check for internal path monitoring failures. If there is no failure, proceed to the next step.Check the status of the card in slot 3 on either chassis by running:admin@PA-7050> show chassis status slot s3If the cards are functioning properly, the status will show an output similar to the following:Slot...Component........Card Status.....Config Status 3.......PA-7000-DPC ...Up..................SuccessEnsure that the DPCs' session distribution policy is set to session-load.- Run the following command to check the DPCs' current distribution policy:
admin@PA-7050> show session distribution policyIf the Ownership Distribution Policy reads as any value other than session-load, run the following command:admin@PA-7050> set session distribution-policy session-loadRunning the show session distribution policy command should now read Ownership Distribution Policy: session-load.