Replace a PA-7000 Series Log Processing Card (LPC)
Table of Contents
Replace a PA-7000 Series Log Processing Card (LPC)
If the LPC fails, the chassis reboots and
will attempt to recover the LPC. If the LPC continues to fail and
the chassis reboots more than 3 times in 30 minutes, it enters maintenance
mode at which time you must power off the chassis until you replace
the LPC.
The LPC contains the drives that the firewall uses
to store logs. If the LPC fails, you will need to remove the drives
and then reinstall them in the new LPC. It is important that you
install each AMC in the same slot in the new LPC to maintain the RAID
configuration. For example, the AMC in the far-right slot of the
old LPC must be installed in the far-right slot in the new LPC and
the same for each of the other three AMCs. After you replace an
LPC, you will need to re-index the drives as described in Re-Index
the LPC Drives.
There is one LPC model used for both
the PA-7050 and PA-7080 firewall and the procedure is the same except
that, on the PA-7050 firewall, you must install the LPC in slot
8 while on the PA-7080 firewall, you must install the LPC in slot 7.
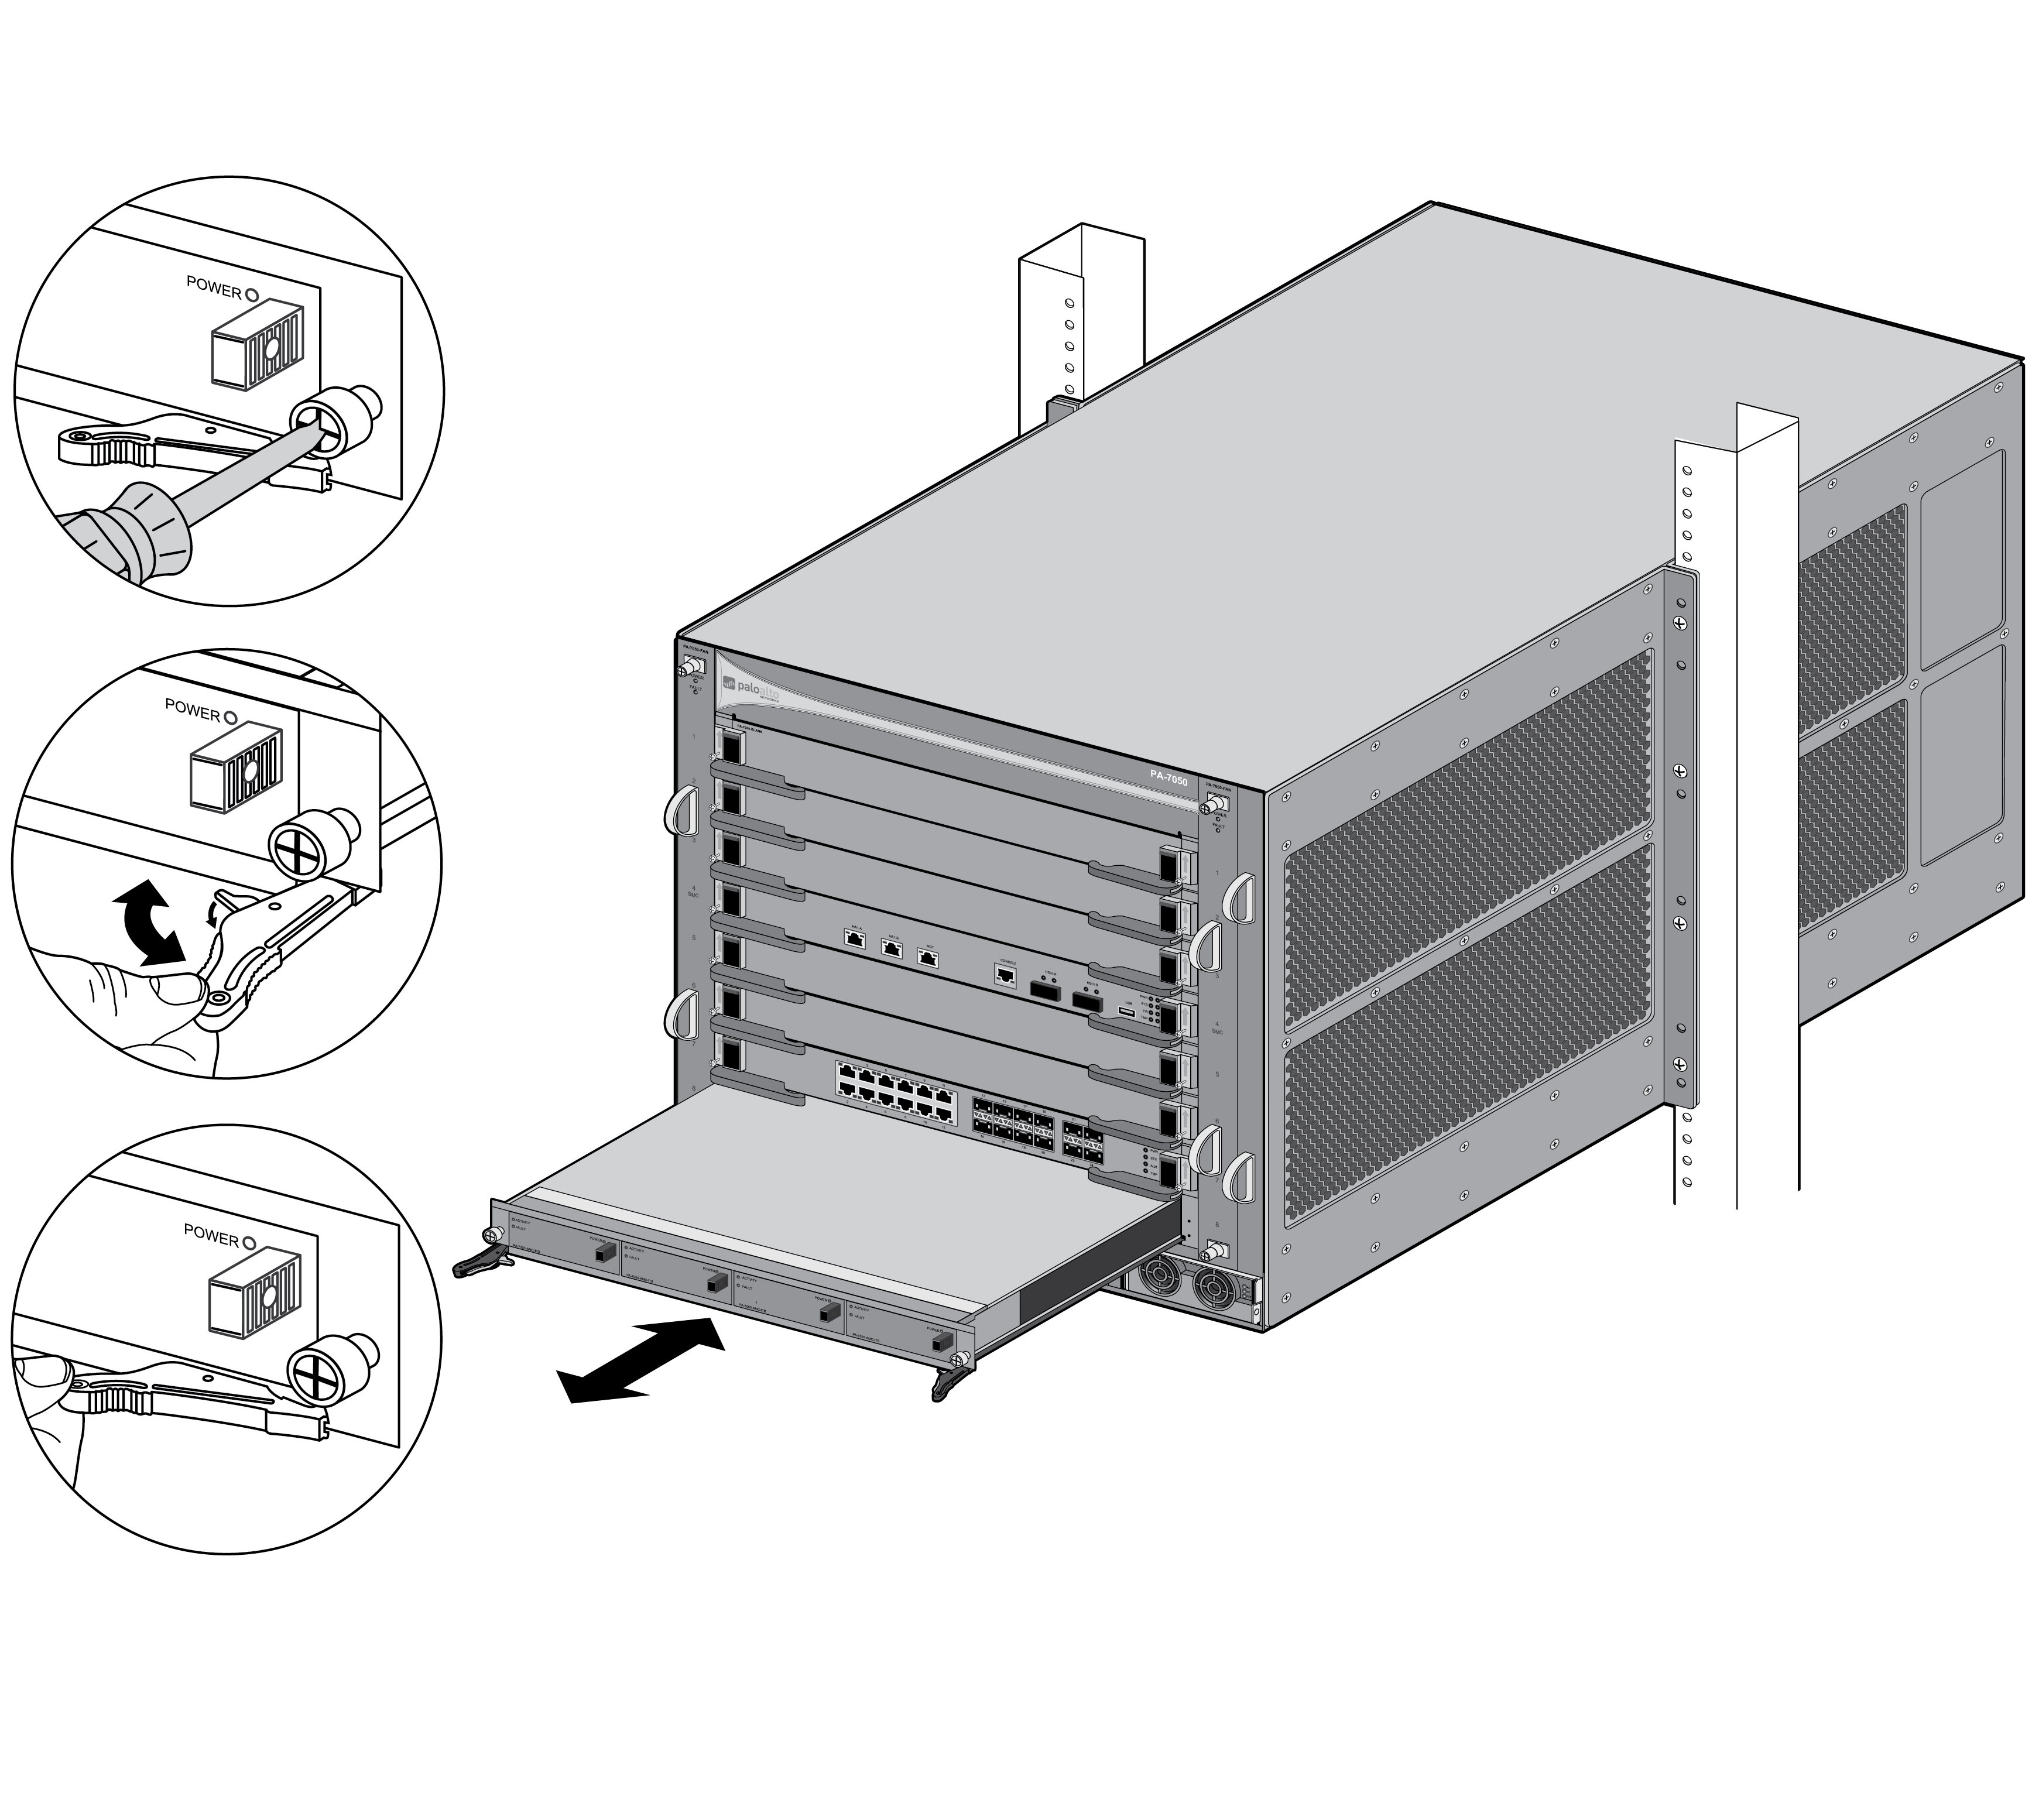
- Power off the chassis and disconnect the power source to the chassis.Put the provided ESD wrist strap on your wrist ensuring that the metal contact is touching your skin. Then attach (snap) one end of the ground cable to the wrist strap and remove the alligator clip from the banana clip on the other end of the ESD grounding cable. Plug the banana clip end into one of the ESD ports located on the front of the chassis before handling ESD sensitive hardware. For details on the ESD port location, see PA-7050 Front Panel (AC) or PA-7080 Front Panel (AC).Remove the four drives from the front of the LPC and note the location of each drive. For details on removing the drives, see Replace a PA-7000 Series Firewall LPC Drive.It is important that you reinstall the drives in the same position from which you removed them to maintain the RAID configuration. It is best to label the drives and take a picture before removing them.Loosen the thumb screws on each side of the LPC.Remove the LPC by pulling the inner release lever to unlock the outer release lever and then use the outer release lever to pull the LPC out of the chassis.The LPC has a double-lever on each side of the card. After loosening the thumb screws, you must pull the inner lever toward you to unlock the outer lever from the chassis and then pull the outer lever to release the card. When installing the card, push the outer lever in to lock the inner lever.
![]()
![]() Remove the new LPC from the antistatic bag. Slide the LPC into the LPC slot, ensuring that the handles are in the open position. When the card is about 1/4-inch from being fully inserted, adjust the levers to align with the chassis and then close the levers to seat the card in place.The small notches located near the hinge of the card levers are used to fully seat the card into the back connector of the slot. To prevent damage, ensure that the notches line up with the chassis so that when you close the levers, the levers fully seat the card into the backplane connectors.Tighten the thumb screws on each side of the LPC to secure it to the chassis.Install the drives that you removed earlier in the same slots from which you removed them. For details on replacing drives, Replace a PA-7000 Series Firewall LPC Drive.If you are using the drives from the failed LPC, read the steps in Re-Index the LPC Drives before powering on the chassis.
Remove the new LPC from the antistatic bag. Slide the LPC into the LPC slot, ensuring that the handles are in the open position. When the card is about 1/4-inch from being fully inserted, adjust the levers to align with the chassis and then close the levers to seat the card in place.The small notches located near the hinge of the card levers are used to fully seat the card into the back connector of the slot. To prevent damage, ensure that the notches line up with the chassis so that when you close the levers, the levers fully seat the card into the backplane connectors.Tighten the thumb screws on each side of the LPC to secure it to the chassis.Install the drives that you removed earlier in the same slots from which you removed them. For details on replacing drives, Replace a PA-7000 Series Firewall LPC Drive.If you are using the drives from the failed LPC, read the steps in Re-Index the LPC Drives before powering on the chassis.