Replace a PA-7000 Series SMC Boot Drive
Table of Contents
Replace a PA-7000 Series SMC Boot Drive
Learn how to replace the mSATA SSD in your first generation
Switch Management Card.
The first generation switch management cards (PA-7050-SMC
and PA-7080-SMC) come with an mSATA solid-state drive (SSD) that contains
the PAN-OS boot images and configuration files. If your PAN-OS configuration
file is too large to fit on the pre-installed SSD, you can replace
the stock SSD with the PAN-PA-7000-MSATA-IMG. The PAN-PA-7000-MSATA-IMG
has more storage space and is pre-loaded with a PAN-OS image. Follow
the procedure below to replace the mSATA in your SMC.
- Put the provided ESD wrist strap on your wrist, ensuring that the metal contact is touching your skin. Attach (snap) one end of the ground cable to the wrist strap and remove the alligator clip from the banana clip on the other end of the ESD grounding cable. Plug the banana clip end into one of the ESD ports located on the front of the chassis before handling ESD sensitive hardware. For details on the ESD port location, see PA-7050 Front Panel (AC) or PA-7080 Front Panel (AC).Before you power off the chassis in the following step, ensure that you have created a backup of your PAN-OS configuration. See Save and Export Firewall Configurations.Power off the chassis. Disconnect the cables connected to the SMC and all power cords plugged into the chassis.Use a #1 or #2 Phillips screwdriver to unscrew the SMC screws at the front of the chassis. On the PA-7050 firewall, the SMC is located in slot 4; on the PA-7080 firewall, the SMC is located in slot 6.Use the card ejector levers adjacent to the SMC screws to release the card. Remove the card and place it on an ESD work surface. Detach your wrist strap’s ground cable from the ESD port on the chassis and securely attach the alligator clip to the new ESD surface.Locate the mSATA.
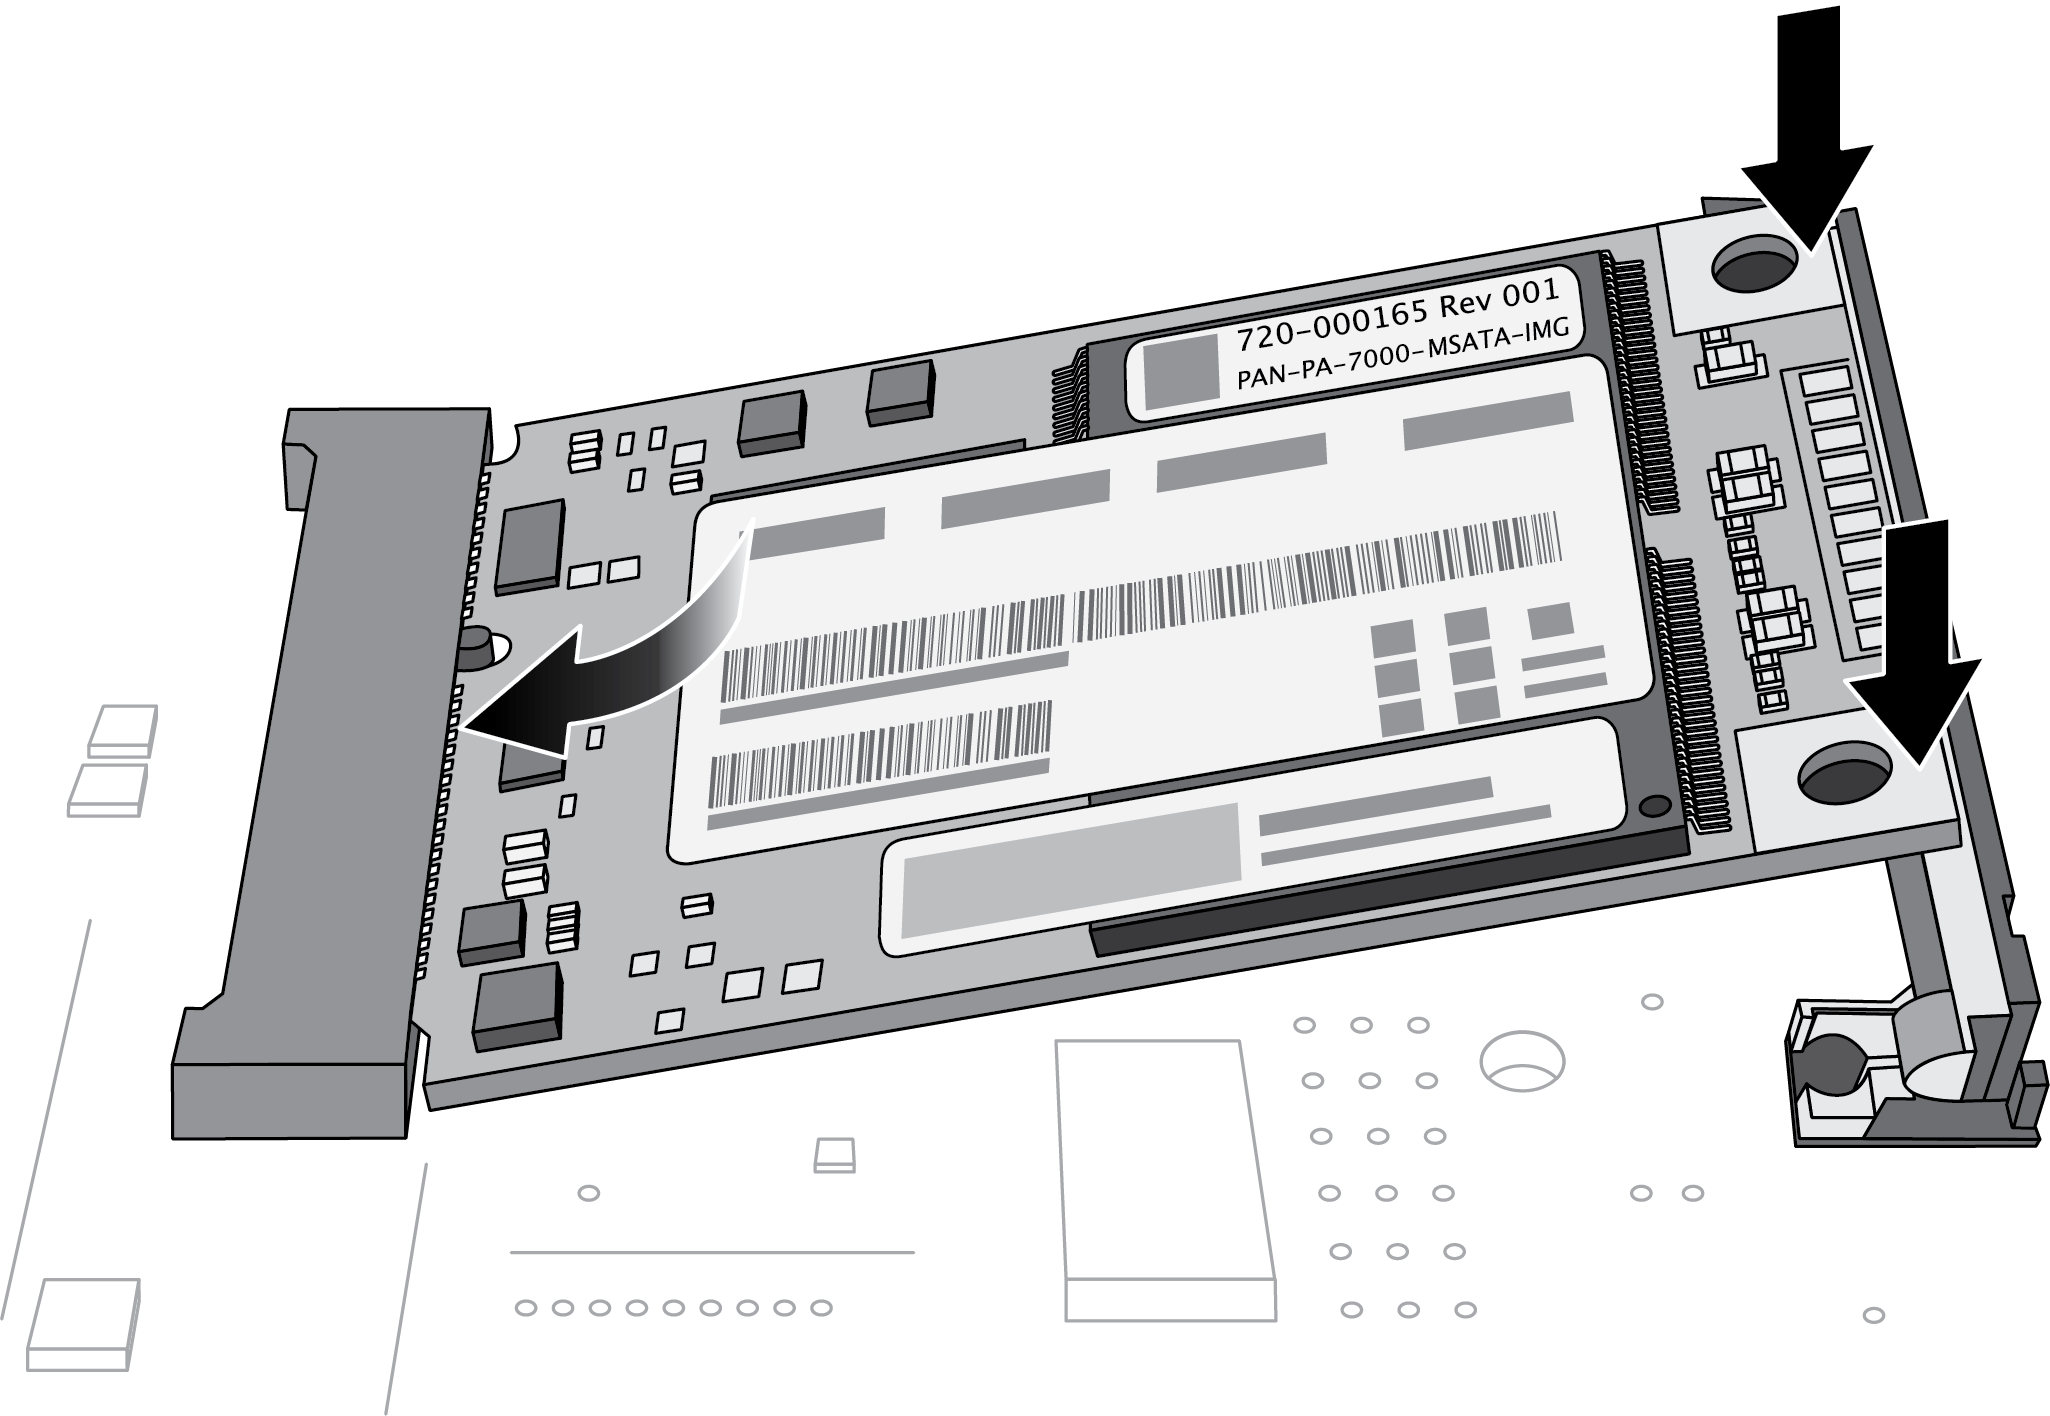
![]() Gently press the two clips to release the mSATA. Once the mSATA pops up, carefully remove it from the socket.
Gently press the two clips to release the mSATA. Once the mSATA pops up, carefully remove it from the socket.![]() Carefully place the new mSATA into the socket. Ensure that the label displaying the Palo Alto Networks SKU and bar codes is facing up. Press the mSATA down until it clicks into place and is secured by both clips.
Carefully place the new mSATA into the socket. Ensure that the label displaying the Palo Alto Networks SKU and bar codes is facing up. Press the mSATA down until it clicks into place and is secured by both clips.![]() Detach your wrist strap’s ground cable from the ESD surface and plug the banana clip back into one of the ESD ports on the front of the chassis. While the card ejector levers are ajar, gently slide the SMC back into the appropriate slot in the chassis. Ensure that the SMC faceplate aligns with the faceplates of the other cards.Lock the card ejector levers and screw the SMC screws back into the front of the chassis.Reconnect the power cords and SMC cables.Boot the chassis with the new mSATA installed. When prompted, log in and reset the firewall to factory default settings. After the reset operation is complete, load your preferred version and configuration of PAN-OS.
Detach your wrist strap’s ground cable from the ESD surface and plug the banana clip back into one of the ESD ports on the front of the chassis. While the card ejector levers are ajar, gently slide the SMC back into the appropriate slot in the chassis. Ensure that the SMC faceplate aligns with the faceplates of the other cards.Lock the card ejector levers and screw the SMC screws back into the front of the chassis.Reconnect the power cords and SMC cables.Boot the chassis with the new mSATA installed. When prompted, log in and reset the firewall to factory default settings. After the reset operation is complete, load your preferred version and configuration of PAN-OS.