Replace a PA-7000 Series Firewall LPC Drive
Table of Contents
Expand all | Collapse all
-
-
-
- PA-7000 Series Power Configuration Options
- Determine PA-7000 Series Firewall Power Configuration Requirements
- Connect AC Power to a PA-7050 Firewall
- Connect DC Power to a PA-7050 Firewall
- Connect AC Power to a PA-7080 Firewall
- Connect DC Power to a PA-7080 Firewall
- View PA-7000 Series Firewall Power Statistics
- Connect Cables to a PA-7000 Series Firewall
- Install the PA-7080 Firewall EMI Filter
-
- Replace a PA-7000 Series Firewall Air Filter
- Replace a PA-7000 Series SMC Boot Drive
- Replace a PA-7000 Series Firewall LPC Drive
- Re-Index the LPC Drives
- Replace a PA-7050-SMC-B or PA-7080-SMC-B Drive
- Increase the PA-7000 Series Firewall LPC Log Storage Capacity
Replace a PA-7000 Series Firewall LPC Drive
The Log Processing Card (LPC) contains four
Advanced Mezzanine Cards (AMCs) used to house one 2.5” SATA drive
each. The first two drives (A1 and A2) are configured in a RAID 1
array and the second two drives (B1 and B2) are configured in a
second RAID 1 array. This configuration provides redundancy
so if a drive in a RAID 1 array fails there is no service interruption
or loss of log data.
When ordering
replacement drives from Palo Alto Networks or your reseller, you
will receive the AMC and the drive as a single unit. Do not attempt
to replace the drive in the AMC with a third-party drive. Also,
do not mix drive models within a RAID 1 array (for example, the
drive model must be the same for both drives in the A1/A2 RAID 1
array). You can, however, mix drive models in different RAID 1 arrays
on the same LPC. For example, the drives in the A1/A2 array can
both be model ST91000640NS and the drives in the B1/B2 array can
both be model ST1000NX0423.
- Identify the failed drive and note the drive model by running the following operational command and viewing the status and model fields:
admin@PA-7080> show
system raid detail
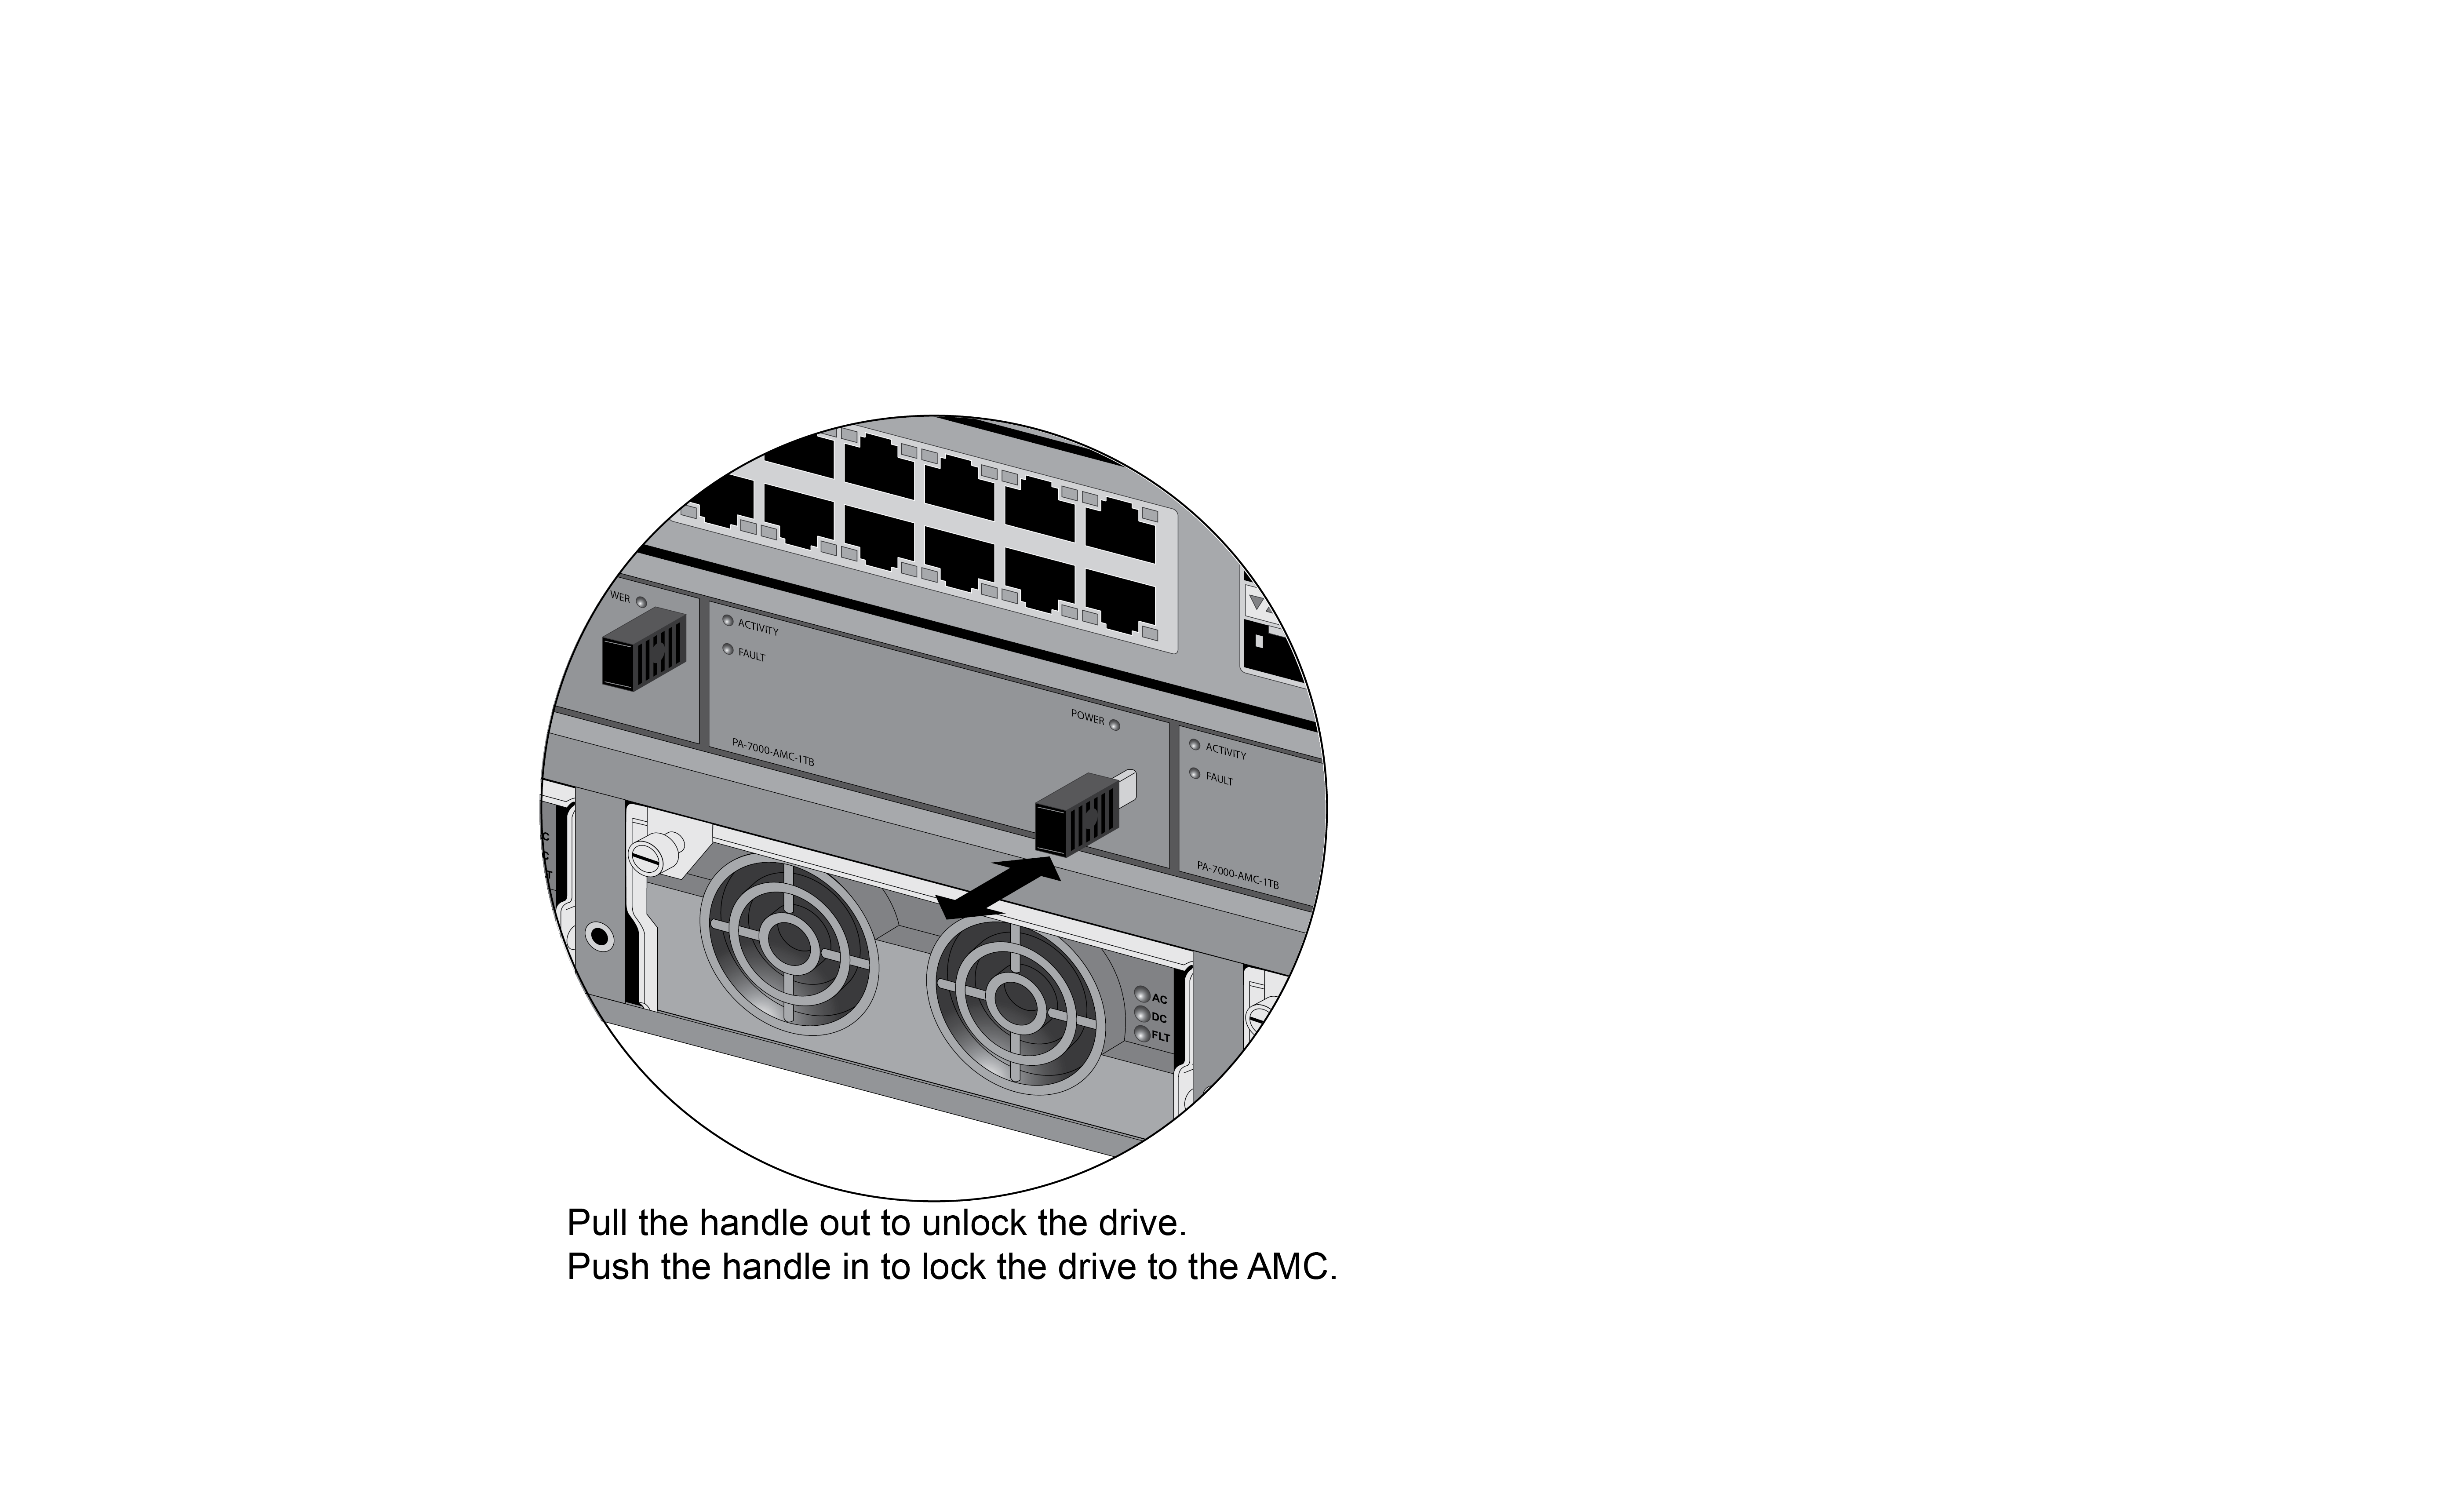
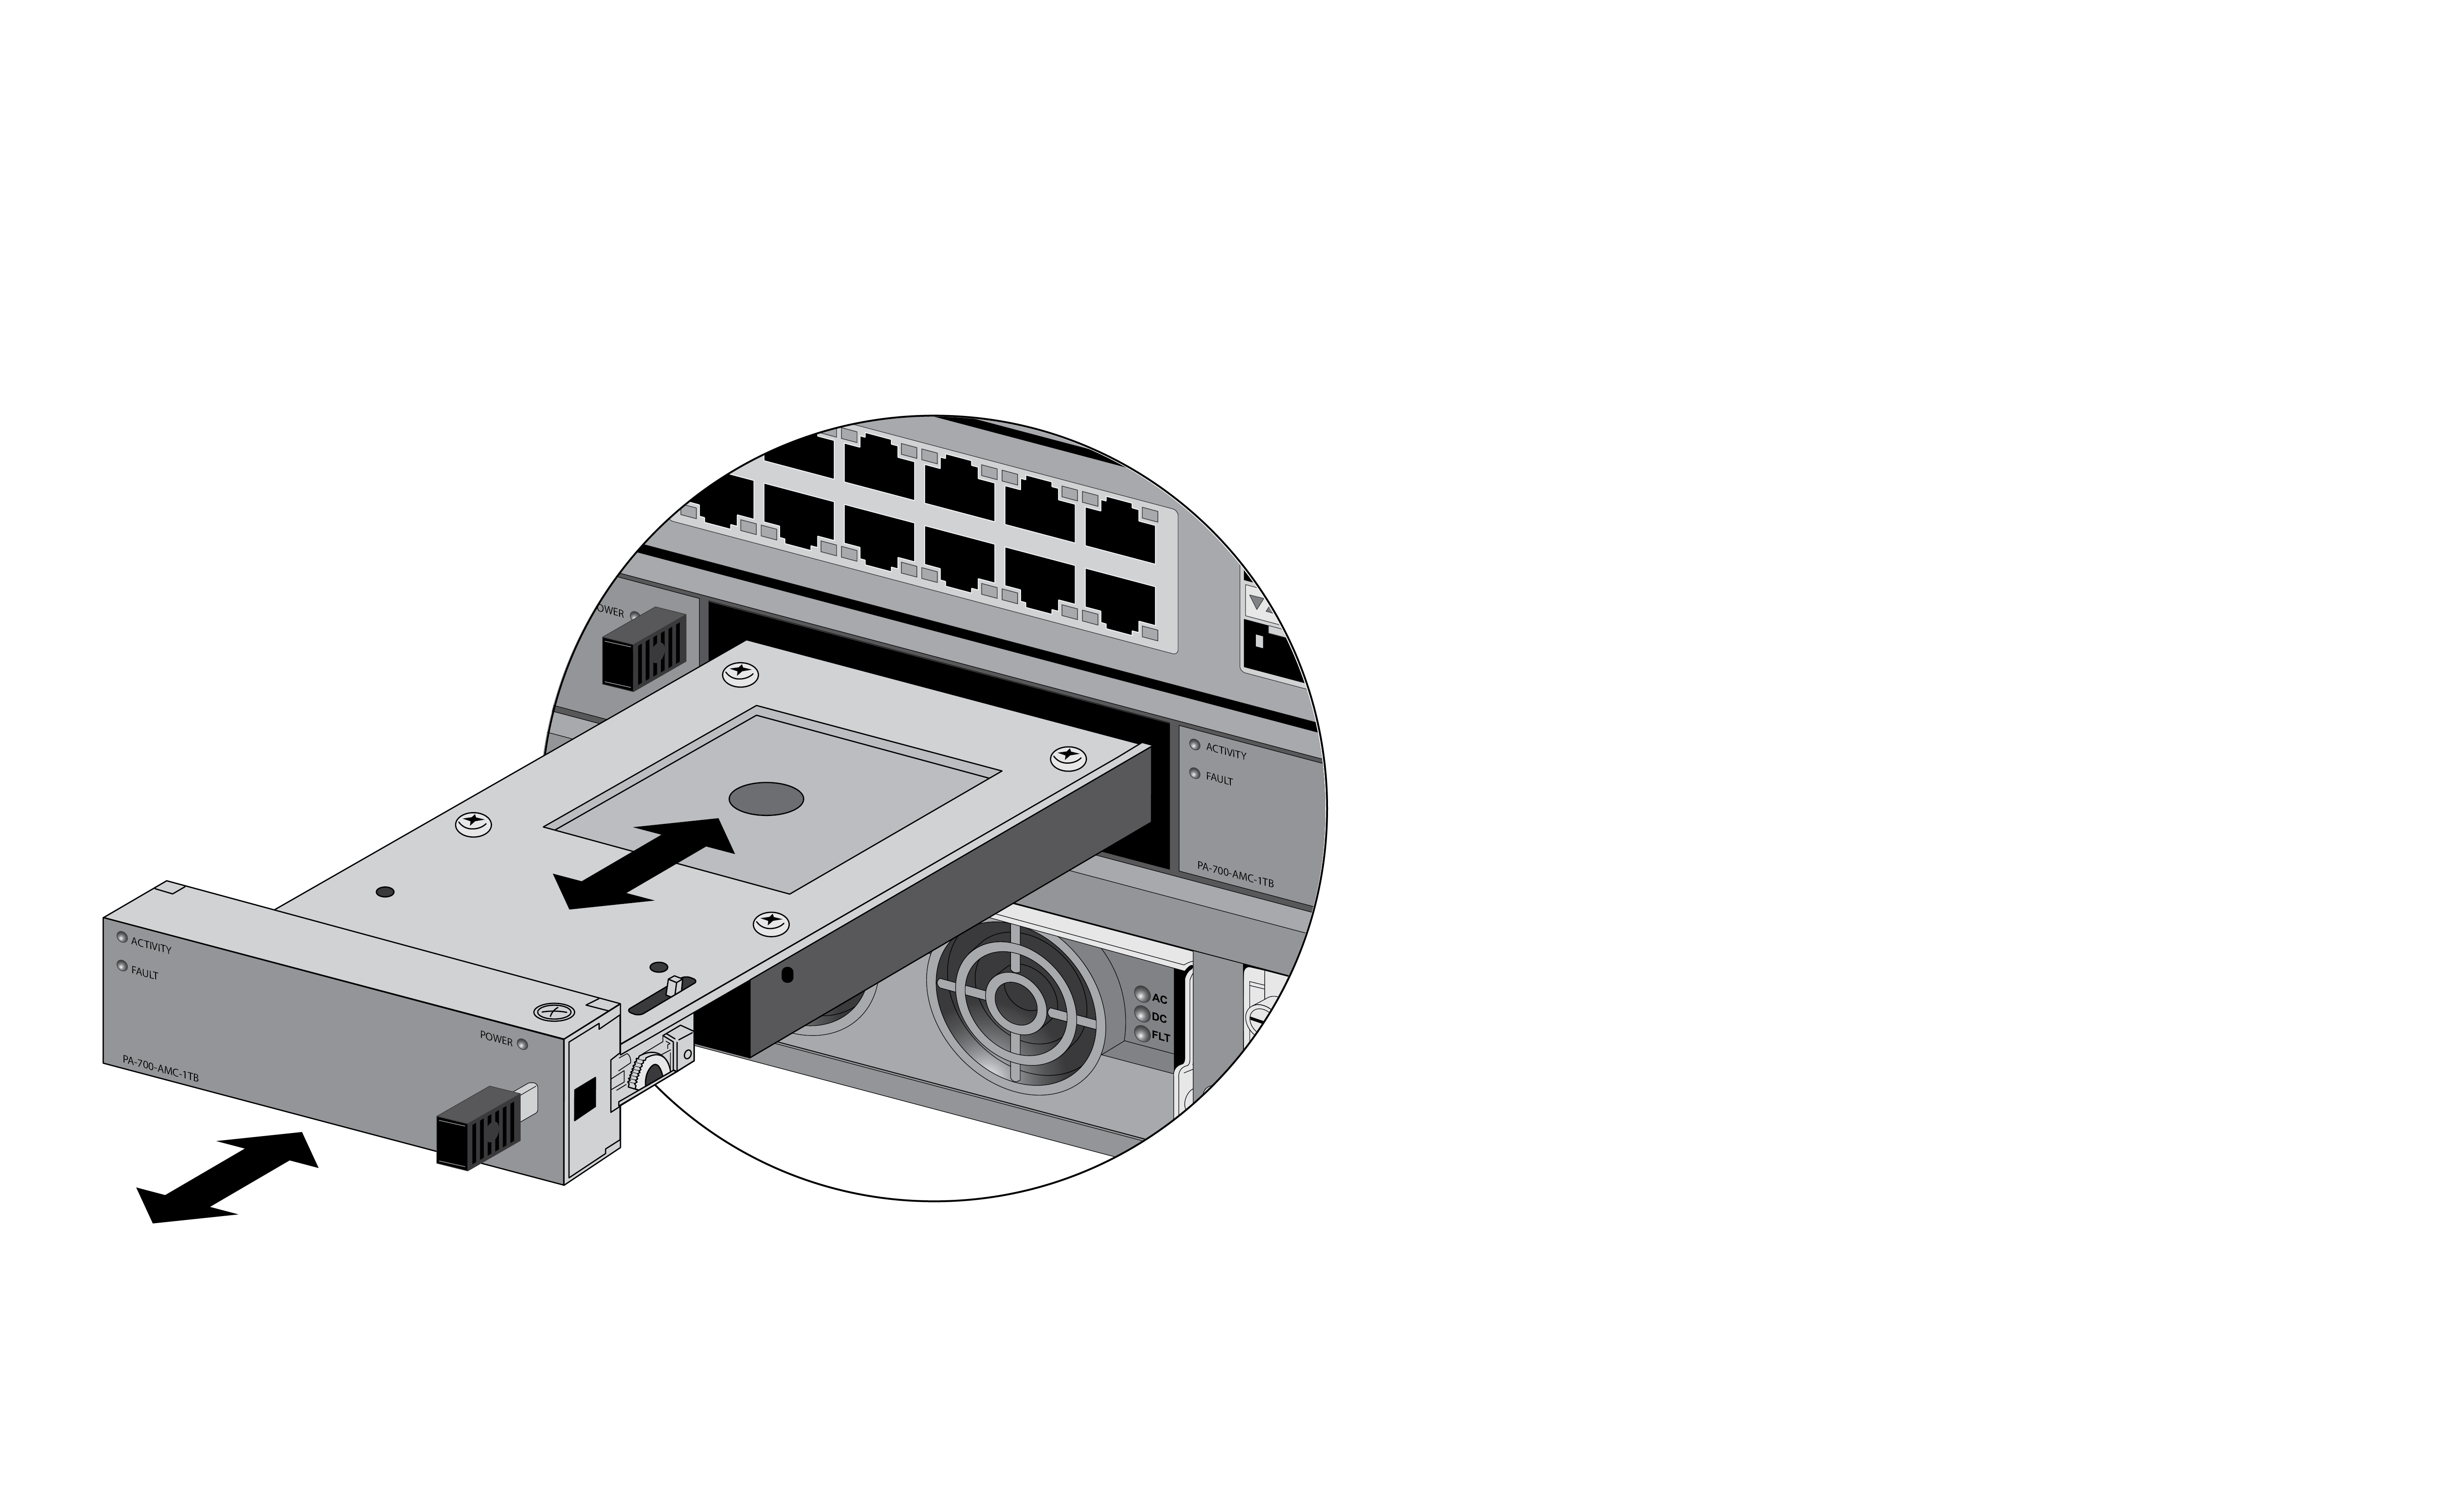
For example, the following output shows that drive A2 failed and the drive model is ST91000640NS.Disk Pair S7A Available Status clean, degraded Disk id A1 Present model : ST91000640NS size : 953869 MB status : active sync card serial : 002901000061 Disk id A2 Present model : ST91000640NS size : 953869 MB status : failed card serial : 002901000067Put the provided ESD wrist strap on your wrist ensuring that the metal contact is touching your skin. Then attach (snap) one end of the ground cable to the wrist strap and remove the alligator clip from the banana clip on the other end of the ESD grounding cable. Plug the banana clip end into one of the ESD ports located on the front of the chassis before handling ESD sensitive hardware. For details on the ESD port location, see PA-7050 Front Panel (AC) or PA-7080 Front Panel (AC).Remove the failed drive from the RAID 1 array. In this example, run the following command to remove drive A2 from the array:admin@PA-7080> request system raid slot s7 remove A2This procedure is based on a PA-7080 firewall where the LPC is installed in slot s7. If you are working on a PA-7050 firewall, the LPC is installed in slot s8. For a PA-7050 firewall, replace slots7 with slot s8 in those commands that specify the LPC slot number.Gently pull the AMC release handle of the failed drive toward you until it stops to unlock the AMC from the chassis and then completely remove the AMC. The FAULT LED on the AMC that contains the failed drive will show red.![]()
![]() Remove the replacement drive from the packaging and compare the drive model on the label with the drive model of the failed drive. Proceed as follows based on your findings:(Same model replacement drive only) Install a replacement drive that is the same model as the other drive in the RAID 1 array:
Remove the replacement drive from the packaging and compare the drive model on the label with the drive model of the failed drive. Proceed as follows based on your findings:(Same model replacement drive only) Install a replacement drive that is the same model as the other drive in the RAID 1 array:- Pull the AMC handle on the replacement drive outward until it stops to prepare it for installation into the LPC.Install the replacement drive by gently sliding it into the empty AMC slot (slot A2 in this example) and then push the release handle inward until it stops to lock the AMC to the LPC.Add the replacement drive to the RAID 1 array. In this example, run the following command to add drive A2 to the array:
admin@PA-7080> request
system raid slot s7 add A2
The system will automatically configure the new drive to mirror the other drive in the RAID 1 array.View the RAID status until you see that the disk pair (S7A in this example) shows Available and both disks show the status active sync. To view RAID status, run the following command:admin@PA-7080> show system raid detailThe following output shows that the RAID 1 array is functioning properly:Disk Pair S7A Available Status clean Disk id A1 Present model : ST91000640NS size : 953869 MB status : active sync card serial : 002901000061 Disk id A2 Present model : ST91000640NS size : 953869 MB status : active sync card serial : 002901000072(Different model replacement drive only) Install a replacement drive that is a different model than the other drive in the RAID 1 array:When you initiate the copy command as described in the following steps, logging and log query will not be available on the drive array until the copy is complete and the disk pair shows Available. If the other drive array (B1/B2 in this example) is low on drive space during the copy process, older logs are deleted to make room for new logs.- Pull the AMC handle on the replacement drive outward until it stops to prepare it for installation into the LPC.Install the replacement drive by gently sliding it into the empty AMC slot (slot A2 in this example) and then push the release handle inward until it stops to lock the AMC to the LPC.If you want to copy data from the existing drive to the replacement drive, proceed to the next substep.If you do not want to copy data to the replacement drive, proceed to installing the second replacement drive.Copy the data from the existing drive in the RAID 1 array to the replacement drive. In this example, run the following command to copy the data from the A1 drive to the A2 drive:
admin@PA-7080> request
system raid slot s7 copy from A1 to A2
Run the following CLI command to view the status of the copy:admin@PA-7080> show system raid detailContinue running this command to view the RAID detail output until the copy is complete and the disk pair shows Available. The following example output shows that Disk Pair S7A is Available.At this point, drive A1 will show notin use because there is a drive model mismatch.Disk Pair S7A Available Status clean, degraded Disk id A1 Present model : ST91000640NS size : 953869 MB status : not in use card serial : 002901000061 Disk id A2 Present model : ST1000NX0423 size : 953869 MB status : active sync card serial : 002901000098Install the second replacement drive. In this example, physically remove the drive from slot A1 and then install the second replacement drive—one that is the same model as you installed in slot A2—into slot A1.Add the second replacement drive to the RAID 1 array. In this example, run the following command to add drive A1 to the array:admin@PA-7080> request system raid slot s7 add A1The system will automatically configure the new drive to mirror the other drive in the RAID 1 array.Continue to view the RAID status until you see that the drive array (S7A in this example) shows Available and both drives show the status active sync.admin@PA-7080> show system raid detailThe following output shows that the RAID 1 array is functioning properly:Disk Pair S7A Available Status clean Disk id A1 Present model : ST1000NX0423 size : 953869 MB status : active sync card serial : 002901000089 Disk id A2 Present model : ST1000NX0423 size : 953869 MB status : active sync card serial : 002901000067


