Replace a PA-7080 DC Power Supply
Table of Contents
Replace a PA-7080 DC Power Supply
The following procedures describe how to replace
a PA-7080 DC power supply located on the front of the chassis. For information
on replacing the Power Entry Module (PEM) located on the back of
the chassis, see Replace
a PA-7080 DC PEM.
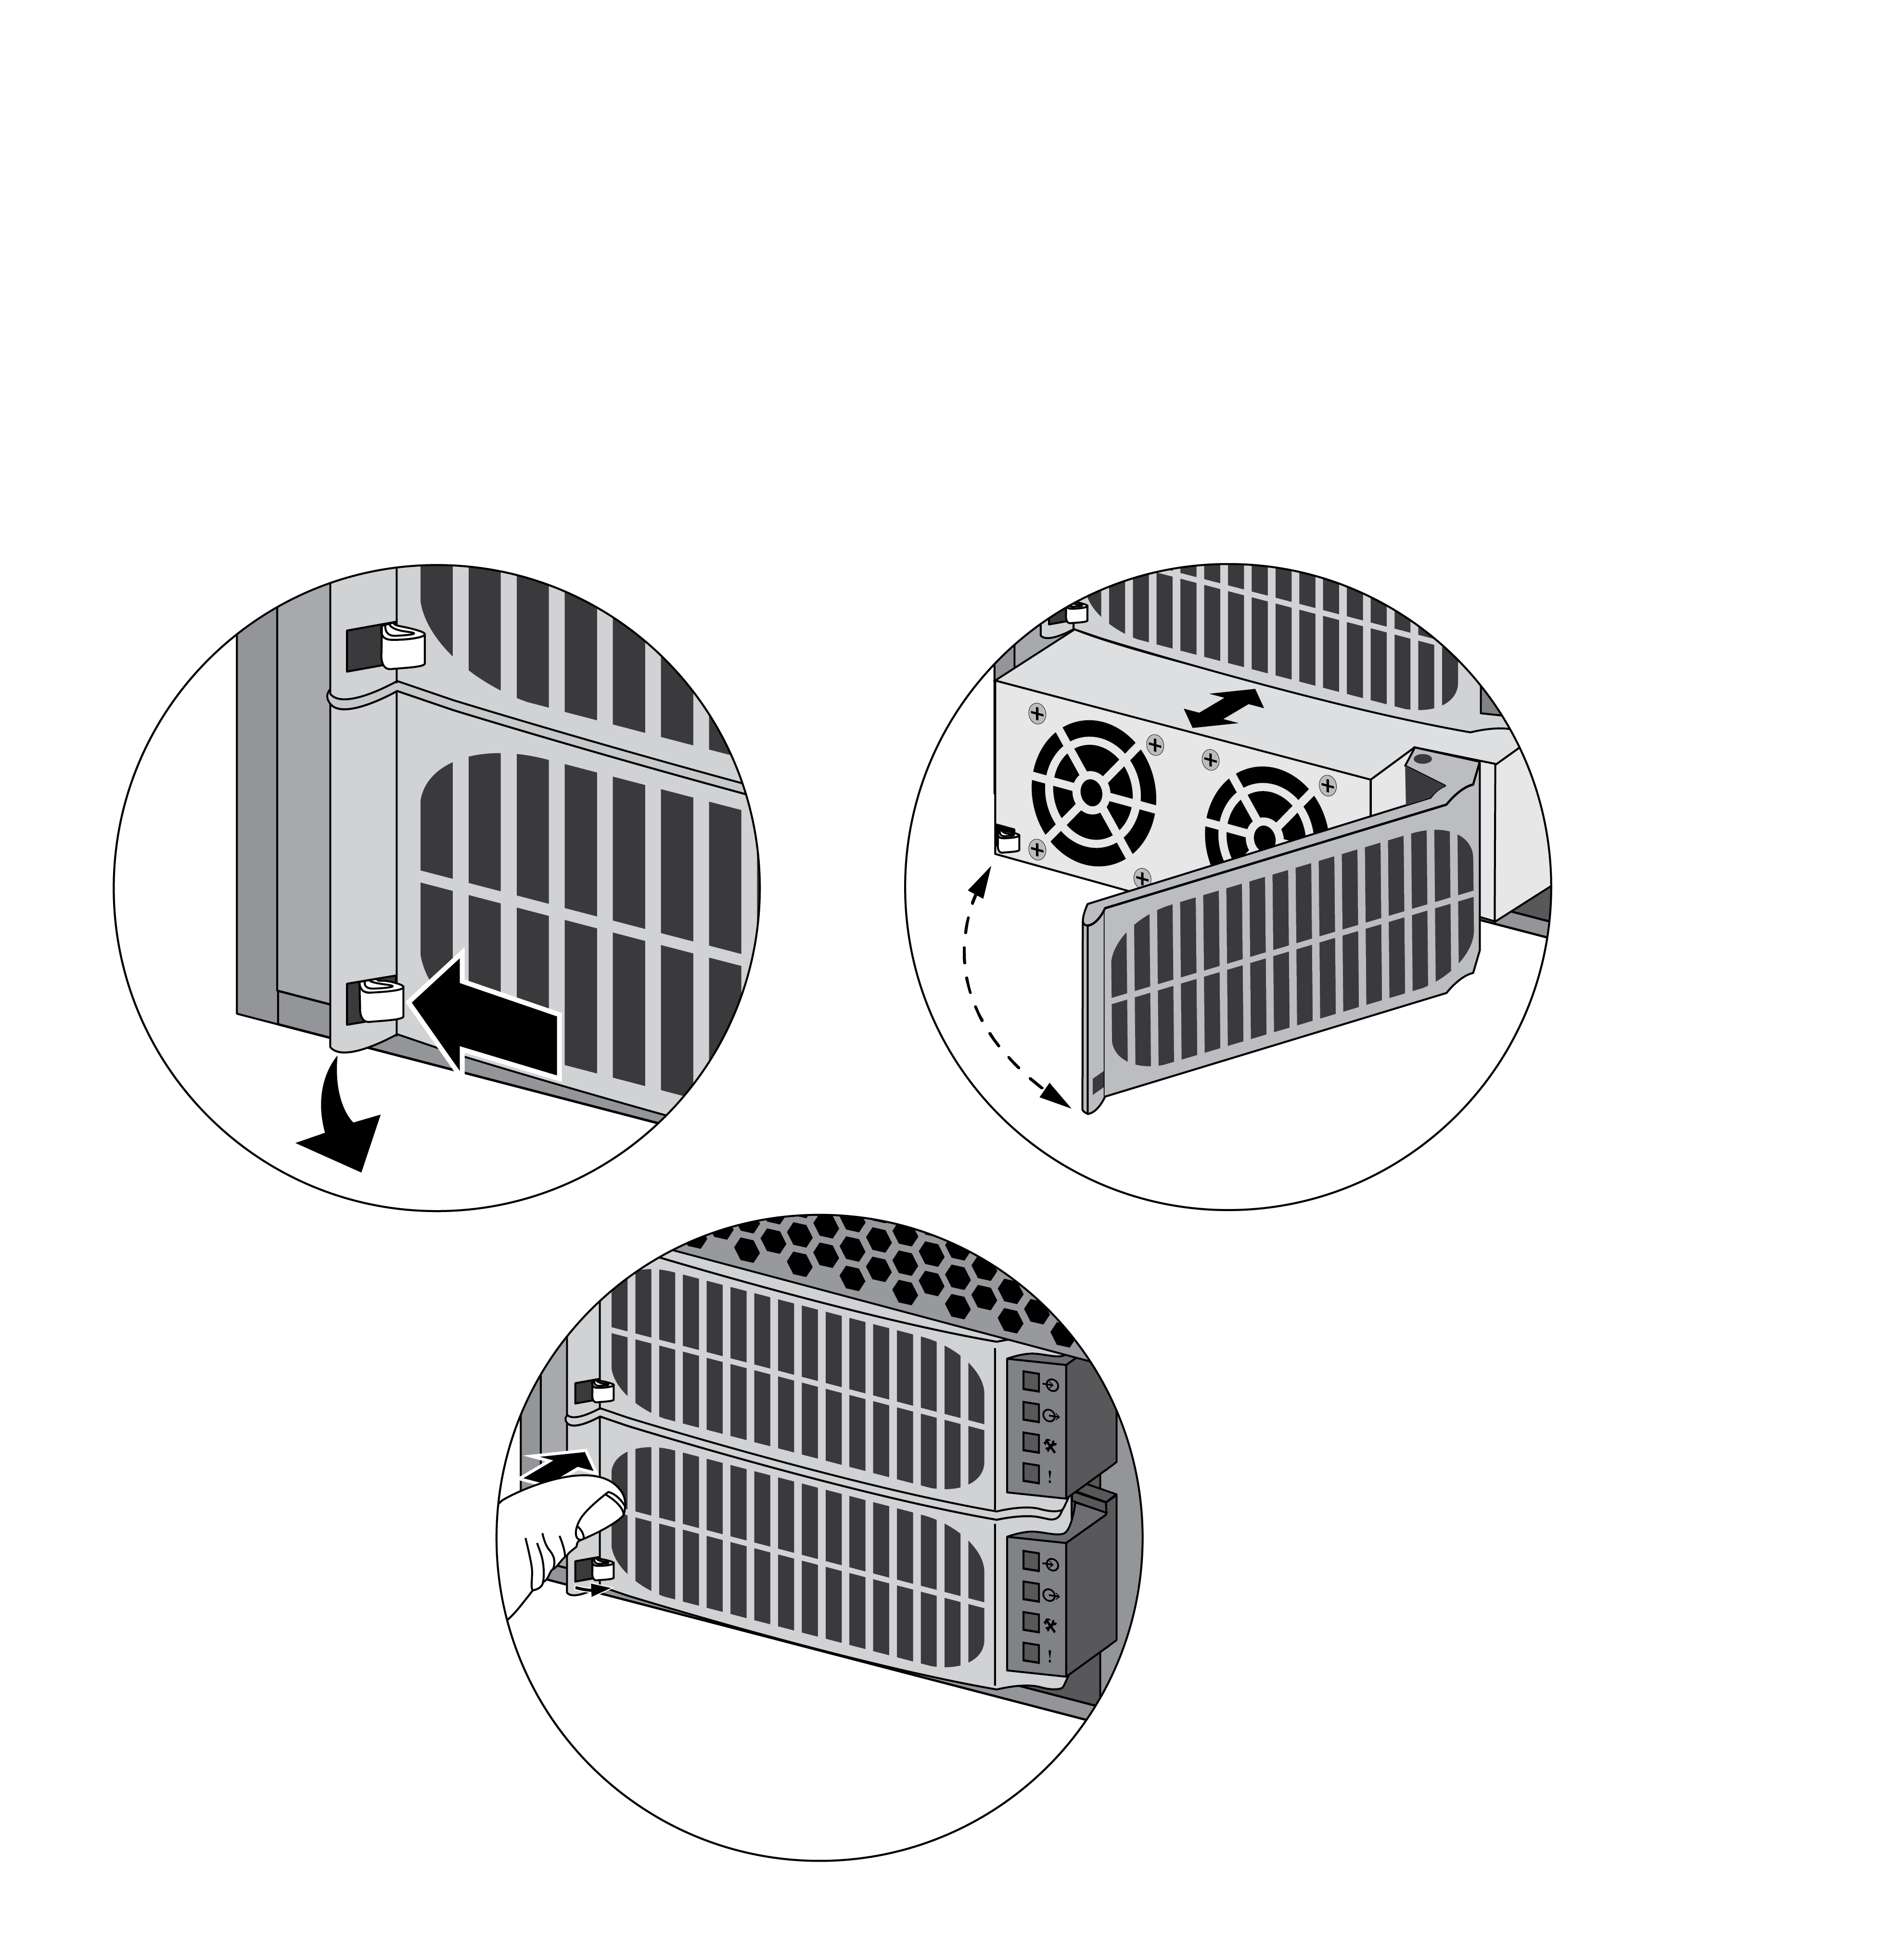
- Put the provided ESD wrist strap on your wrist ensuring that the metal contact is touching your skin. Then attach (snap) one end of the ground cable to the wrist strap and remove the alligator clip from the banana clip on the other end of the ESD grounding cable. Plug the banana clip end into one of the ESD ports located on the front of the chassis before handling ESD sensitive hardware. For details on the ESD port location, see PA-7080 Front Panel (AC).Locate the failed power supply by viewing the system logs or by viewing the LED on the front of the power supply. A red LED indicates a failed power supply. For details on the power supply LEDs, see Interpret the PA-7000 Series Firewall Power Supply LEDs.Turn off the DC power feed connected to the Power Entry Module (PEM) on the back of the chassis that corresponds to the failed power supply on the front of the chassis. Check that the power LED on the PEM turns off, to ensure that you powered off the correct circuit breaker.There are two rows of power supplies on the front of the chassis and two rows of Power Entry Modules (PEMs) on the back, which are numbered. For example, while facing the front of the chassis, the two far left power supplies are 1A and 1B, which connect to the power connections on the far right while facing the back of the chassis, numbered PEM A1 and PEM B1.Remove the failed power supply by pushing the small metal clip located on the bottom left of the power supply ejector door. Pull the door toward you from the left side to open, which will eject the power supply from the chassis. Pull the power supply toward you and remove it.
![]() Remove the replacement power supply from the packaging and open the front ejector door until it is fully open. Remember to push the metal clip located on the bottom left to release the door.Slide the new power supply into the empty power supply slot until it almost fully seated. Ensure that the notch near the hinged part of the ejector door inserts into the chassis, so when you close the door, it pulls the power supply inward and seats it into place.Plug the power cable into the corresponding AC power module on the back of the chassis and turn on the power switch.
Remove the replacement power supply from the packaging and open the front ejector door until it is fully open. Remember to push the metal clip located on the bottom left to release the door.Slide the new power supply into the empty power supply slot until it almost fully seated. Ensure that the notch near the hinged part of the ejector door inserts into the chassis, so when you close the door, it pulls the power supply inward and seats it into place.Plug the power cable into the corresponding AC power module on the back of the chassis and turn on the power switch.