SaaS Security
Begin Scanning a Microsoft Azure Storage App
Table of Contents
Begin Scanning a Microsoft Azure Storage App
Authorize Data Security to connect to Microsoft Azure
Storage to scan all content shared within the app.
| Where Can I Use This? | What Do I Need? |
|---|---|
|
Or any of the following licenses that include the Data Security license:
|
In addition to the Data Security license, you must have an Evident
Storage license for Data Security to scan for Microsoft Azure
Storage assets.
To connect a Microsoft Azure Storage app to Data Security and begin scanning assets, you need
to:
- Supported Content
- Create Your AAD Application
- Register Your AAD Application
- Retrieve Required Information from AAD Application
- Enable Iterative Scanning Service
- Register Your AAD Application
- Identify Risks
- Fix Microsoft Azure Storage App Onboarding Issues
Support for automated remediation capabilities varies by SaaS application.
Supported Content
|
Support For
|
Details
|
|---|---|
|
Scan Content
| Storage Accounts, Containers, Files |
|
Backward Scan
|
Yes
|
|
Forward Scan
|
Yes
|
|
Rescan
|
No
|
|
Selective Scan
|
Yes
|
|
Exposure
|
Internal, External, Public
|
|
Remediation Actions
|
|
|
Post-Remediation Actions (Actions after Admin
Quarantine):
You can delete, restore, or download a quarantined file
after performing a remediation action (for example
quarantine or incident generation).
|
|
|
Notifications
|
|
|
User Activities
|
|
|
Snippet Support
|
Yes
|
|
Known License/Version restrictions
|
Supported Versions
|
|
Caveats/Notes
|
None
|
Create Your AAD Application
To discover containers, Data Security requires specific permissions. Permissions are tied to
roles, and these roles are bound to the Azure Storage app subscription and an
AAD application that you create in advance of adding the Microsoft Azure Storage
app on Data Security.
Item | Description |
|---|---|
Ensure that you have the required permissions
to create an application in Azure Active Directory (AAD). | Check Azure Active Directory Permissions in
the Microsoft documentation. |
Create an AAD Application. In a text editor (such as Notepad), copy the App-ID and name of the application to use later in
this procedure. | Create an Azure Active Directory Application in
the Microsoft documentation. |
Get the Tenant ID,
which is the ID of the AAD directory in which you created the application. In
a text editor (such as Notepad), copy the Directory (tenant) ID
to use later in this procedure. The Directory ID value
is the tenant ID required to install Azure to Data Security. | Get Tenant ID in
the Microsoft documentation. |
Assign Reader Role to
the AAD Application on the subscriptions to scan. Assign Storage
Account Key Operator Service Role to the AAD Application
on the subscriptions or storage accounts to scan. | Assign Application to Role in the Microsoft documentation. |
Enable roles required by the AAD Application. 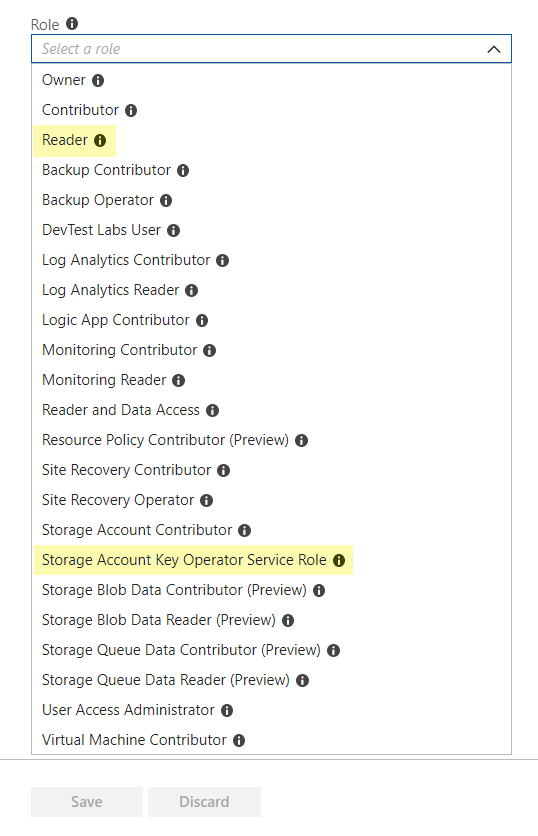
| From your subscription select . Enable the following
roles:
|
Register Your AAD Application
Before you can add the Microsoft
Azure Storage app, you must register the application to provide
secure sign-in and authorization for Data Security.
- Register your application with an Azure Active Directory tenant.
- Log in to Microsoft Azure.Select .Do one of the following:
- Add a New application registration: Enter the application Name and Supported account type and, optionally, URI to Register a new application.
- Select an application that has already been registered by clicking on the app from the list.
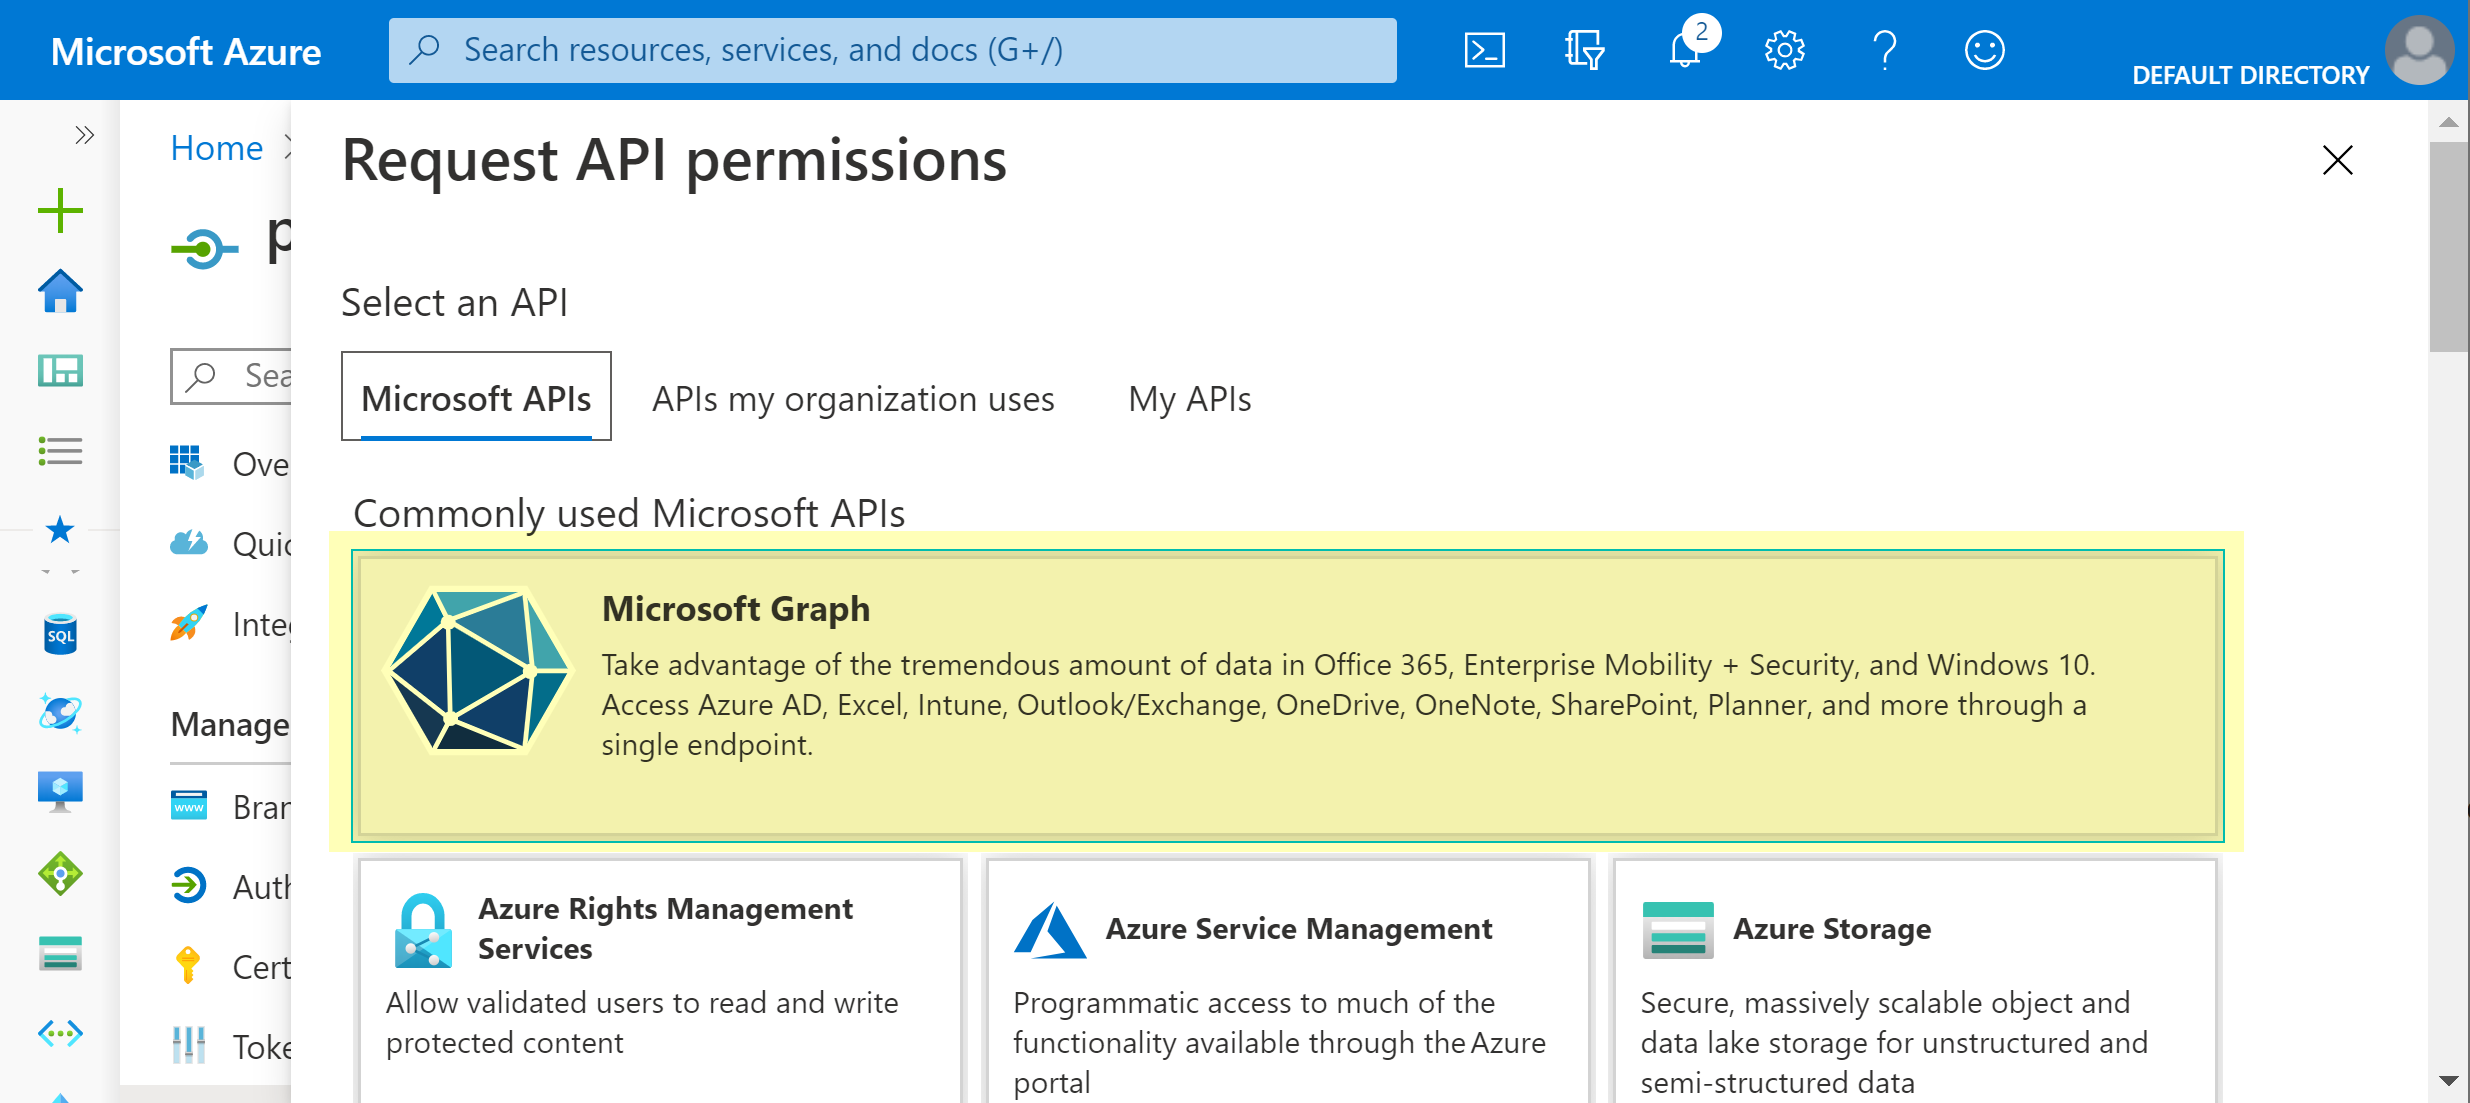
![]() Enable API permissions for Microsoft Graph.
Enable API permissions for Microsoft Graph.- Click on the Display name for the registered app.Select .
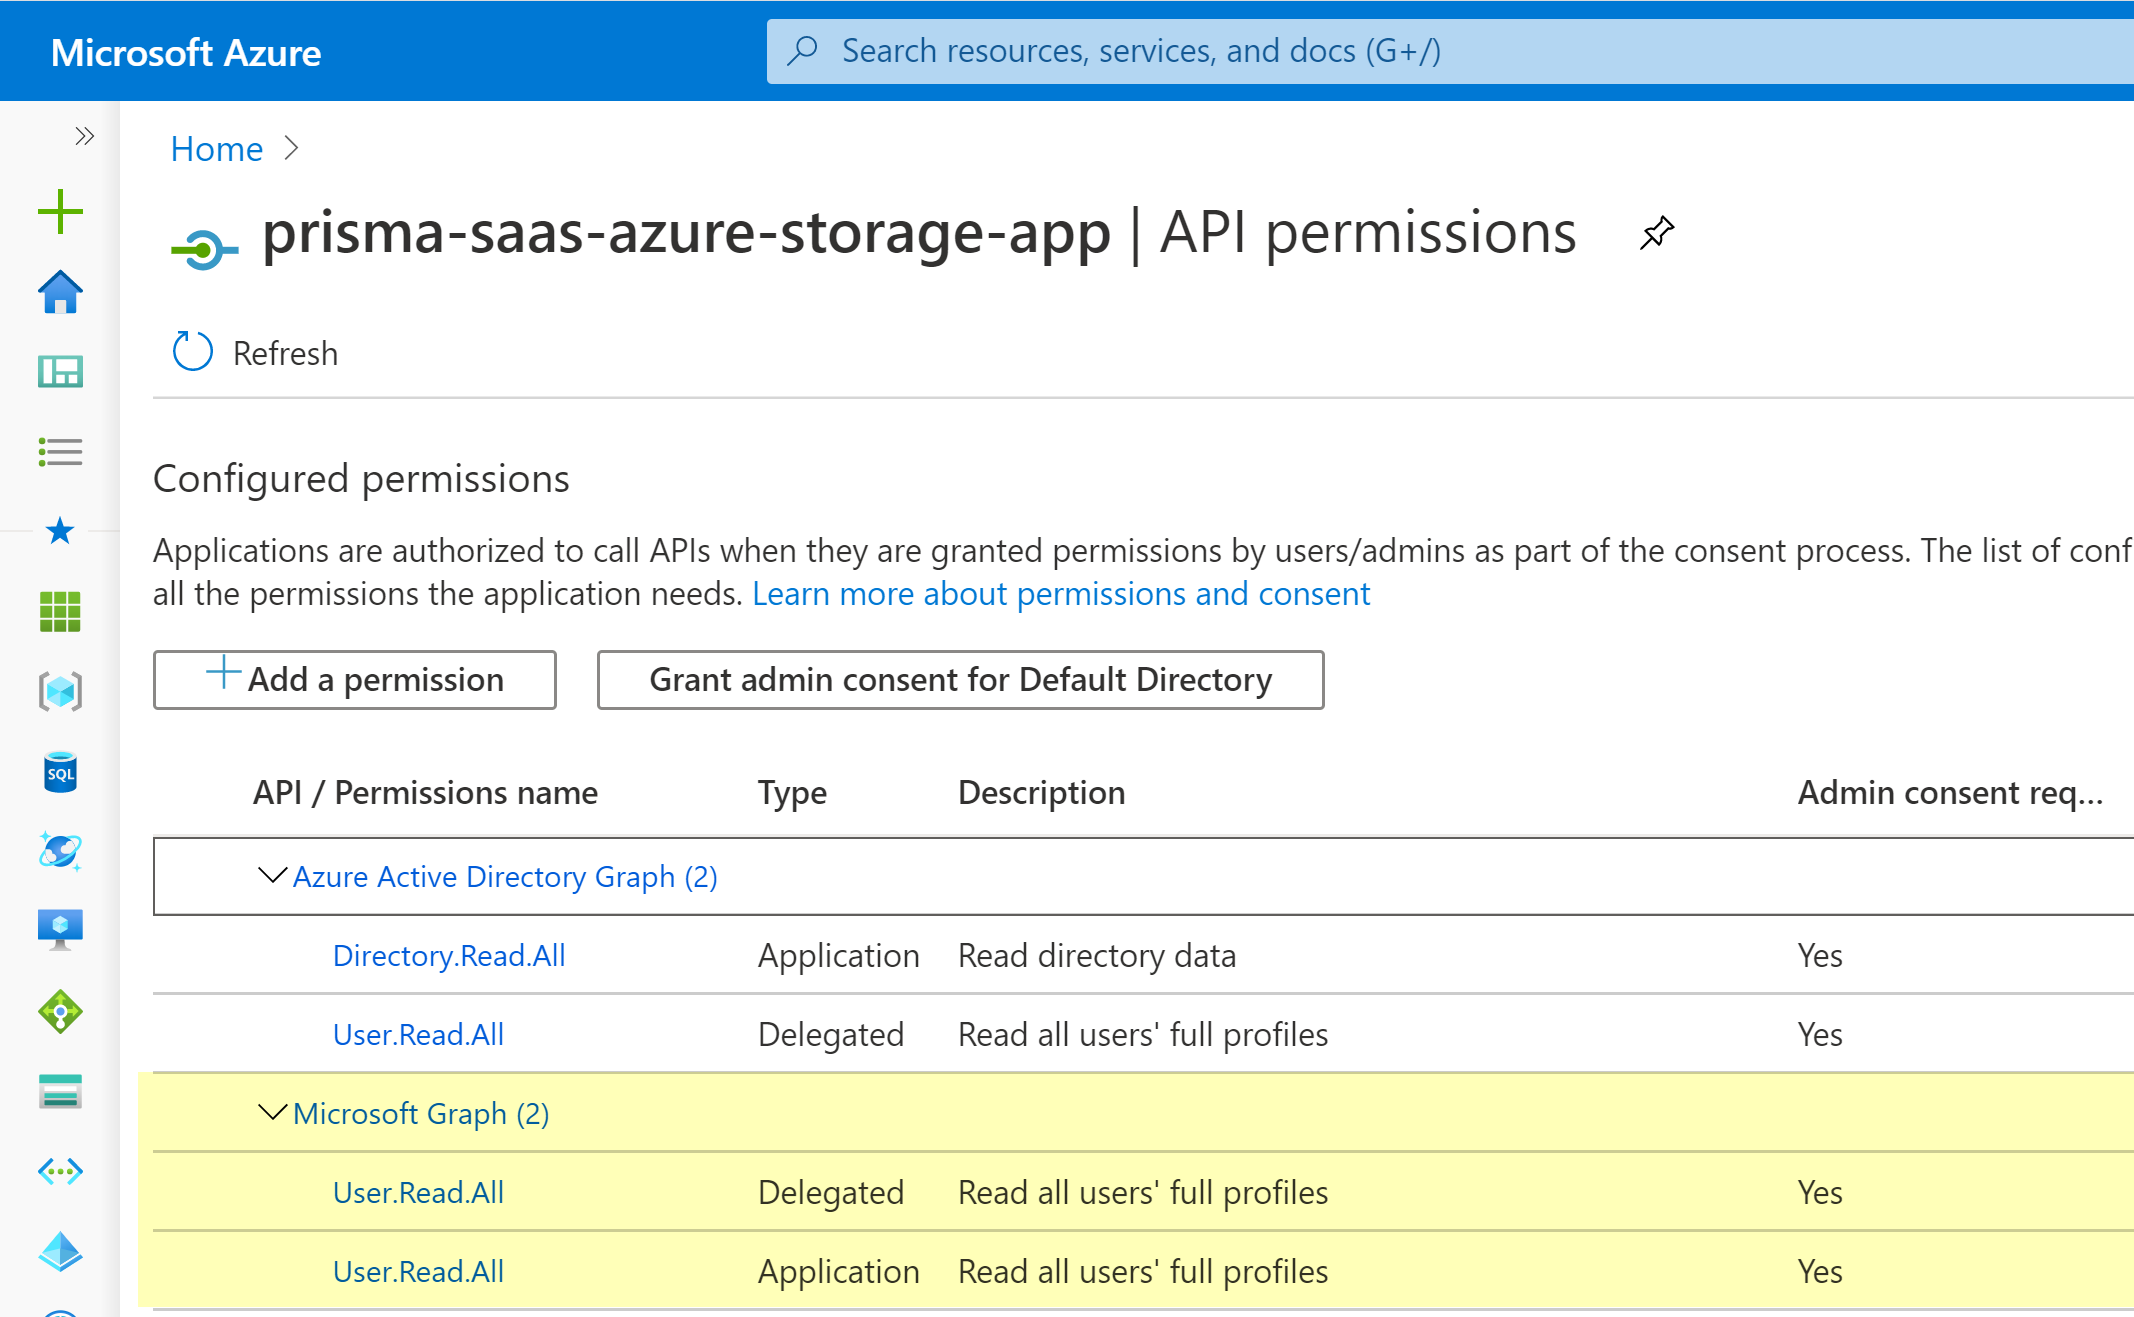
![]() Add in Application Permissions and Delegated Permissions.
Add in Application Permissions and Delegated Permissions.![]() Enable API permissions for Azure Active Directory Graph.Microsoft Azure Active Directory Graph API has been retired. To enable the Directory.Read.All and User.Read.All permissions for Azure Active Directory Graph, see https://learn.microsoft.com/en-gb/graph/migrate-azure-ad-graph-configure-permissions.Grant application and delegated permissions.
Enable API permissions for Azure Active Directory Graph.Microsoft Azure Active Directory Graph API has been retired. To enable the Directory.Read.All and User.Read.All permissions for Azure Active Directory Graph, see https://learn.microsoft.com/en-gb/graph/migrate-azure-ad-graph-configure-permissions.Grant application and delegated permissions.- Click on the Display name for the registered app.Select .A confirmation window displays to grand permissions for all accounts in the current directory. Select Yes to grant the permissions for the accounts.
![]()
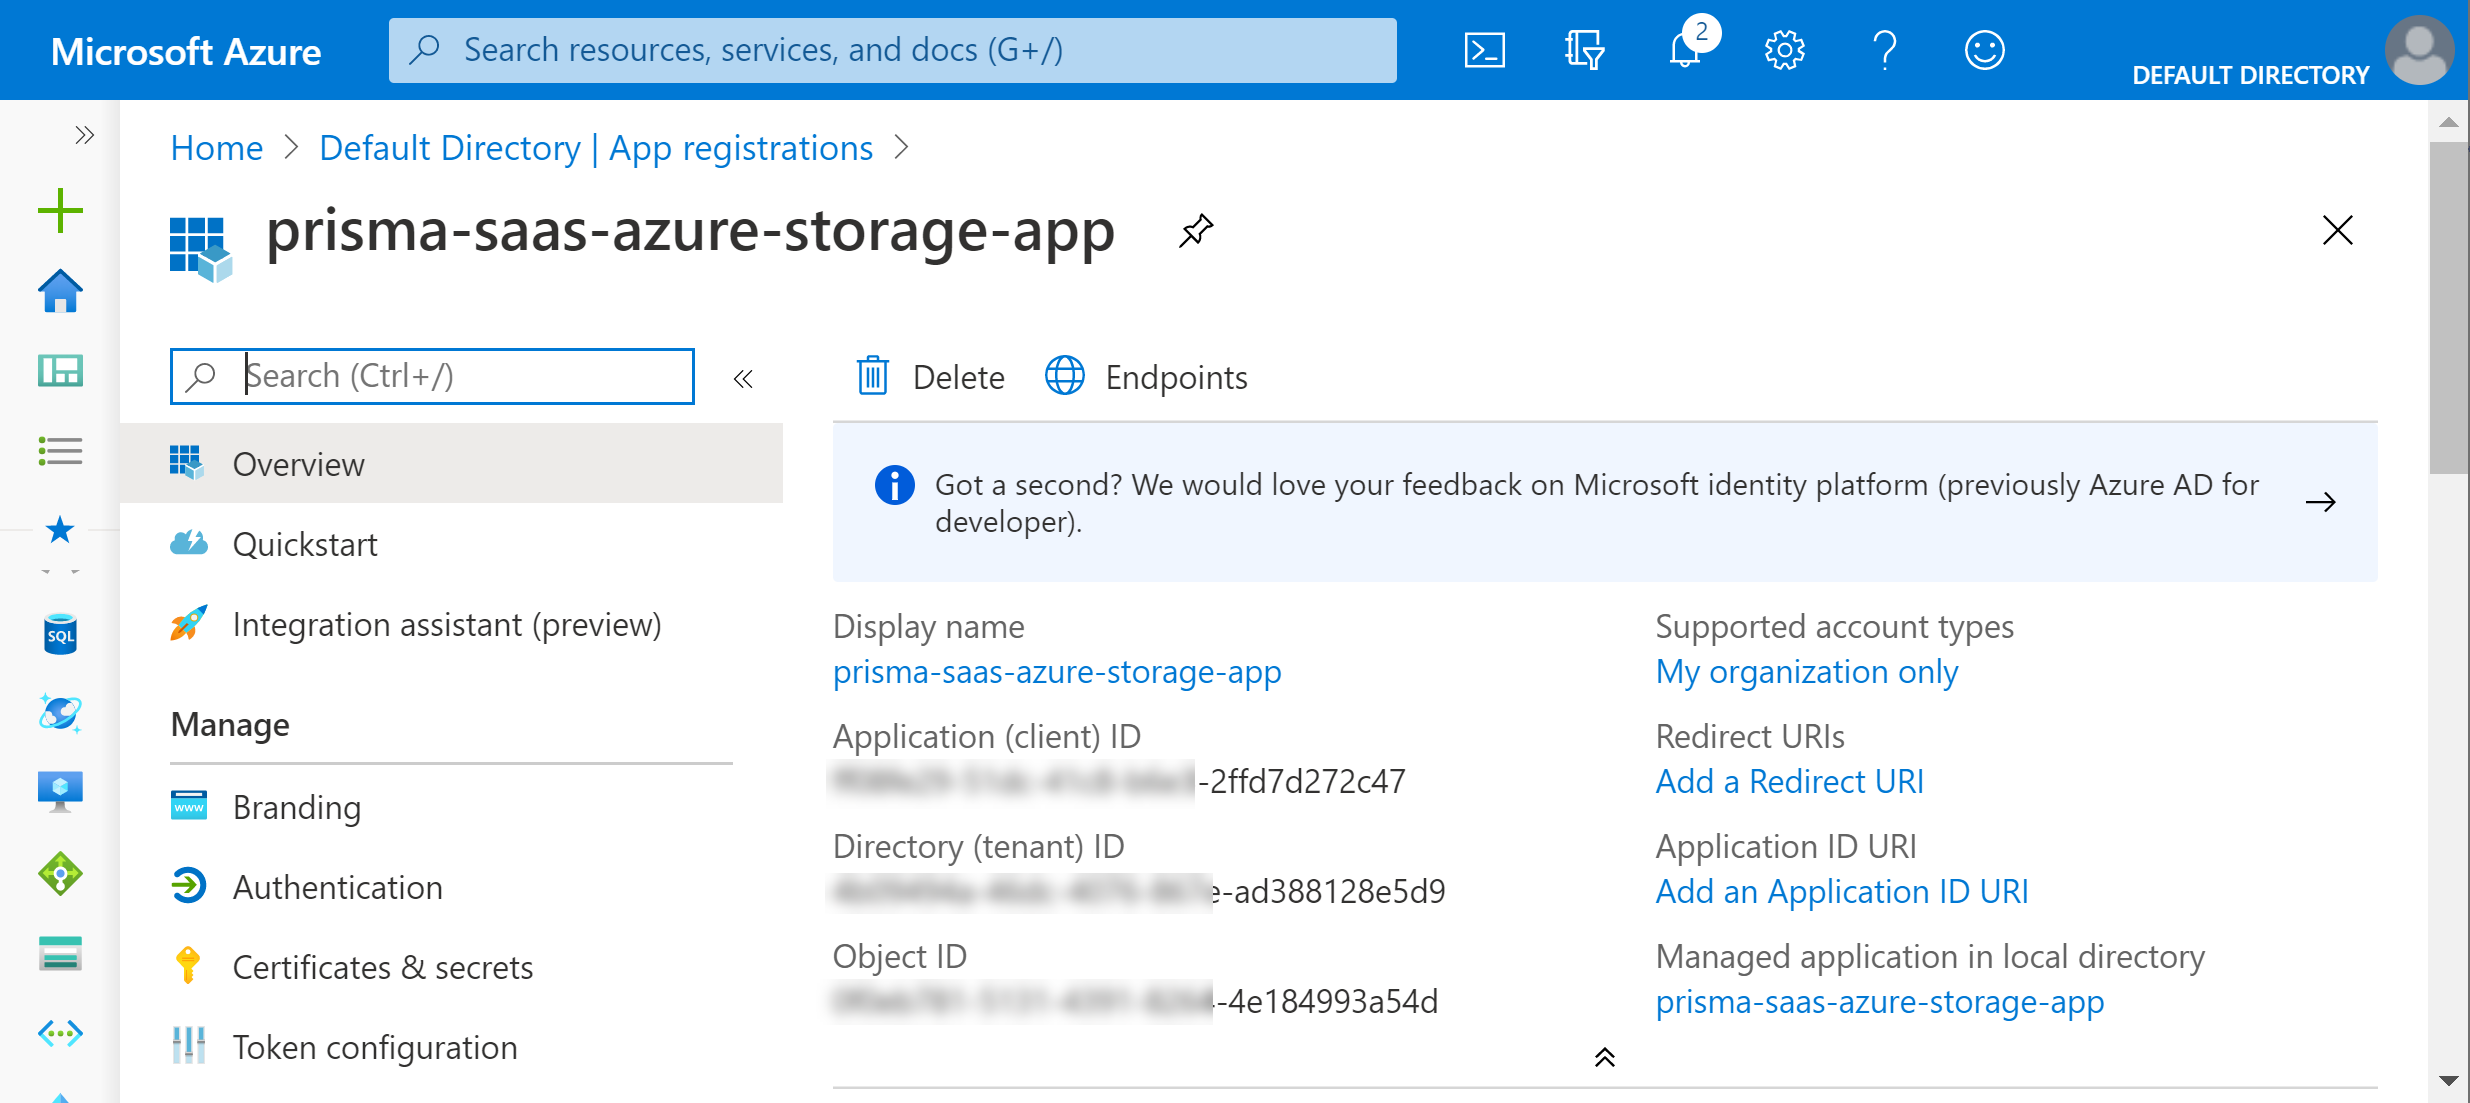
Retrieve Required Information from AAD Application
Now that you’ve registered your AAD application, you must retrieve the following information to complete the setup of the Microsoft Azure Storage app on Data Security. Additionally, to generate the Application Key, you need to create the key as outlined in the final step below.- Application (client) ID
- Directory (tenant) ID
- Application Key
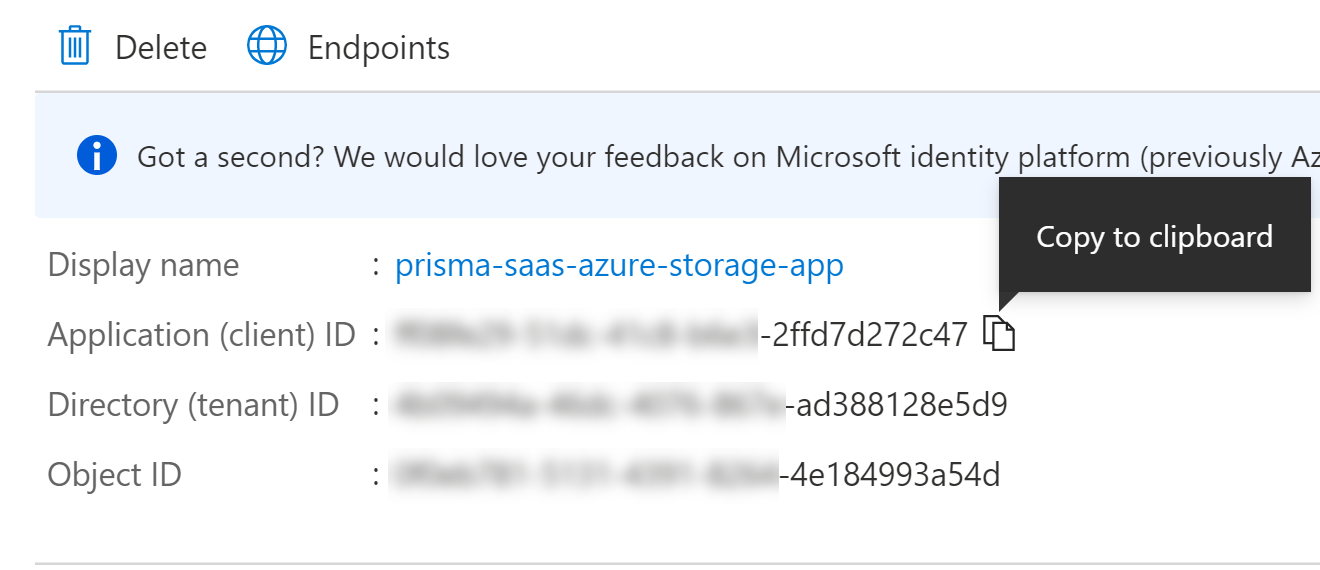
- Log in to Microsoft Azure.(App-ID) Select the registered app to view and copy the Application ID to enter during app installation.
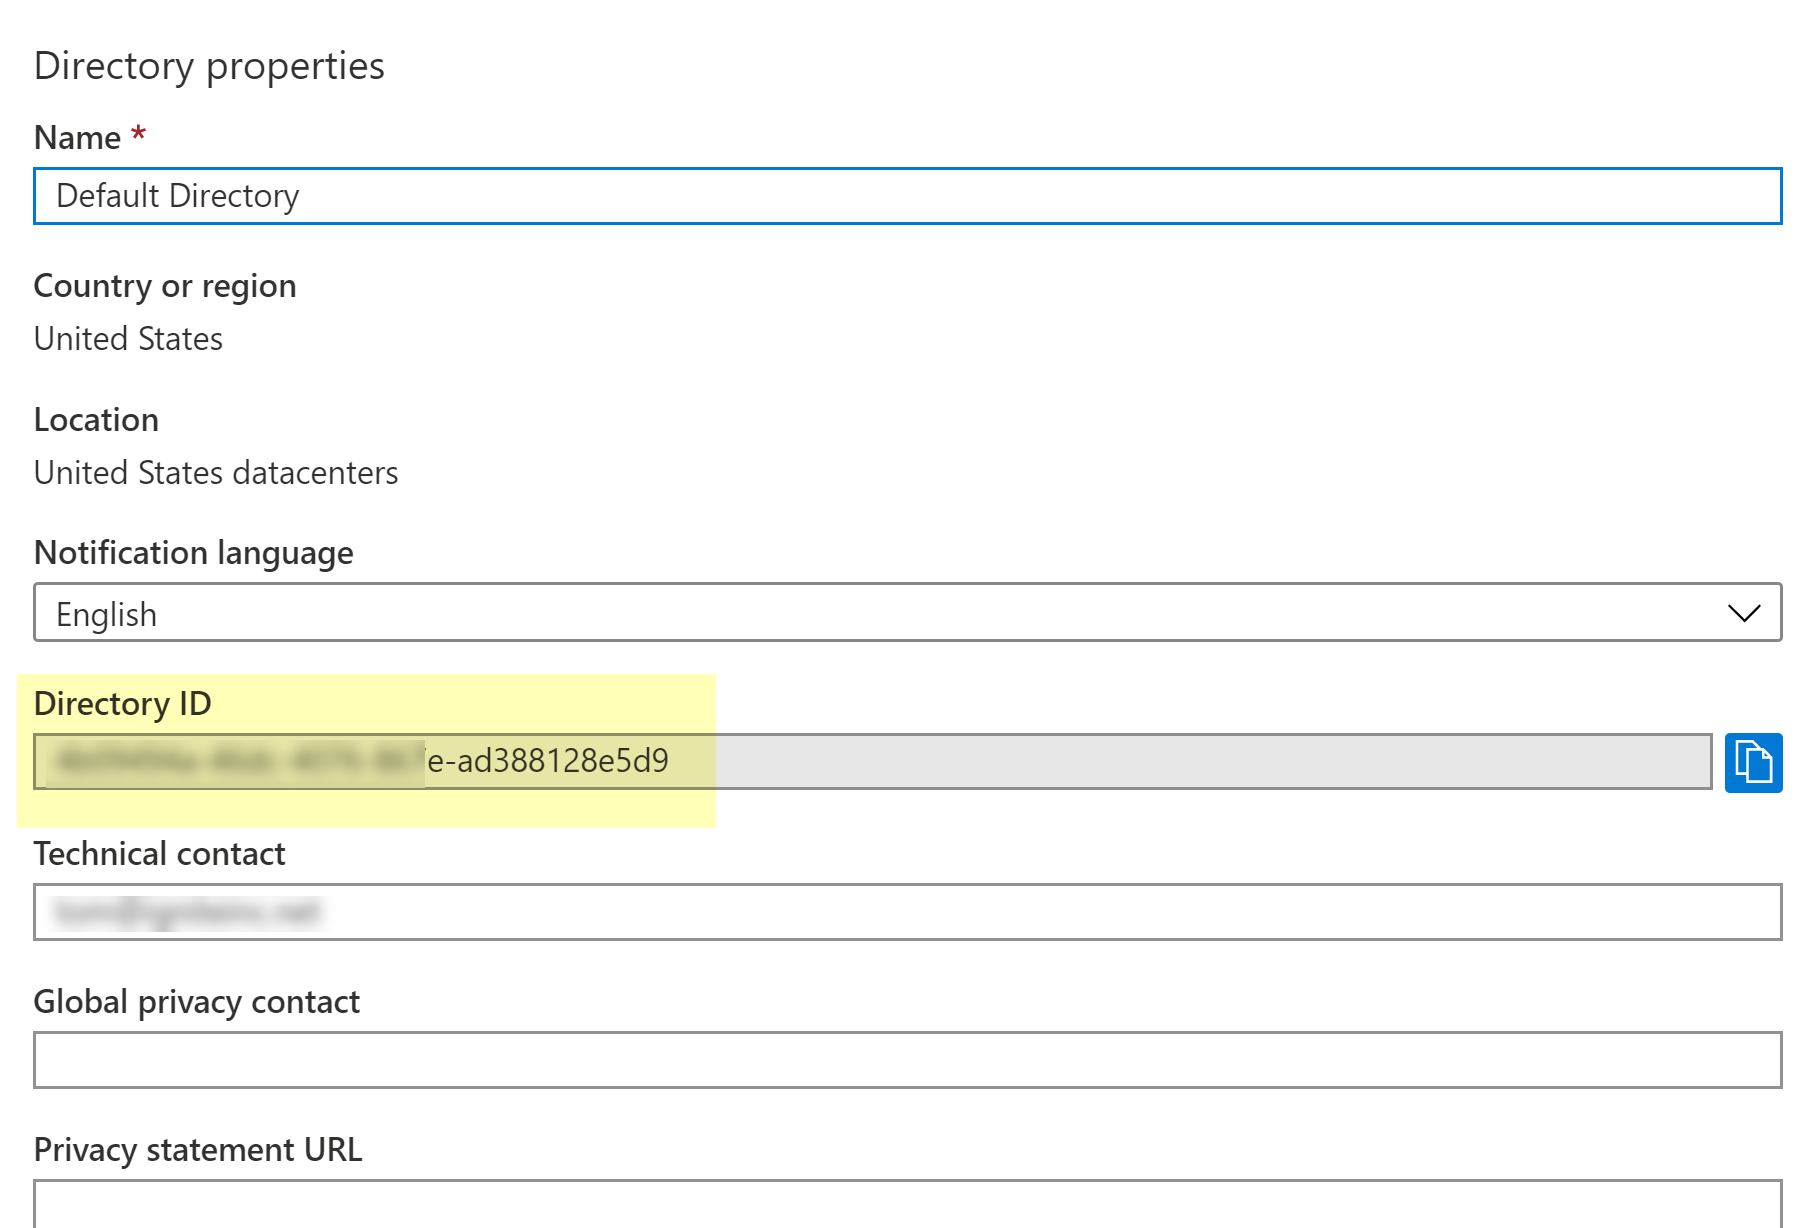
![]() (Directory ID) Select . Copy the Directory ID to enter during app installation.
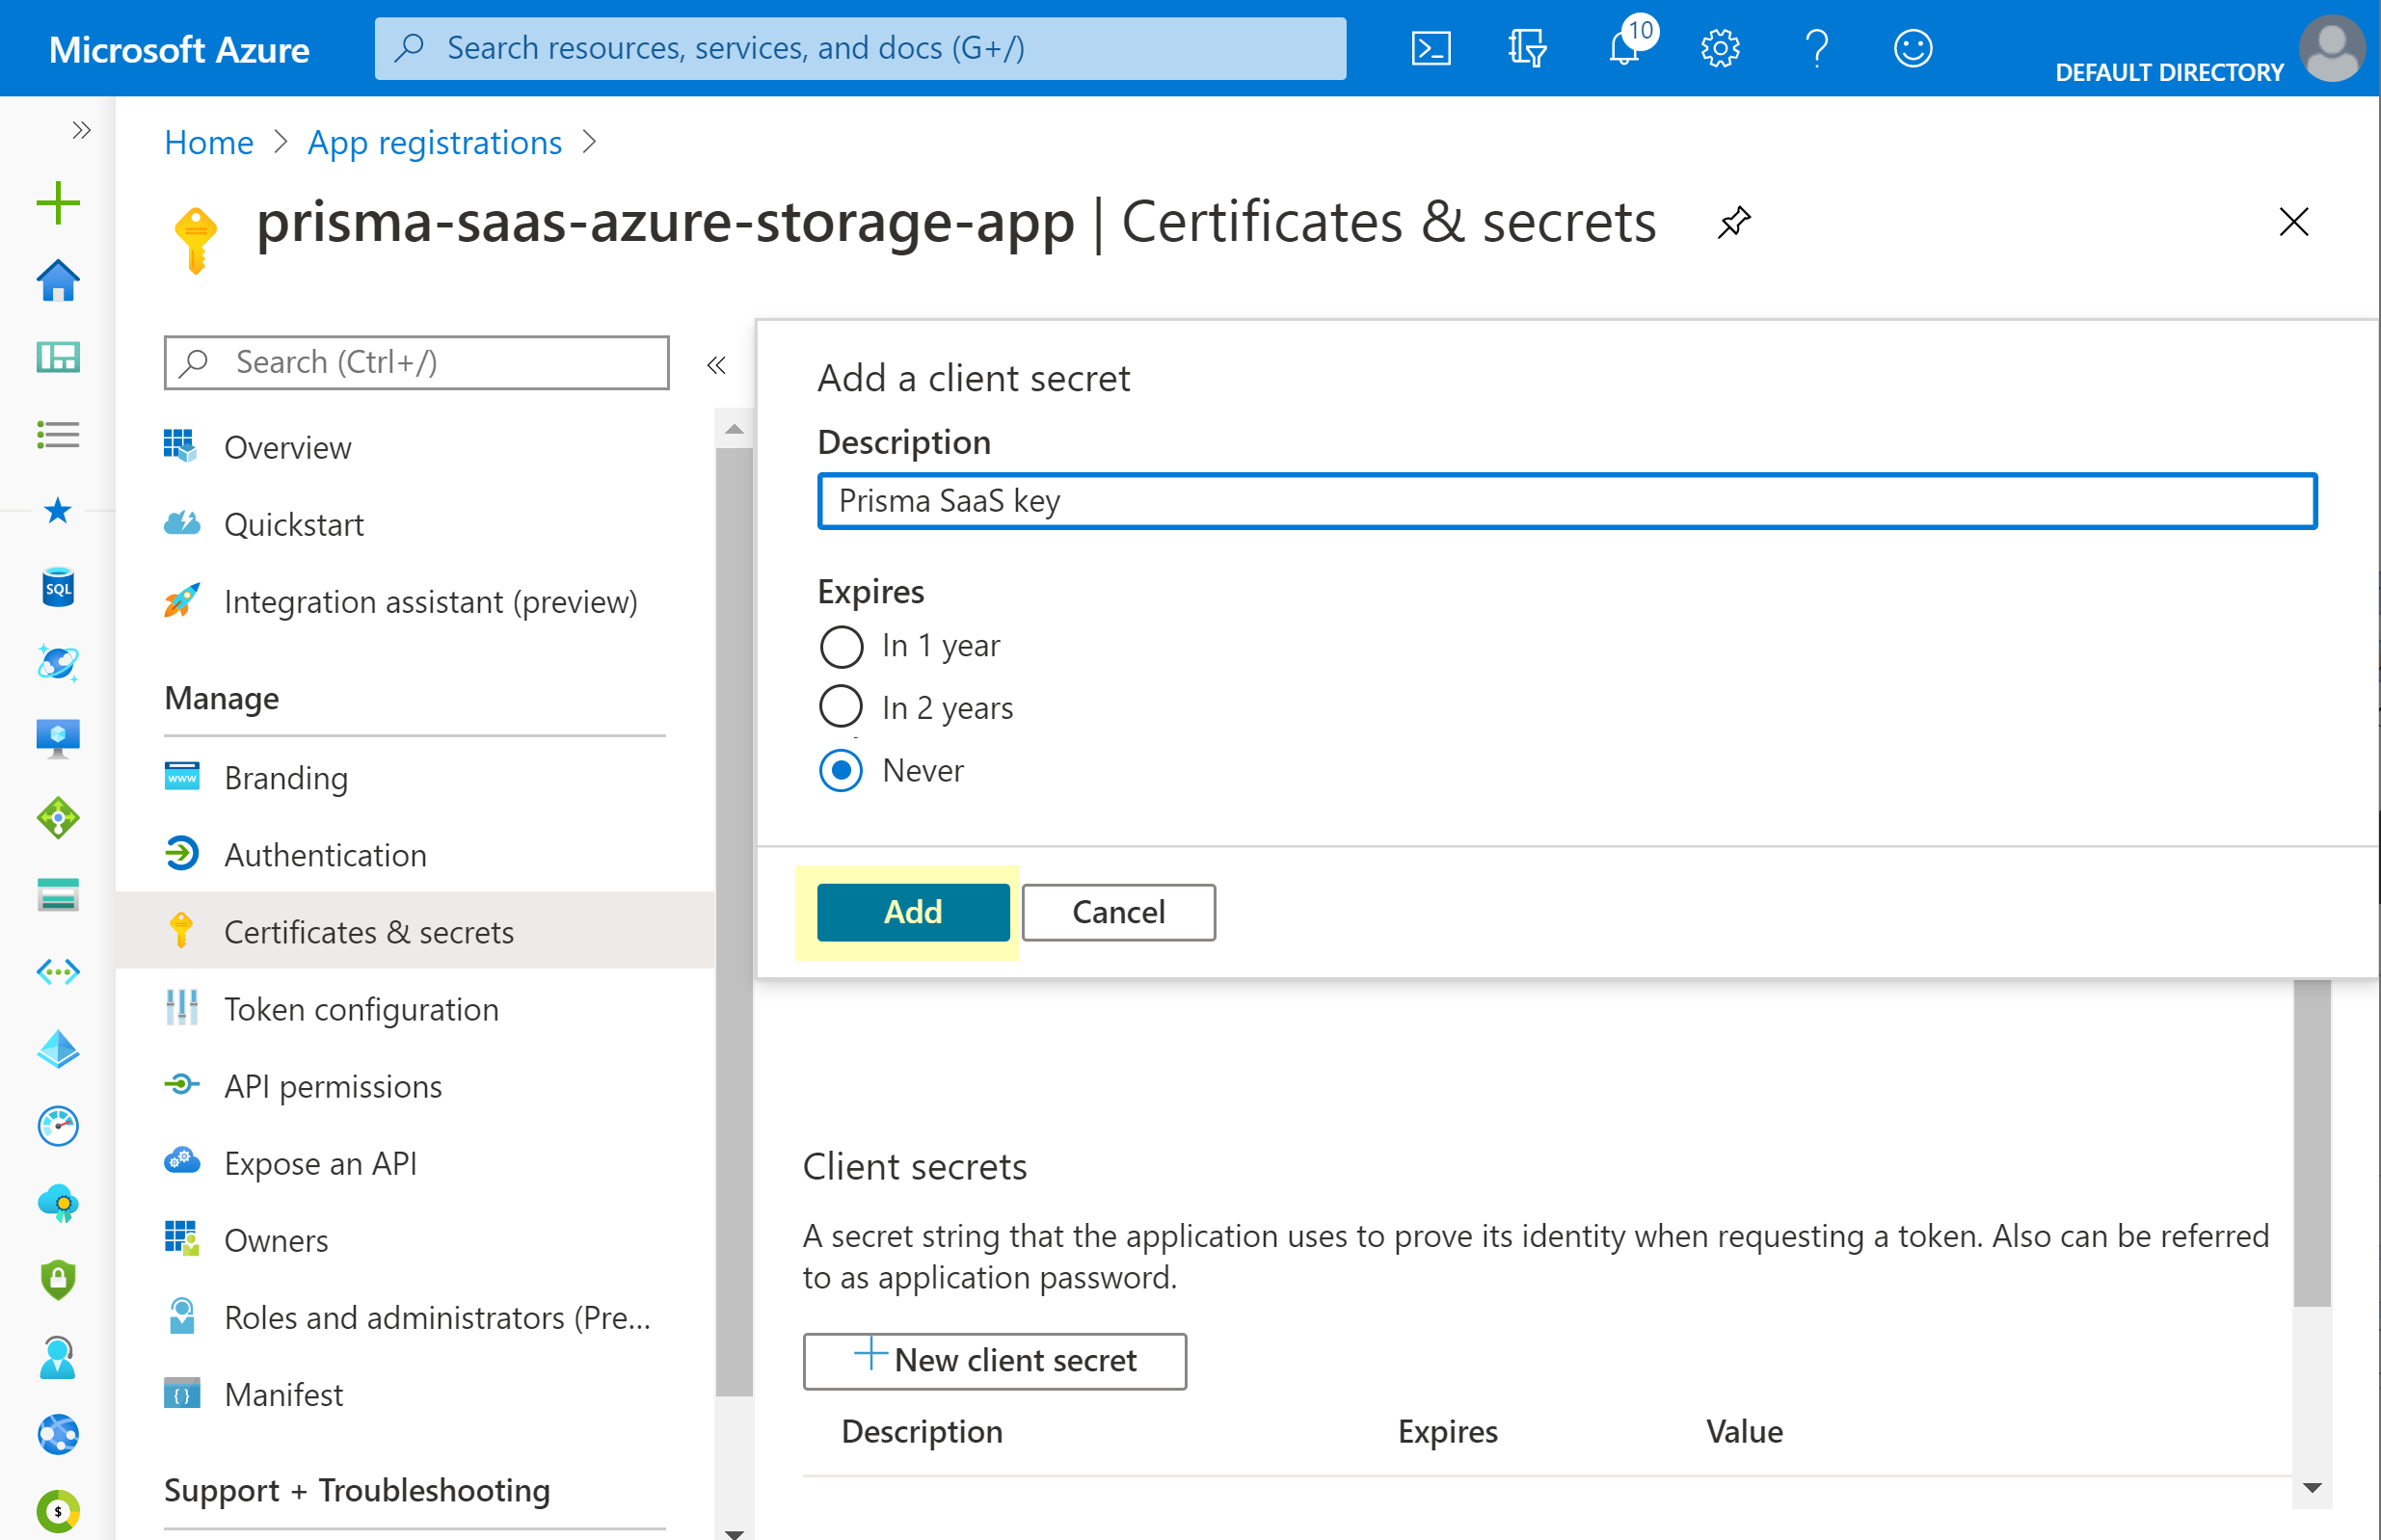
(Directory ID) Select . Copy the Directory ID to enter during app installation.![]() (Application Key) Add and copy the key:
(Application Key) Add and copy the key:- From the registered application, select , provide a description and set duration to Never, then Add the key.
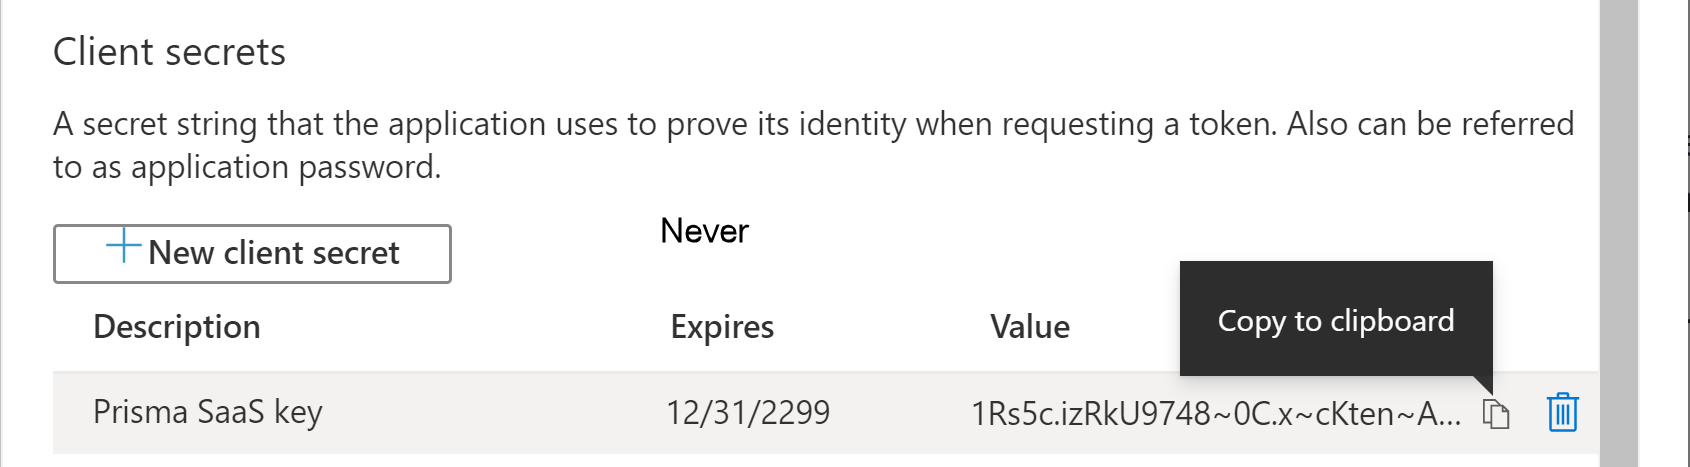
![]() The key value is the Application Key to enter during app installation. After saving the key, the value of the key is displayed.Copy this value because you're not able to retrieve the key later.
The key value is the Application Key to enter during app installation. After saving the key, the value of the key is displayed.Copy this value because you're not able to retrieve the key later.![]()
Enable Iterative Scanning Service
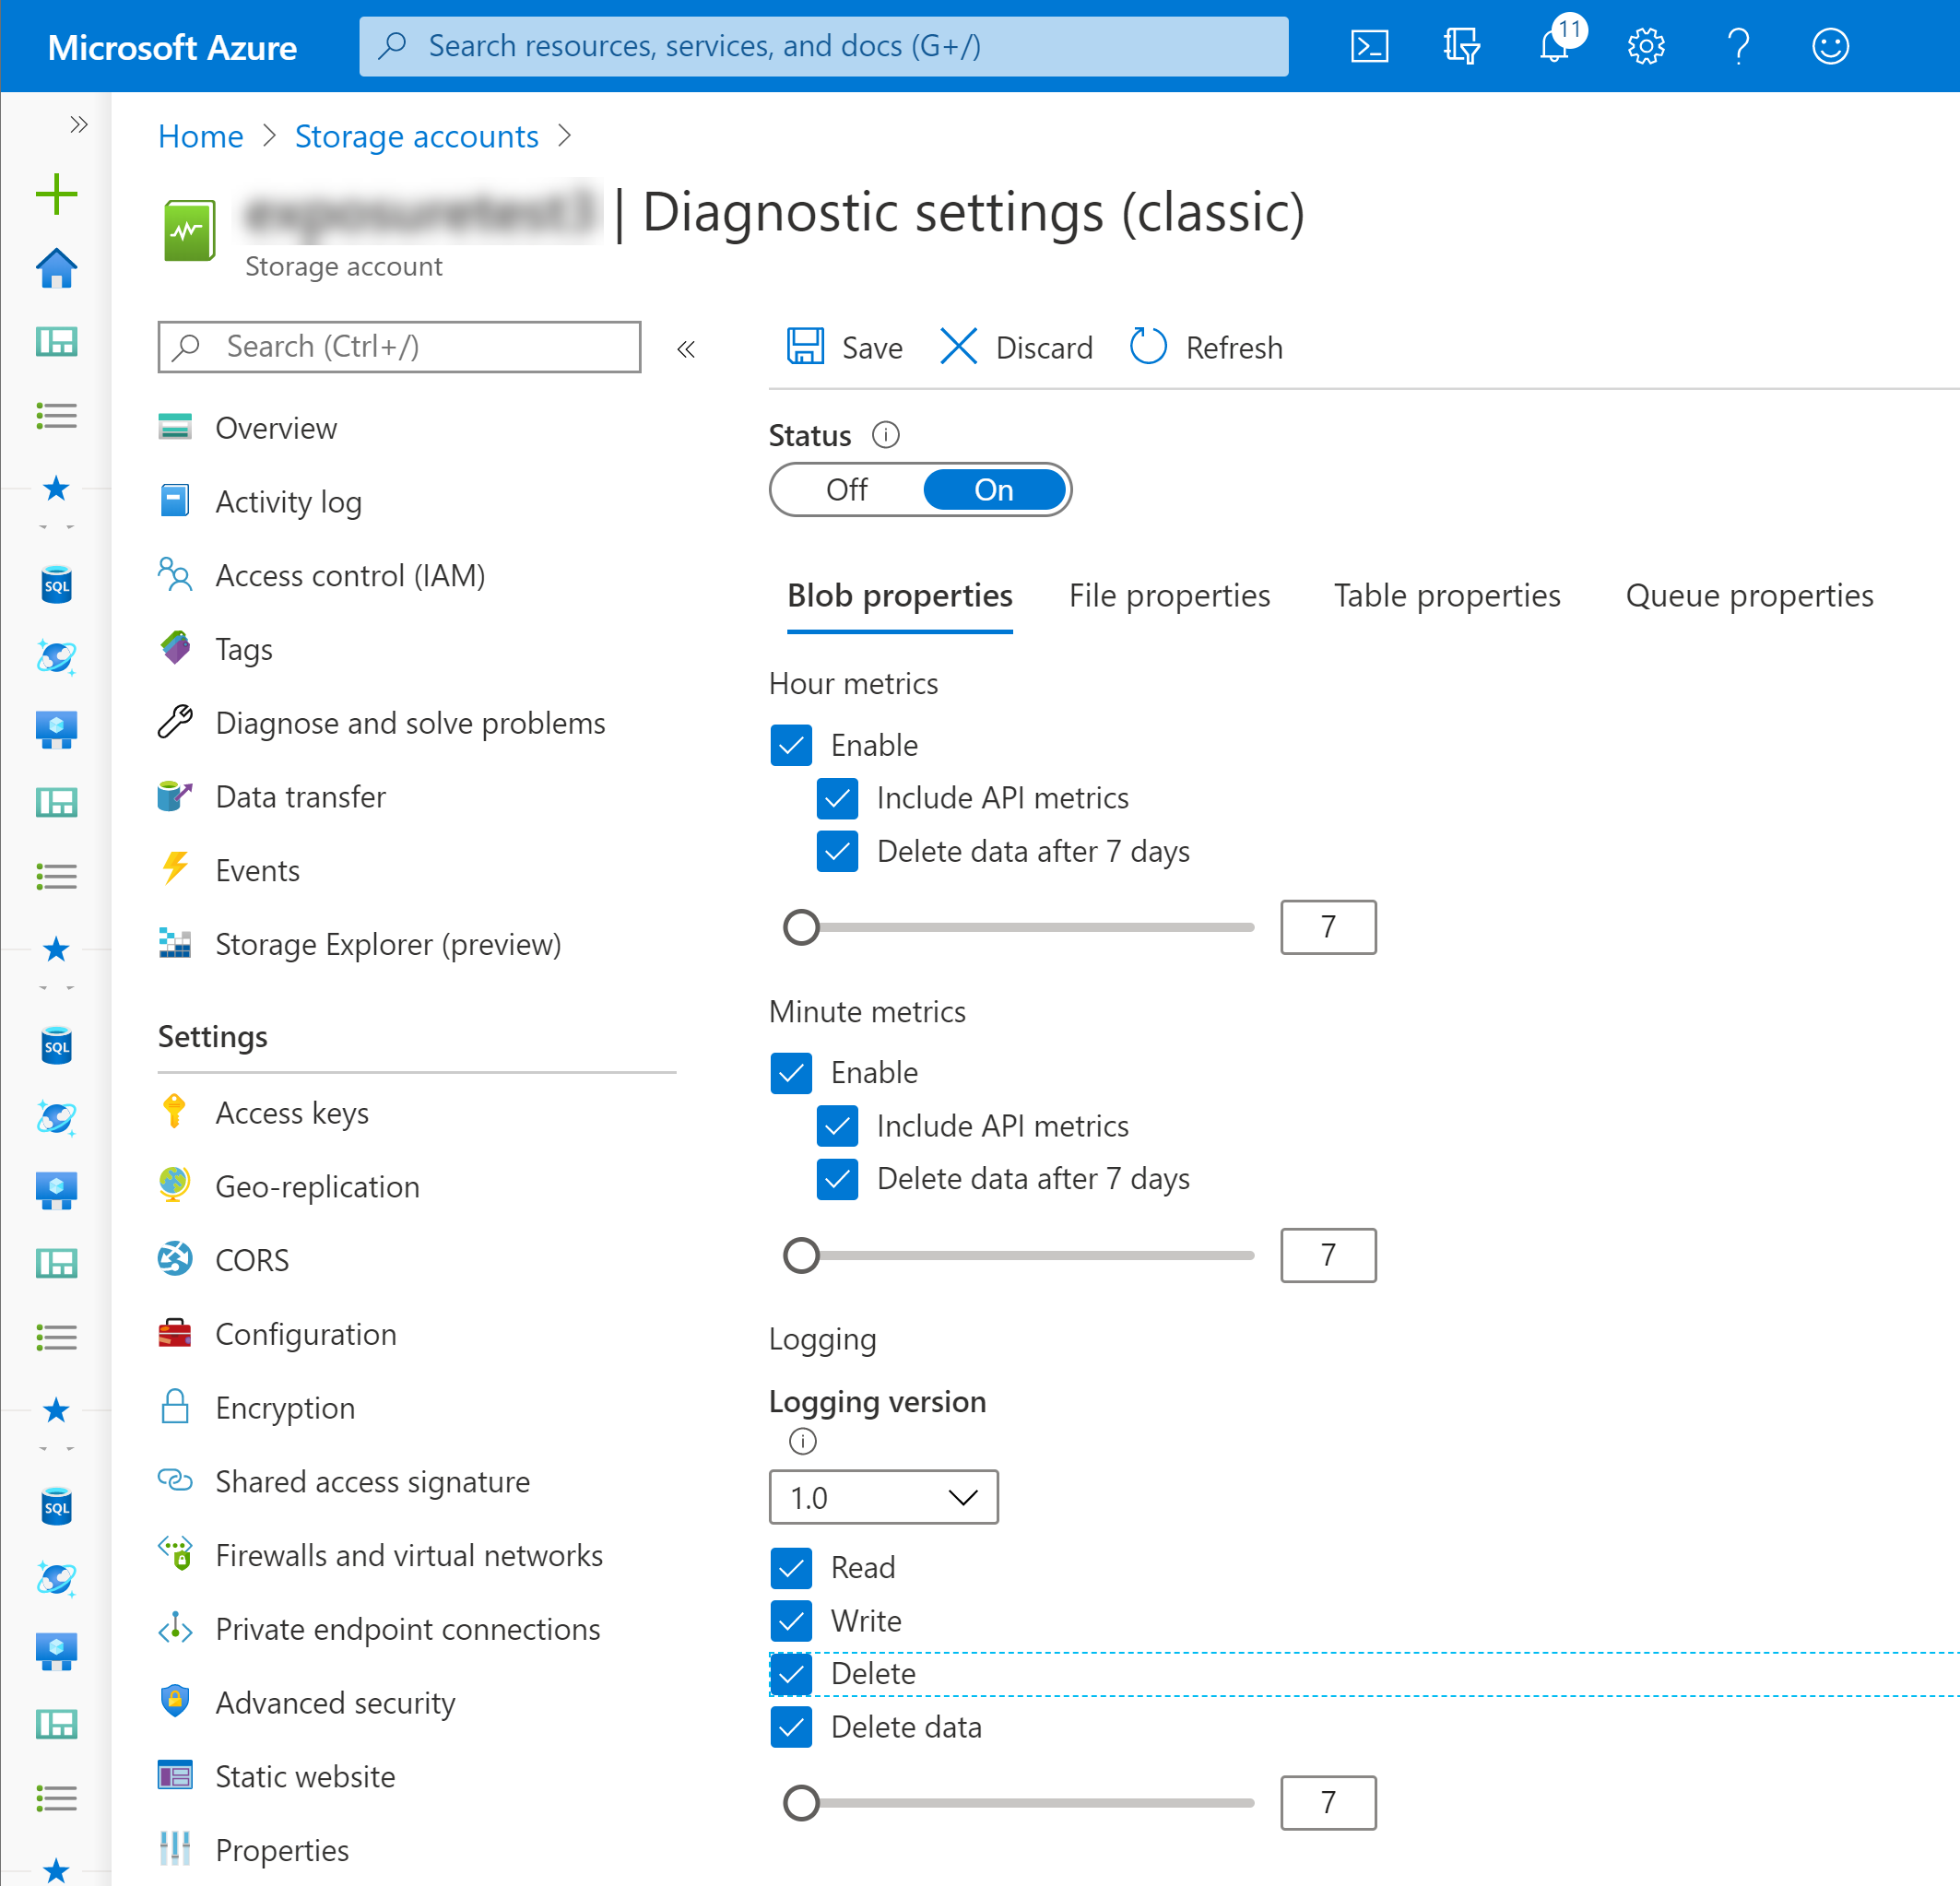
Data Security can continuously scan for Azure Storage subscriptions and accounts to identify and report any new accounts, activities, and events with the iterative scanning service. The service also scans and identifies users assigned to subscriptions, resources, groups, containers, and storage accounts.To enable iterative scan on Data Security, you need to configure the diagnostic service settings in Azure for each storage account.- Select the storage account to configure the diagnostic service settings.Select . If not already, enable the settings by turning the status On.Select the type of Metrics and Logging data for each service you wish to monitor, and the retention policy for the data by moving the retention in days slider from 1 to 365.Save your monitoring configuration.
![]()
Add the Microsoft Azure Storage App
To begin scanning a Microsoft Azure Storage app:- (Recommended) Add your Microsoft Azure Storage domain as an internal domain.For more information, see Define Your Internal Domains section.Log in to Strata Cloud Manager.Select .
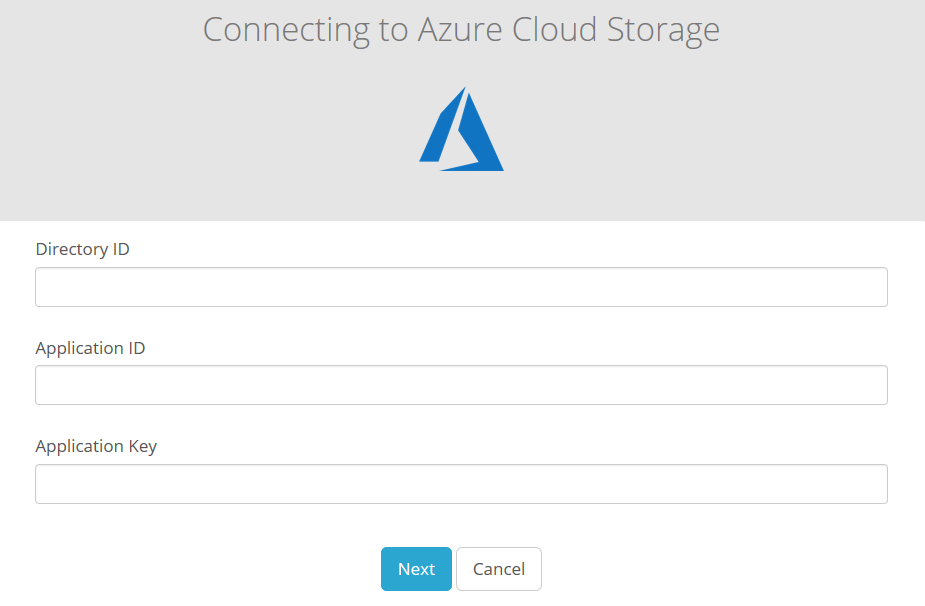
![]() Configure your Microsoft Azure Storage settings.
Configure your Microsoft Azure Storage settings.- Click Connect to Account.Enter the Directory ID, Application ID, and Application Key you recorded in the previous steps.Click Next.
![]() Select the Azure subscriptions to monitor.
Select the Azure subscriptions to monitor.- Enable a Subscription to scan from the discovered list, or you can select Automatically scan all new subscriptions.Click Next.
![]() Review initial scan discoveries and complete the Azure Storage app installation. View Details on the discovered containers to review the discoveries and determine if you want to proceed with scanning:
Review initial scan discoveries and complete the Azure Storage app installation. View Details on the discovered containers to review the discoveries and determine if you want to proceed with scanning:- To proceed scanning all discovered containers, enable Scan all current and any new containers and then Save your scan setting.
- To proceed scanning individual containers and subscriptions, select the items to scan and then Save your scan setting.
- If you do not want to proceed with scanning the discovered containers, select Cancel to abort the installation.
- Save the Azure Cloud Storage app to the list of Cloud Apps.
(Optional) Give a descriptive name to this app instance.- Select the Azure Cloud Storage link on the Cloud Apps list.Enter a descriptive Name to differentiate this instance of the Azure Cloud Storage app from other instances you are managing.To start scanning the new Azure Cloud Storage app for risks, select .The status changes to Scanning. Data Security starts scanning all assets in the associated Azure Cloud Storage app and begins identifying incidents. Depending on the number of Azure assets, it may take some time for the service to complete the process of discovering all assets and users. However, as soon as you begin to see this information populating on the Dashboard, you can begin to Assess Incidents.Monitor the scan results.During the discovery phase, as Data Security scans files and matches them against enabled default policy rules.Verify that your default policy rules are effective. If the results don’t capture all the risks or you see false positives, improve the results.(Optional) To view the status of Subscriptions and Containers being scanned, select . Select an Azure Storage app from the list of Cloud Apps and expand the Subscriptions and Containers to view the scan details.
![]()
Identify Risks
When you add a new cloud app, Data Security automatically scans the cloud app against the default data patterns and displays the match occurrences. You can take action now to improve your scan results and identify risks.- (Optional) Modify match criteria for existing policy rules.(Optional) Add new policy rules.Consider the business use of your app, then identify risks unique to your enterprise. As necessary, add new:(Optional) Configure or edit a data pattern.You can configure data patterns to identify specific strings of text, characters, words, or patterns to make it possible to find all instances of text that match a data pattern you specify.
Fix Microsoft Azure Storage App Onboarding Issues
The most common issues related to onboarding a Microsoft Azure Storage app are as follows:SymptomExplanationSolutionScan results for subscriptions and containers don't display in SaaS Security web interface.Data Security can't discover containers without the correct permissions.Create the AAD application and associate your AAD application with the roles under each subscription as outlined in Create Your AAD Application.