Prisma Access
Set Up the Privileged Remote Access Portal
Table of Contents
Expand All
|
Collapse All
Prisma Access Docs
-
- 6.1 Preferred and Innovation
- 6.0 Preferred and Innovation
- 5.2 Preferred and Innovation
- 5.1 Preferred and Innovation
- 5.0 Preferred and Innovation
- 4.2 Preferred
- 4.1 Preferred
- 4.0 Preferred
- 3.2 Preferred and Innovation
- 3.1 Preferred and Innovation
- 3.0 Preferred and Innovation
- 2.2 Preferred
-
-
- 4.0 & Later
- Prisma Access China
-
-
Set Up the Privileged Remote Access Portal
Configure the Privileged Remote Access portal that your users will use to access their PRA apps.
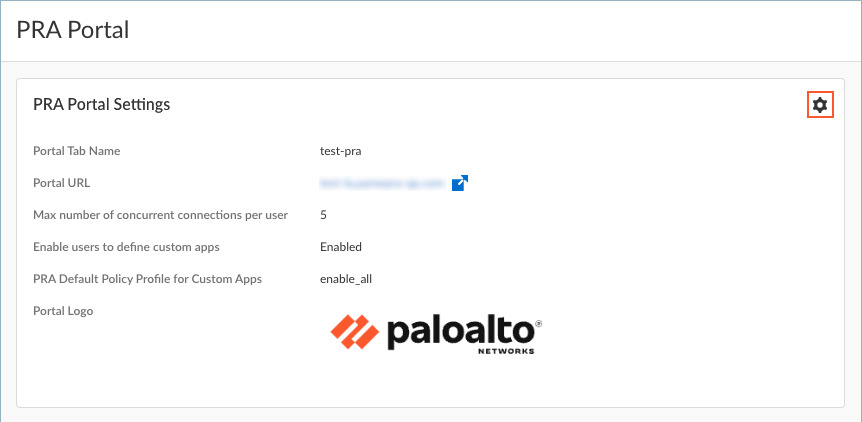
You can configure Privileged Remote Access (PRA) portal settings to define how the portal
will appear to your PRA users. For example, you can configure
the name of the portal tab, the URL for the portal, and the icon for the portal
website.
- Navigate to the PRA Portal page.
- For Prisma Access (Managed by Strata Cloud Manager):
- Log in to Strata Cloud Manager as the administrator.
- Select ConfigurationPrivileged Remote AccessPortal.
- For Prisma Access (Managed by Panorama):
- Launch Privileged Remote Access from the Cloud Services plugin on Panorama by selecting PanoramaCloud ServicesPrivileged Remote Access.
- Click Get Started.
- Select ConfigurationPrivileged Remote AccessPortal.
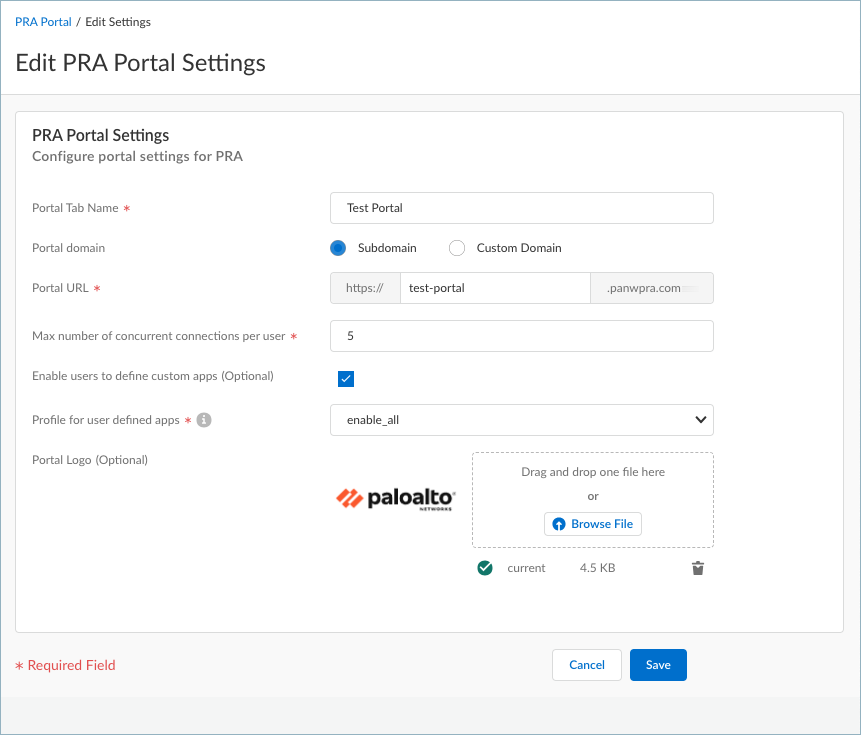
Edit the Privileged Remote Access portal settings.![]() Enter the Portal Tab Name. This name will appear on the browser tab for the PRA portal website.Specify the portal domain. The portal domain is the FDQN (URL) that your end users will visit to access their PRA apps. You can enter a subdomain of the default domain (.panwpra.com) or specify a custom domain.
Enter the Portal Tab Name. This name will appear on the browser tab for the PRA portal website.Specify the portal domain. The portal domain is the FDQN (URL) that your end users will visit to access their PRA apps. You can enter a subdomain of the default domain (.panwpra.com) or specify a custom domain.- To use a subdomain of the default domain, select Subdomain and enter the subdomain in the Portal URL field.
![]() To use a custom domain:
To use a custom domain:- Select Custom Domain and enter the FQDN for your custom domain in the Portal URL field.
- Specify a Certificate that enables secure
access for PRA apps through the custom
domain.
- On Strata Cloud Manager, select or Import a certificate. Selecting Import will open the Certificate Management page where you can select a certificate and import it.
- On Prisma Access (Managed by Panorama), copy the name of the certificate from Panorama and paste it here.
![]() In Max Number of concurrent connections per user, enter the maximum number of PRA apps that a user can connect to at the same time.(Optional) Allow your users to access their own remote apps through the PRA portal.
In Max Number of concurrent connections per user, enter the maximum number of PRA apps that a user can connect to at the same time.(Optional) Allow your users to access their own remote apps through the PRA portal.- Select Enable users to define custom apps (Optional).(Optional) Select a PRA Profile for custom apps that defines what functions your users can perform while accessing the custom app, such as copy, paste, upload files, or download files. If you do not select a profile, the Default_PRA_Profile is used.(Optional) Upload a Portal Logo (Optional) for the PRA portal page. You can either drag and drop an image file or Browse File to upload the image. The supported image types are .jpg and .png. The maximum logo size is 250 KB.Save your settings.
- For Prisma Access (Managed by Strata Cloud Manager):


