Prisma Access
Migrate Prisma Access from Panorama to Strata Cloud Manager
Table of Contents
Expand All
|
Collapse All
Prisma Access Docs
-
- 6.1 Preferred and Innovation
- 6.0 Preferred and Innovation
- 5.2 Preferred and Innovation
- 5.1 Preferred and Innovation
- 5.0 Preferred and Innovation
- 4.2 Preferred
- 4.1 Preferred
- 4.0 Preferred
- 3.2 Preferred and Innovation
- 3.1 Preferred and Innovation
- 3.0 Preferred and Innovation
- 2.2 Preferred
-
-
- 4.0 & Later
- Prisma Access China
-
-
Migrate Prisma Access from Panorama to Strata Cloud Manager
Migrate your Prisma Access deployment from Panorama to Strata Cloud
Manager.
| Where Can I Use This? | What Do I Need? |
|---|---|
|
|
If you have an existing Prisma Access (Managed by Panorama) deployment and want to migrate to Strata Cloud Manager for configuration management, Palo Alto Networks offers an
in-product workflow that lets you migrate your existing Prisma Access
configuration to Prisma Access (Managed by Strata Cloud Manager).
To enable migration
workflow, contact your Palo Alto Networks account team.
Managing your Prisma Access configuration using Strata Cloud Manager instead of
Panorama can offer you benefits such as:
- Continuous best practice assessments
- Secure default configurations
- Machine learning (ML)-based configuration optimization
- Streamlined web security workflows
- An interactive visual summary (Command Center) that helps you to assess the health, security, and efficiency of the network
- Intuitive workflows for complex tasks
- Simple and secure management APIs
- Cloud-native architecture provides scalability, resilience, and global reach
- No hardware to manage or software to maintain
Prepare to Migrate to Prisma Access (Managed by Strata Cloud Manager)
- When to Migrate—Don’t perform your upgrade during a dataplane or infrastructure upgrade. Check your upgrade preferences to see if you have an upcoming dataplane upgrade.
- One-Way Migration from Panorama to Prisma Access (Managed by Strata Cloud Manager)—You can only migrate from a Prisma Access (Managed by Panorama) to a Prisma Access (Managed by Strata Cloud Manager) deployment. After you migrate to Strata Cloud Manager, you can’t return to managing your Prisma Access deployment using Panorama.
- Minimum Panorama Version—A minimum Panorama version of 10.0 is required.
- Required Panorama and Strata Cloud Manager Administrator Roles—Be sure that you have Superuser administrative roles for Panorama and Strata Cloud Manager. Before you begin the migration process, you export an .xml configuration file from Panorama, and the user exporting the file must have an administrative role of Superuser, and the user doing the migration in Strata Cloud Manager must also be a Superuser.
- Licensing Requirements—A valid Prisma Access license is required.
- Cloud Identity Engine—You must have integrated the Directory Sync component of the Cloud Identity Engine with the current Prisma Access (Managed by Panorama) tenant before migrating.
- Unsupported Functionalities—The migration program does not support
the following Prisma Access functionalities:
- Data Filtering (as an alternative, use Enterprise DLP)
- FedRAMP deployments
- IoT Security
- Multitenant deployments
- SSH Proxy
- Separate authentication for GlobalProtect™ portals and gateways
- Prisma SD-WAN and Prisma Access Migrations—If you migrate a Prisma Access and a Prisma SD-WAN deployment, Prisma Access and Prisma SD-WAN must share the same tenant service group ID (TSG ID).
- Config Diff Issues—When you run the config diff
during the migration, ignore any diffs that show the following object names
because they don't affect your configuration:
- Clientless-vpn crypto-settings
- Hip-profiles rename
- Mobile-user-redundancy
- Exclude-video-traffic
Migrate Your Prisma Access (Managed by Panorama) Deployment to Strata Cloud Manager
At a high level,
you:
- Make sure that you have successfully pushed the latest configuration to Prisma Access, have saved the latest configuration, and have exported an
.xml configuration file from the Panorama that manages Prisma Access.
The user exporting this file in Panorama must have an administrative role of Superuser.
- Start the migration program from Strata Cloud Manager.
- Check the configuration differences (diffs) between the Panorama configuration and the migrated Strata Cloud Manager configuration.
- Resolve the diffs and complete the migration.
- Prepare your Panorama for the migration.
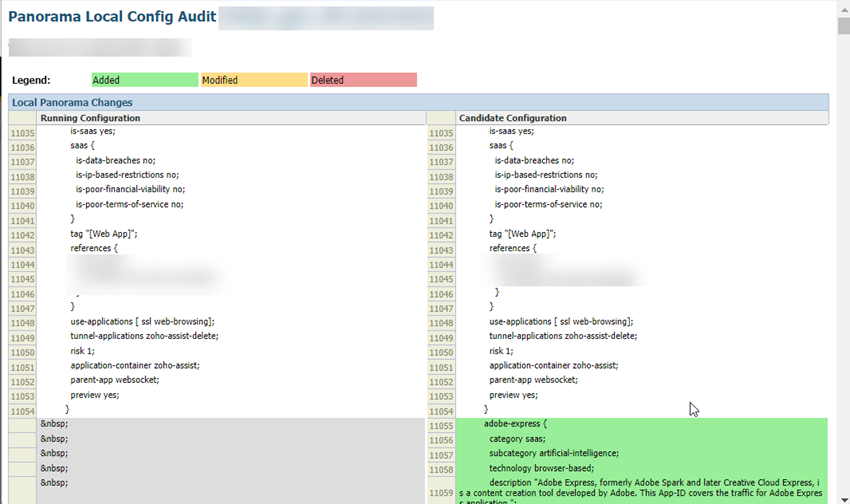
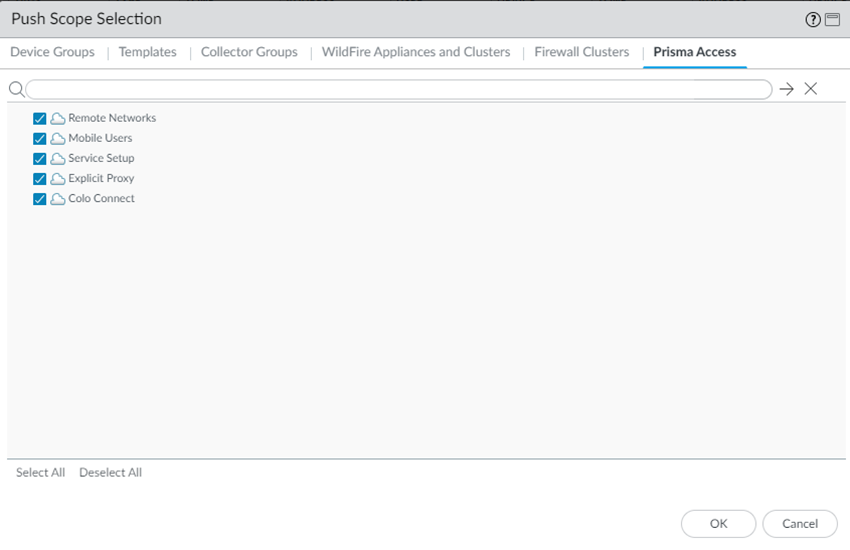
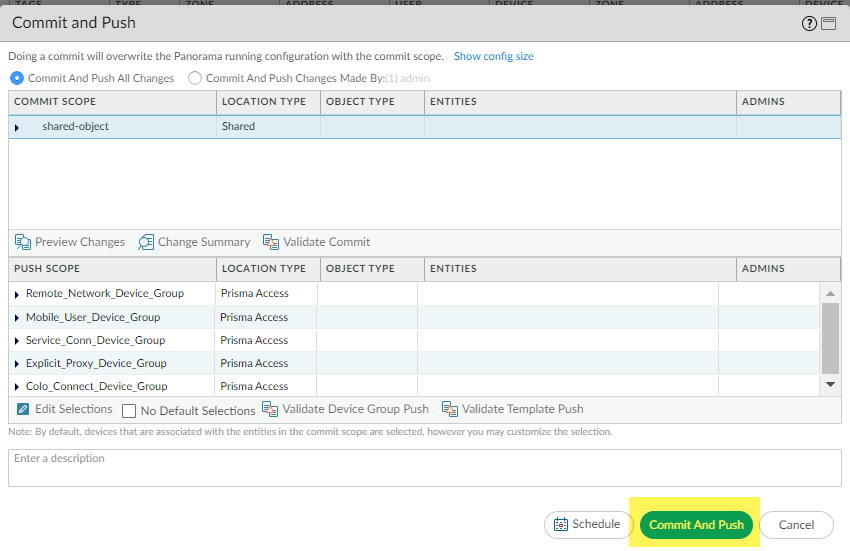
- Log in to the Panorama that manages Prisma Access with an administrative role of Superuser.(Optional) If you have configured a custom Master Key for your Panorama and for Prisma Access, make a note of it.If your deployment uses the default Master Key, this step isn't required.Make sure that your current Panorama configuration is up to date and you have committed and pushed all your changes to Panorama and to Prisma Access by going to CommitCommit & Push and Preview Changes.(Optional) Check the diffs between the running config and the candidate config and determine whether you want to push those changes. If you want to commit and push the changes, Edit Selections and select the Prisma Access components you want to push in the Push Scope.
![]()
![]() (Optional) Commit and Push your changes.
(Optional) Commit and Push your changes.![]() Go to PanoramaSetupOperations and Export named Panorama configuration snapshot.This .xml file is required to upload to Strata Cloud Manager during the migration process. Don't upload a techsupport file or any other file except an .xml configuration file.The user exporting this file in Panorama must have an administrative role of Superuser.Select the running-config.xml configuration file and OK.
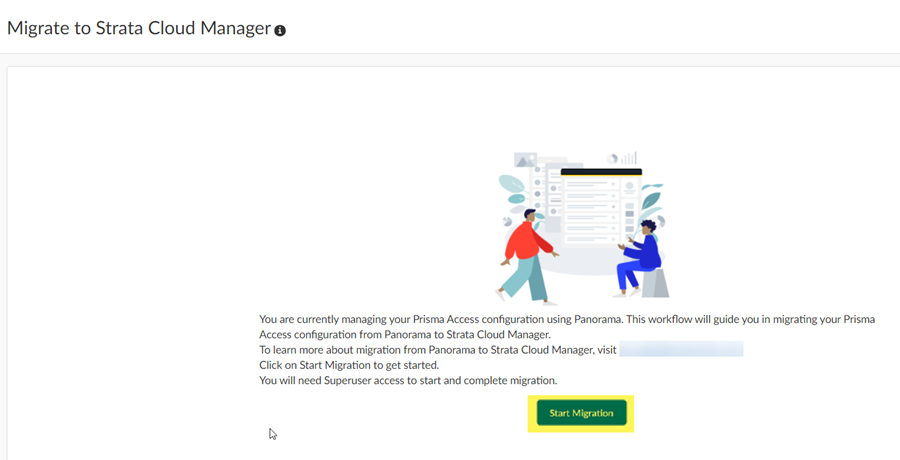
Go to PanoramaSetupOperations and Export named Panorama configuration snapshot.This .xml file is required to upload to Strata Cloud Manager during the migration process. Don't upload a techsupport file or any other file except an .xml configuration file.The user exporting this file in Panorama must have an administrative role of Superuser.Select the running-config.xml configuration file and OK.![]() Log in to Strata Cloud Manager as an administrator with a Superuser role and go to ConfigurationNGFW and Prisma Access.The migration program detects that you have a Panorama managed deployment.Start Migration.
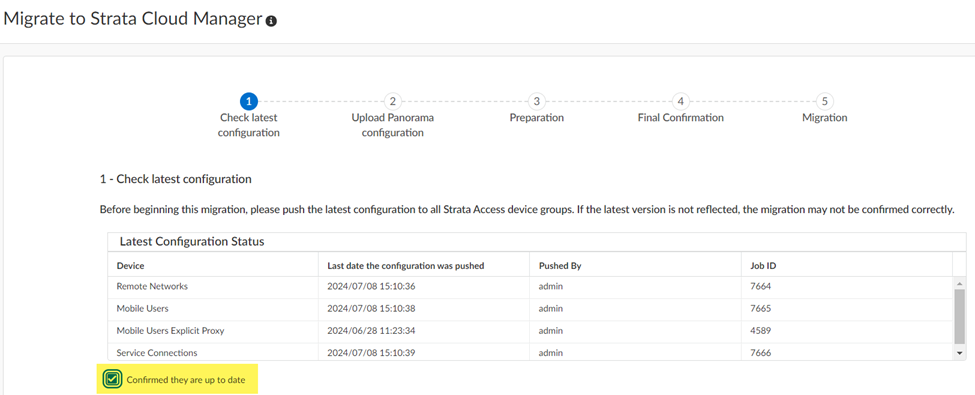
Log in to Strata Cloud Manager as an administrator with a Superuser role and go to ConfigurationNGFW and Prisma Access.The migration program detects that you have a Panorama managed deployment.Start Migration.![]() The migration program asks you to make sure that your configuration is up to date and shows you the last user who updated it. After you have verified that this configuration has the latest changes, select Confirmed they are up to date and click Next.
The migration program asks you to make sure that your configuration is up to date and shows you the last user who updated it. After you have verified that this configuration has the latest changes, select Confirmed they are up to date and click Next.![]() Select the Panorama configuration .xml file you downloaded in an earlier step by dragging and dropping it or Choose File.Input your Master Key, or if you did not create a custom master key, ask Strata Cloud Manager to use the Default one and click Next.
Select the Panorama configuration .xml file you downloaded in an earlier step by dragging and dropping it or Choose File.Input your Master Key, or if you did not create a custom master key, ask Strata Cloud Manager to use the Default one and click Next.![]() The migration program begins.
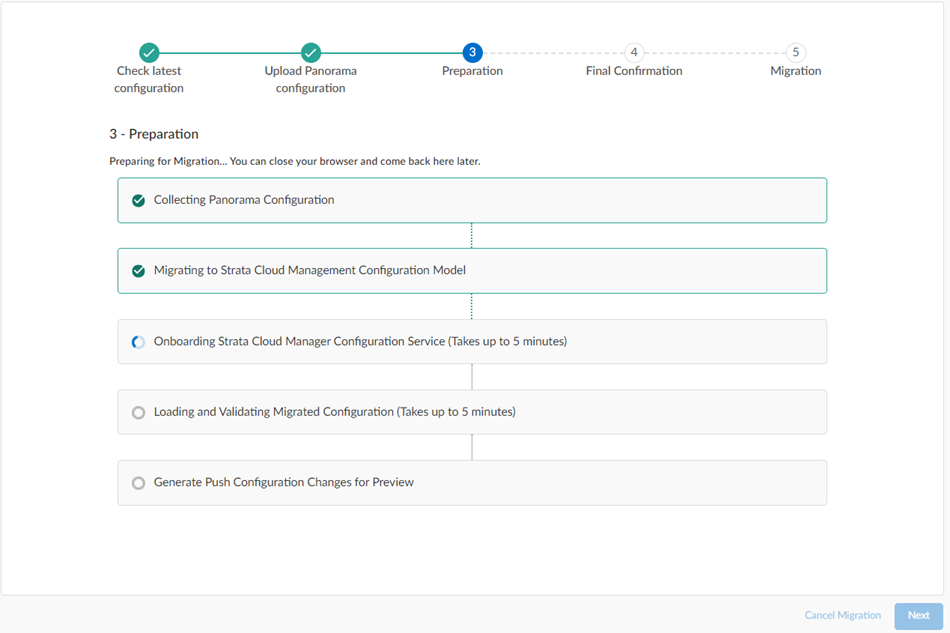
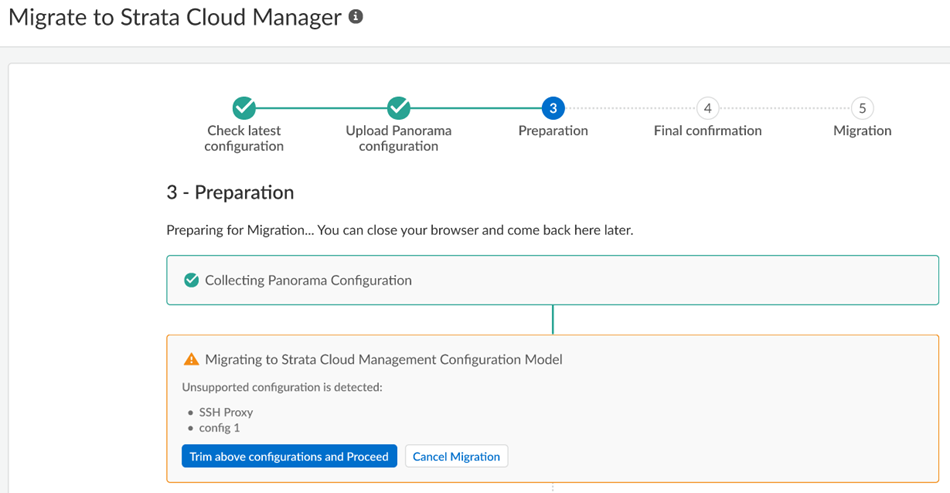
The migration program begins.![]() Wait for all the steps to complete.If, during migration, the program indicates that it encountered an unsupported configuration, you can Trim the above configurations and proceed or Cancel migration.
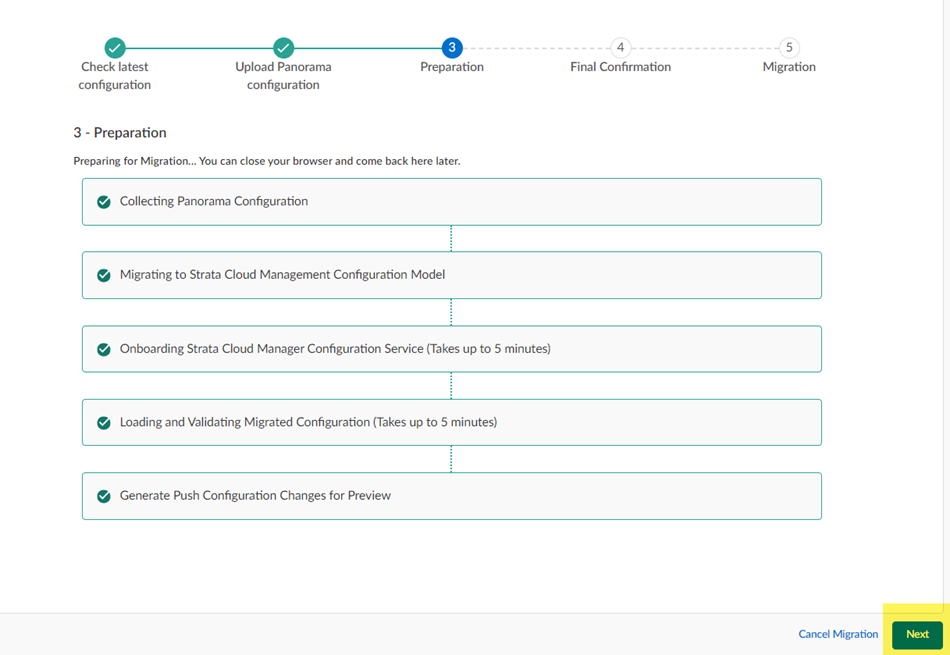
Wait for all the steps to complete.If, during migration, the program indicates that it encountered an unsupported configuration, you can Trim the above configurations and proceed or Cancel migration.![]() Some unsupported configurations (such as a multitenant configuration) cancel the migration and the migration program can't resolve the issue; in this case, Cancel Migration.After migration completes, click Next.
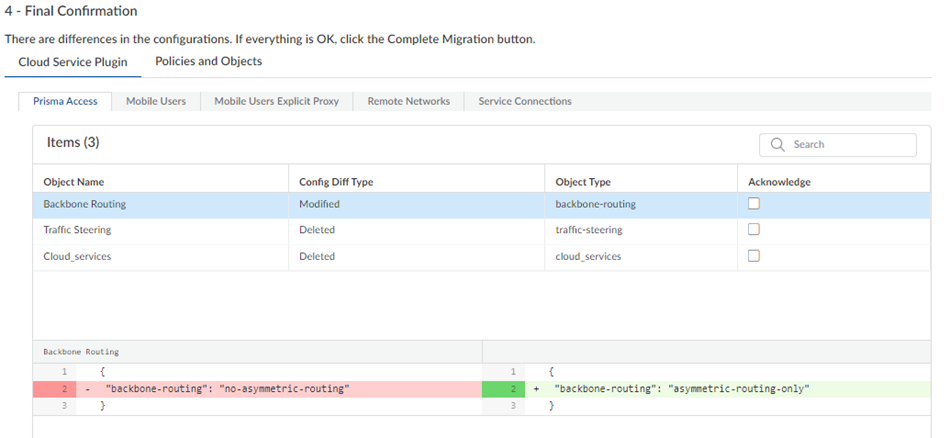
Some unsupported configurations (such as a multitenant configuration) cancel the migration and the migration program can't resolve the issue; in this case, Cancel Migration.After migration completes, click Next.![]() If the migration program made changes, review them in the final confirmation screen.The migration program might make changes to your configuration to account for differences in the Panorama and the Strata Cloud Manager configuration or to fix unsupported functionality. If changes are required, the migration program shows those changes in a diff view with the new lines in green and the deleted lines in red.Ignore any diffs that show the following object names; they don't affect your configuration:
If the migration program made changes, review them in the final confirmation screen.The migration program might make changes to your configuration to account for differences in the Panorama and the Strata Cloud Manager configuration or to fix unsupported functionality. If changes are required, the migration program shows those changes in a diff view with the new lines in green and the deleted lines in red.Ignore any diffs that show the following object names; they don't affect your configuration:- Clientless-vpn crypto-settings
- Hip-profiles rename
- Mobile-user-redundancy
- Exclude-video-traffic
![]() (Optional) Make changes to the diffs.Any changes you make are not committed to your configuration until you complete the migration and push your changes to Strata Cloud Manager.
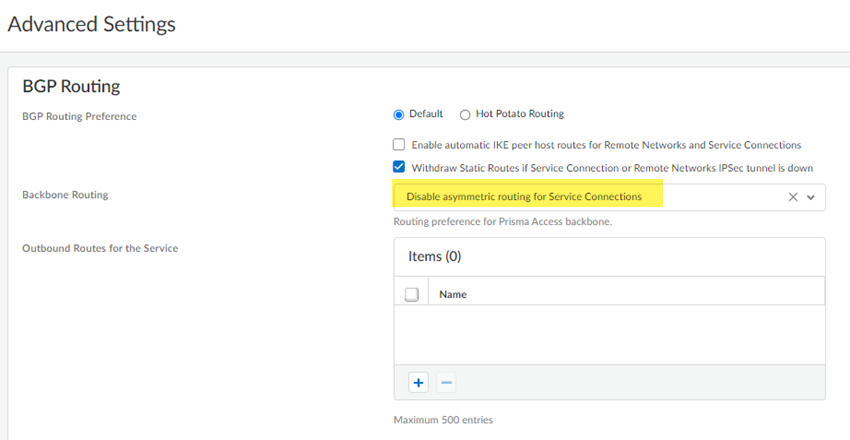
(Optional) Make changes to the diffs.Any changes you make are not committed to your configuration until you complete the migration and push your changes to Strata Cloud Manager.- Navigate to the area in the Prisma Access configuration where you found the diffs and make changes to the configuration.For the example in the previous step, the migration program made a change to Backbone Routing (from no-asymmetric-routing to asymmetric-routing-only). To change this setting back to your original configuration, go to ConfigurationNGFW and Prisma AccessConfiguration ScopePrisma AccessService ConnectionsAdvanced Settings and change the Backbone Routing configuration to Disable Asymmetric Routing for Service Connections.
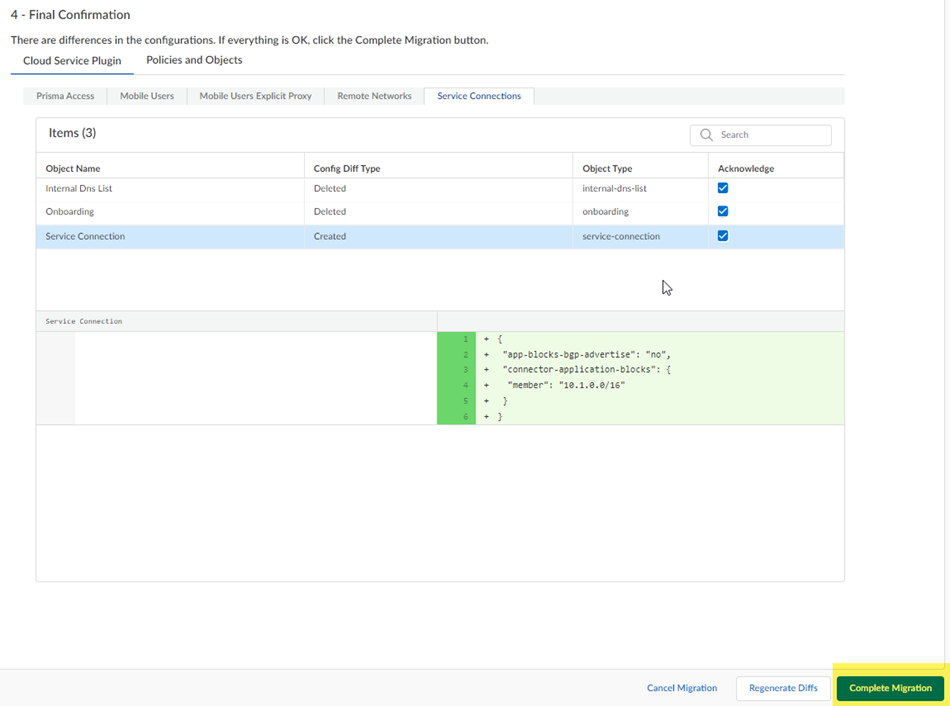
![]() (Optional) To keep track of your changes, Acknowledge them as you complete them.While not required, it can be useful to acknowledge each change as you make them, so you can keep track of them.
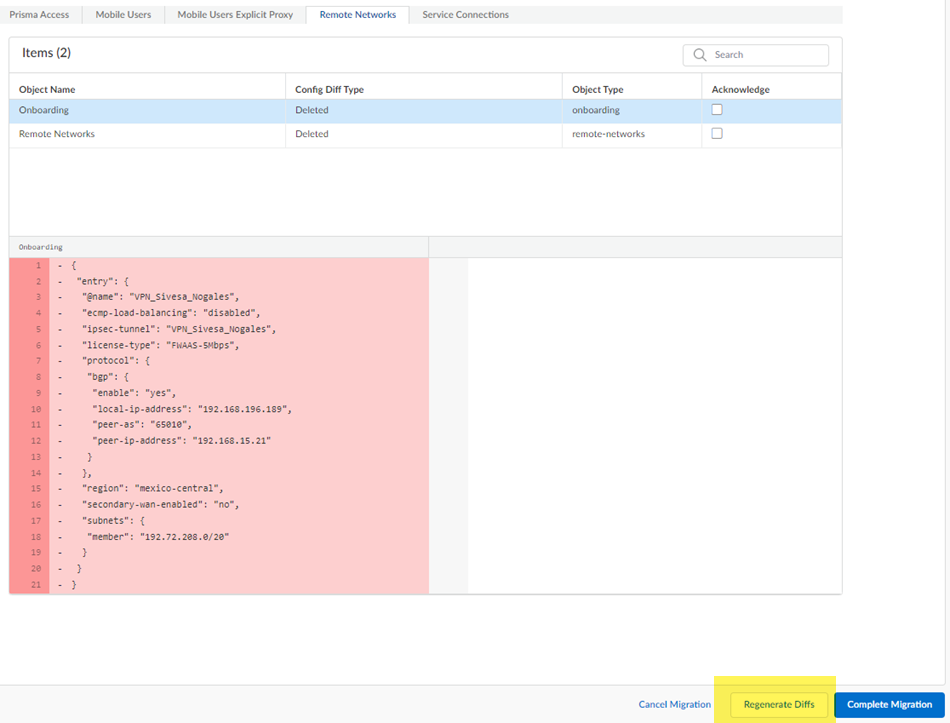
(Optional) To keep track of your changes, Acknowledge them as you complete them.While not required, it can be useful to acknowledge each change as you make them, so you can keep track of them.![]() Continue to review the changes and make changes and acknowledge them.(Optional) If you have made any changes to the configuration, Regenerate Diffs to see the updated diffs.
Continue to review the changes and make changes and acknowledge them.(Optional) If you have made any changes to the configuration, Regenerate Diffs to see the updated diffs.![]() Complete Migration.While not required, you can also Acknowledge your changes.After you Complete Migration, you can't go back to a Panorama managed deployment and your deployment permanently uses Strata Cloud Manager for its management.
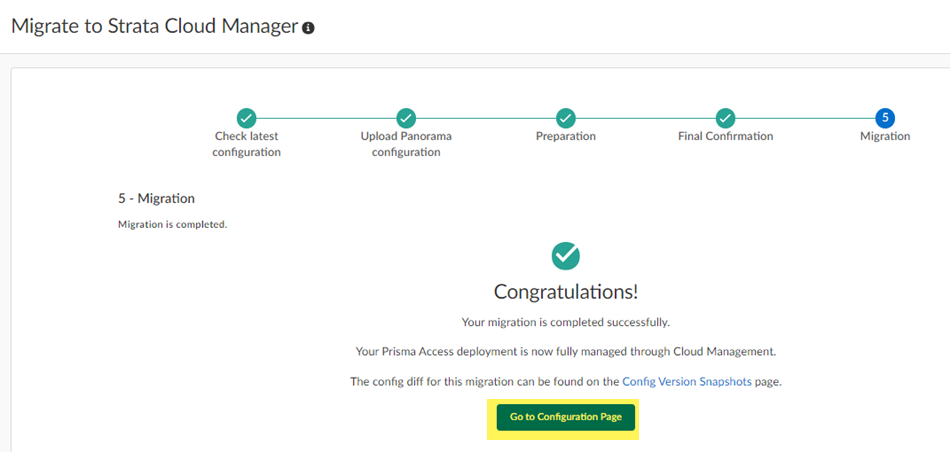
Complete Migration.While not required, you can also Acknowledge your changes.After you Complete Migration, you can't go back to a Panorama managed deployment and your deployment permanently uses Strata Cloud Manager for its management.![]() (Optional) Go to Configuration Page to see your migrated configuration.
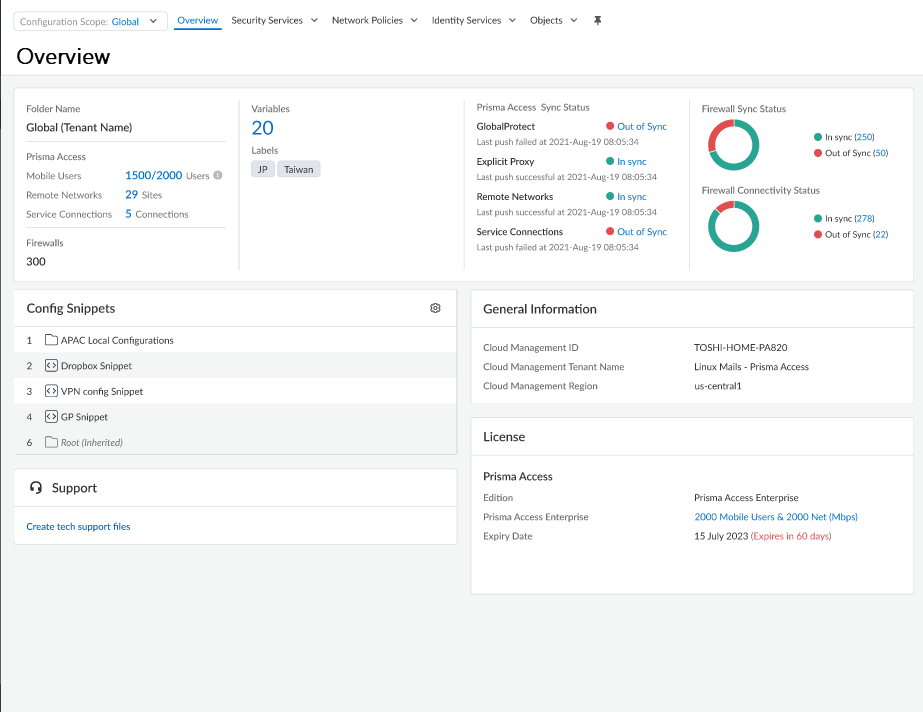
(Optional) Go to Configuration Page to see your migrated configuration.![]() Your migrated deployment displays.
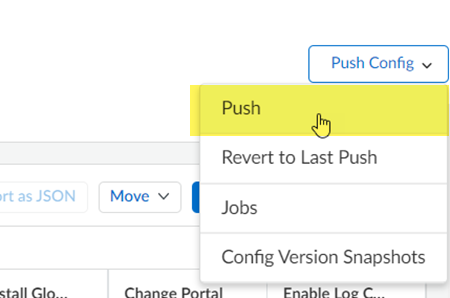
Your migrated deployment displays.![]() Push ConfigPush to apply your migrated configuration changes.This Push operation ensures that your migration has successfully completed and that Prisma Access has applied all changes to your migrated configuration.
Push ConfigPush to apply your migrated configuration changes.This Push operation ensures that your migration has successfully completed and that Prisma Access has applied all changes to your migrated configuration.![]() Make a note of any messages you received during the Push operation and, if you see any issues, make changes to your configuration as required.
Make a note of any messages you received during the Push operation and, if you see any issues, make changes to your configuration as required.

