Prisma Access
Configure Dynamic DNS Updates for Prisma Access (Managed by Panorama)
Table of Contents
Expand All
|
Collapse All
Prisma Access Docs
-
- 6.1 Preferred and Innovation
- 6.0 Preferred and Innovation
- 5.2 Preferred and Innovation
- 5.1 Preferred and Innovation
- 5.0 Preferred and Innovation
- 4.2 Preferred
- 4.1 Preferred
- 4.0 Preferred
- 3.2 Preferred and Innovation
- 3.1 Preferred and Innovation
- 3.0 Preferred and Innovation
- 2.2 Preferred
-
-
- 4.0 & Later
- Prisma Access China
-
-
Configure Dynamic DNS Updates for Prisma Access (Managed by Panorama)
Configure dynamic DNS updates for Prisma Access Strata Cloud Manager.
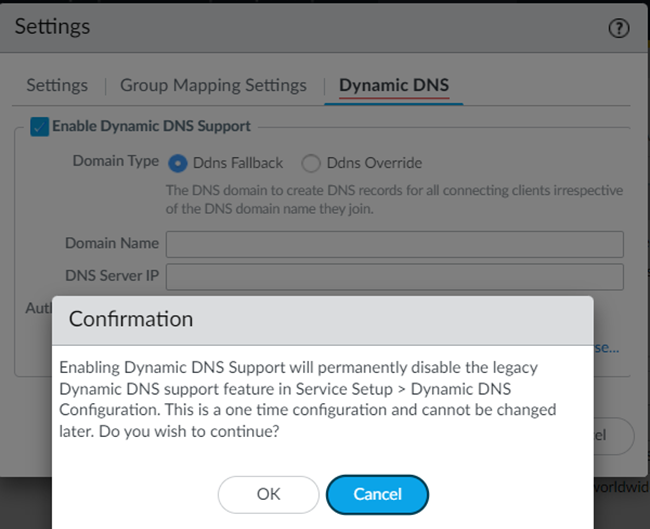
- From Panorama, go to Cloud ServicesConfigurationMobile Users—GlobalProtect and click the gear to edit the Settings.Select Dynamic DNS.Enable Dynamic DNS Support.
![]() You are prompted that, if you have the legacy Dynamic DNS support enabled, enabling the updated support permanently disables the legacy support. Click OK to continue.
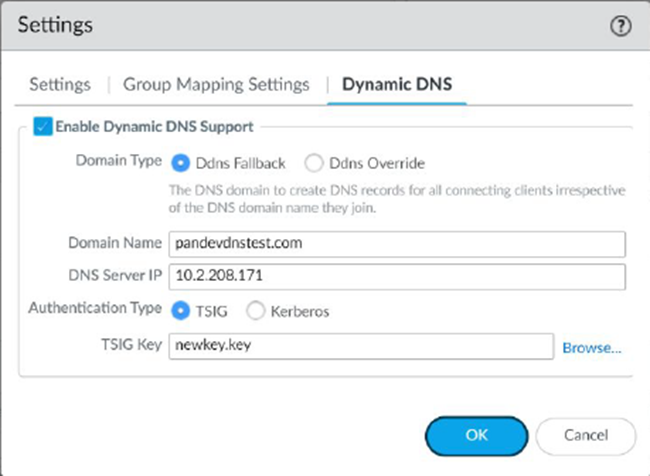
You are prompted that, if you have the legacy Dynamic DNS support enabled, enabling the updated support permanently disables the legacy support. Click OK to continue.![]() Configure the Dynamic DNS settings.
Configure the Dynamic DNS settings.- Select Enable Dynamic DNS Support.Select the Domain Type.
- Ddns Fallback—The domain used for the
nsupdate events falls back to the domain you specify in the
Domain Name area. Use this choice if
the GlobalProtect clients are not joined to any domain, or if
they are domain-joined to the same domain that the DDNS service
uses to update the records on the DNS server. If you select Ddns Fallback and users who are not connected to a domain log into GlobalProtect, their information is added under the Ddns Fallback zone that's created on the DNS server.If GlobalProtect clients that are logging in to GlobalProtect belong to an unexpected domain that isn't configured on the DNS server, nsupdate might fail; in this case; select Ddns Override to override the unknown domain with the domain that is known to the DNS server.
- Ddns Override—Prisma Access uses only the domain you specify to update the DNS server and overrides all other domains. If GlobalProtect clients log in to another domain, the DDNS service uses the domain you specify here to update the DNS A and PTR records.
Select the domain that is used to update the PTR records for either fallback or Domain Names in the Domain Name field.Select the DNS Server IP address.Select the Authentication Type (either TSIG or Kerberos).(TSIG Deployments Only) Select the TSIG Key to use with TSIG.Make sure that the TSIG file is in the correct format and has a filetype of .key.- If you are running a Panorama Managed deployment with a plugin version of 5.2.0 version or greater and you choose a Kerberos authentication type, upload an auth key through a .key file that has the base64 encoded string of the Kerberos key retrieved from the DNS server, for example: "ABCDEFGHIJKLMNOPQRSTUV5WXYZOUy5DT00ADUFabcDluaXN0cmF0b3IAAAABAAAAAAEAEgAg3aBcdE3Fg4IAaQOWMUpzN4hCtNnVcrjbFndYPQVvYVg=
- If you are running a Panorama Managed deployment with a plugin version less than 5.1.0 and you choose a Kerberos authentication type, upload an auth key through a .key file that has the unencoded Kerberos keytab file retrieved from the DNS server.
The TSIG file should be in the following format:key "ddns-gp" { algorithm hmac-sha256; secret "aBCDEFGhiJklMNO89PQR+8stUVWX+YZAbcdeFgHI5J="; };(Kerberos Deployments Only) Specify the Kerberos options to use.- Enter the IP address of the Kerberos Domain Controller.
- Enter the IP address of the Kerberos Admin Server.
- Enter the Kerberos User Name.
- Enter the Kerberos Key (the keytab) to
use. Use base64 encoding on the Kerberos key before uploading it.
![]() Save your changes.Set up forward lookup and reverse lookup zones on your DNS server.Refer to the documentation for your IPAM vendor to set up these zones. This step requires that you enter the Infrastructure Subnet and Client IP Pool from Prisma Access.
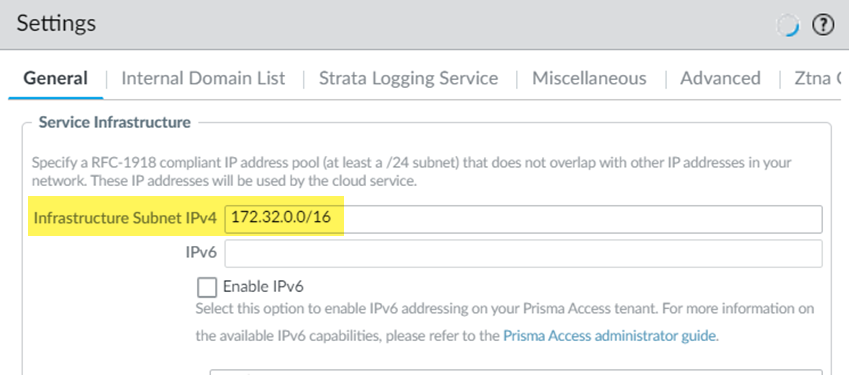
Save your changes.Set up forward lookup and reverse lookup zones on your DNS server.Refer to the documentation for your IPAM vendor to set up these zones. This step requires that you enter the Infrastructure Subnet and Client IP Pool from Prisma Access.- To find the infrastructure subnet, go to PanoramaCloud ServicesConfigurationService Setup, click the gear to edit the
Settings and make a note of the
Infrastructure Subnet IPv4.
![]()
- To find the GlobalProtect mobile user IP address pool, go to PanoramaCloud ServicesMobile Users—GlobalProtect, select the Hostname, select
IP Pools and make a note of the IP
Pool IPv4.
![]()
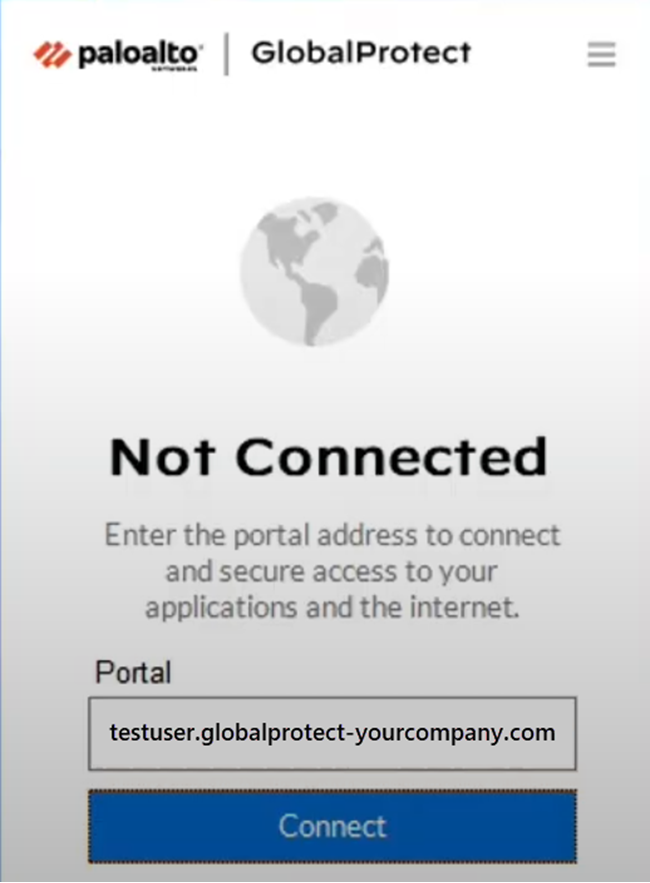
Verify that DNS records are being updated on the IPAM DNS server.- Open a client machine and connect to a Prisma Access GlobalProtect gateway.
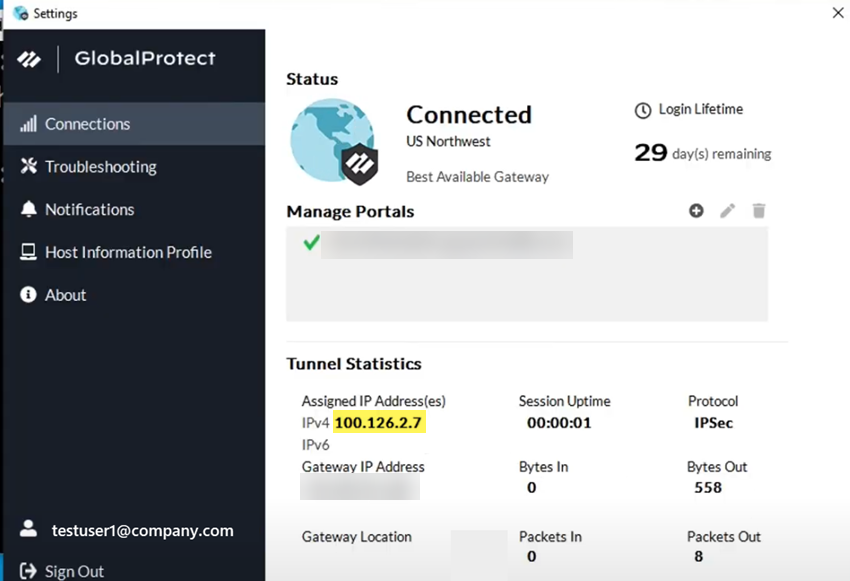
![]() Select GlobalProtect Settings and verify the GlobalProtect IP address that Prisma Access assigned to the user.
Select GlobalProtect Settings and verify the GlobalProtect IP address that Prisma Access assigned to the user.![]() The Assigned IP Address(es) (100.126.2.7) shows that the IP address comes from the GlobalProtect IP address pool (100.126.0.0/16).
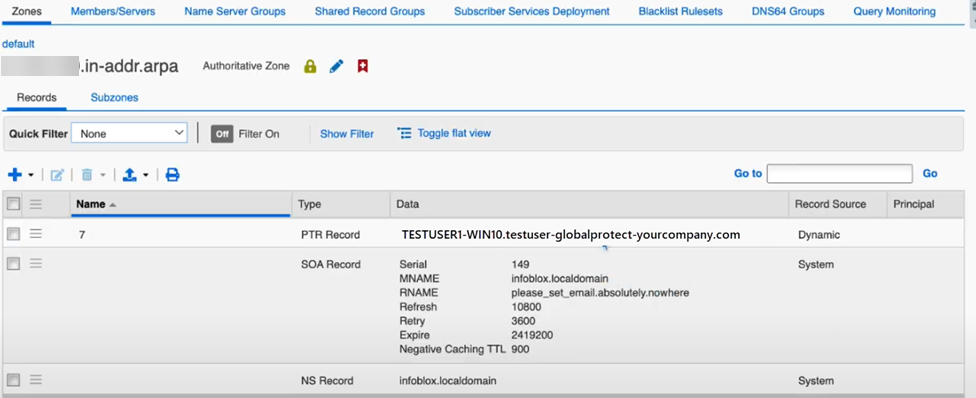
The Assigned IP Address(es) (100.126.2.7) shows that the IP address comes from the GlobalProtect IP address pool (100.126.0.0/16).![]() From the IPAM DNS server, view the user's record.In this example, the user is named testuser1-win10.
From the IPAM DNS server, view the user's record.In this example, the user is named testuser1-win10.![]() The DNS reverse lookup also displays the username in the PTR record.
The DNS reverse lookup also displays the username in the PTR record.![]() Log the user off from GlobalProtect and check the records to make sure that the DNS server has deleted the records for the user.
Log the user off from GlobalProtect and check the records to make sure that the DNS server has deleted the records for the user.


