Prisma Access
Configure Applications for Remote Connections in Privileged Remote Access
Table of Contents
Configure Applications for Remote Connections in Privileged Remote Access
Add the apps that your users will access from the Privileged Remote Access
portal.
After you set up the Privileged Remote Access (PRA) portal, you can add the apps that your
users will access from the PRA portal. You can add apps that
users can access using the RDP, SSH, or VNC protocol. For example, you can set up a
PRA app for the remote access of a Windows desktop using
RDP, or to remotely log in to a computer using SSH or VNC.
After adding applications, you can set up application groups to help
manage which users can access which groups of apps.
Before you can add the applications that your users will access from the PRA portal, you will need the following information about the
apps:
- The type of protocol that your users will use to access the app
- The FQDN or IP address of the app destination
- The port number used to reach the app (if different from the default port)
- Login credentials for the app on the target machine (optional)
To resolve the internal hostnames of applications deployed in your data center,
you need to have an active Service Connection to the data center and firewall
rules to access your internal DNS server.
Learn how to the add following types of remote applications to the PRA portal.
Configure RDP Applications for Privileged Remote Access
Add the RDP apps that your users will access remotely from the Privileged Remote Access
portal.
To add the RDP apps that your users will remotely access from your PRA portal:
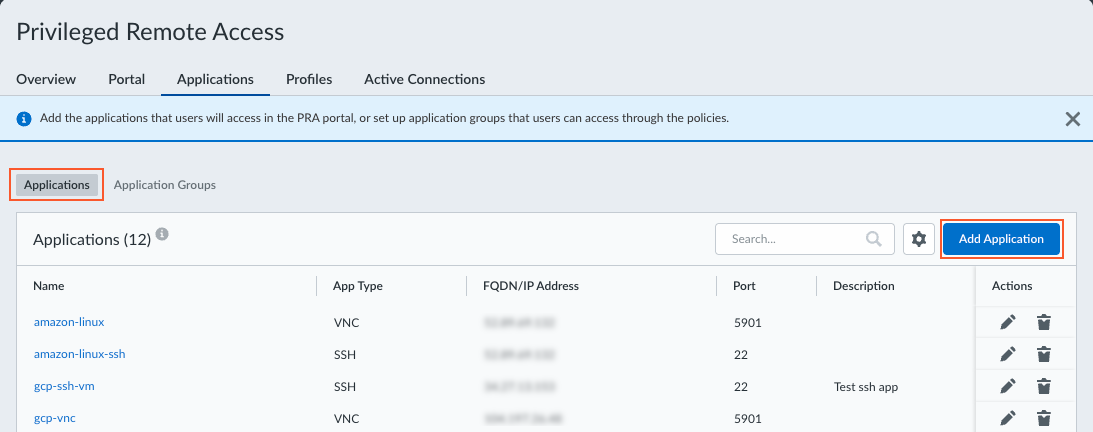
- Navigate to the PRA Applications page.
- For Prisma Access (Managed by Strata Cloud Manager):
- Log in to Strata Cloud Manager as the administrator.
- Select .
- For Prisma Access (Managed by Panorama):
- Launch Privileged Remote Access from the Cloud Services plugin on Panorama by selecting .
- Click Get Started.
- Select .
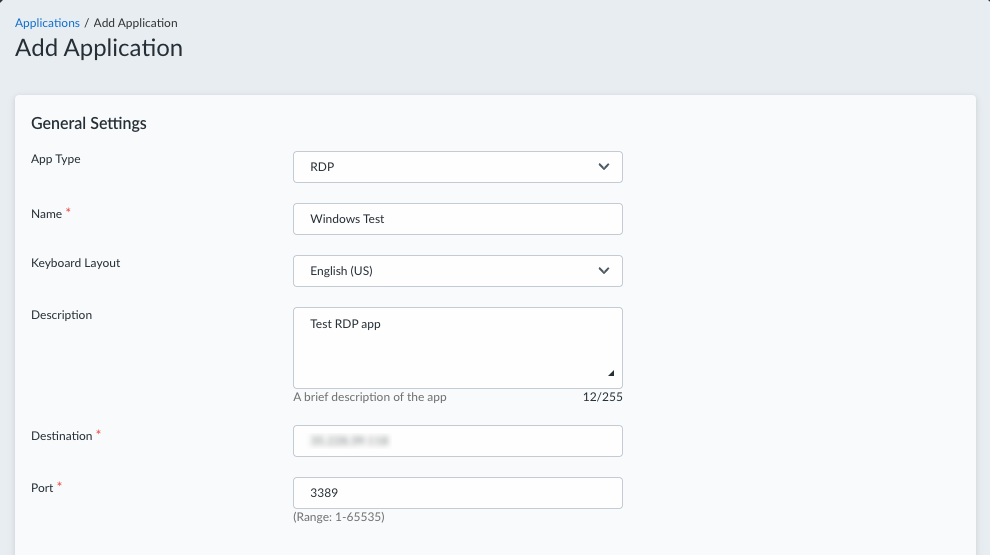
Click .![]() Configure general settings for the app.
Configure general settings for the app.- Select .Enter a Name for the app.(Optional) Select a Keyboard Layout to use for the remote RDP app.(Optional) Enter a description for the app.Enter the Destination FQDN or IP address of the app. The FQDN or IP address must be reachable using a Service Connection in your Prisma Access tenant.Enter the Port to use for the app, if different from the default port.You can enter only one port between 1-65535. (Default: 3389)
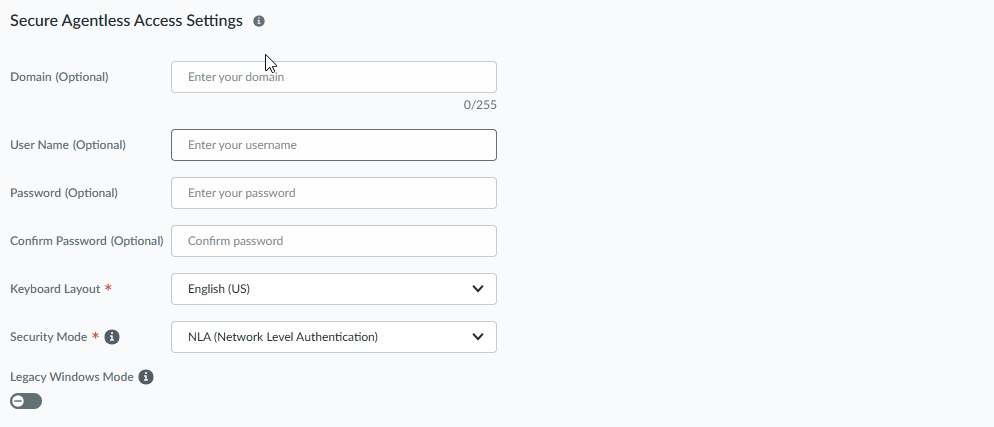
![]() Configure additional settings for the RDP app.
Configure additional settings for the RDP app.- (Optional) Enter the Domain associated with the RDP application. When you configure this field, the system applies the domain automatically during authentication, allowing users to log in using only their username.(Optional) Enter the User Name and Password for the remote app, and confirm the password. The username and password are optional, but you must enter both settings or leave both blank.Select the Security Mode for the app, which determines the authentication and encryption method for the RDP connection.
- NLA (Network Level Authentication)—(Recommended) This is the default and highest security option. With NLA, users must authenticate with valid credentials before establishing a full remote desktop session. This preauthentication process (CredSSP) helps protect server resources by validating user identity first, before consuming significant memory or processing power.Best for: Standard direct RDP connections where you need maximum security.
- TLS Encryption—This mode uses Transport Layer Security to encrypt the connection, but authentication happens after connection establishment at the Windows login screen rather than beforehand.Best for: Specialized network setups including RDP Gateway connections or load-balanced server farms where the initial connection might be redirected to different target servers.
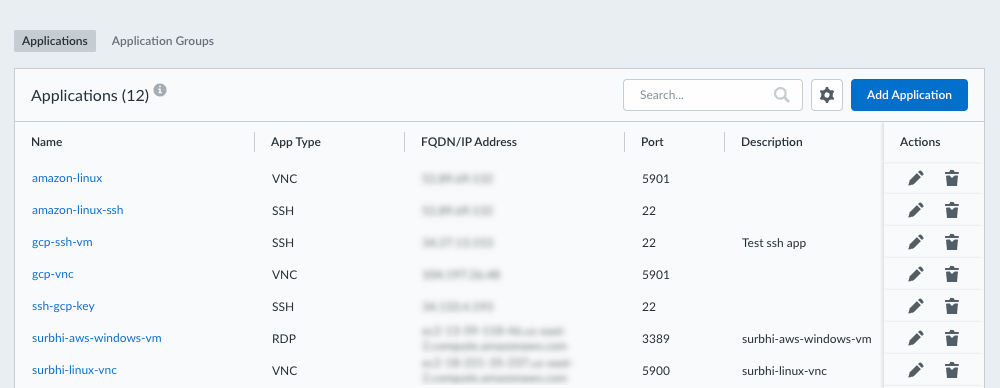
(Optional) Enable Legacy Windows Mode if you experience display issues when connecting to older Windows systems.Some older Windows operating systems, such as Windows 7, might experience display problems due to incorrect color depth negotiation. These systems usually support 16-bit color but can fail when attempting to fall back to 8-bit color, which can result in corrupted display or connection failures. When enabled, this mode uses a color depth negotiation method designed for compatibility with these older systems.![]() Save your settings. The application is added to the Applications table. You can visit this page later to add, edit, or remove an app.
Save your settings. The application is added to the Applications table. You can visit this page later to add, edit, or remove an app.![]()
Configure SSH Applications for Privileged Remote Access
Add the SSH apps that your users will access remotely from the Privileged Remote Access portal.To add the SSH apps that your users will remotely access from your PRA portal:- Navigate to the PRA Applications page.
- For Prisma Access (Managed by Strata Cloud Manager):
- Log in to Strata Cloud Manager as the administrator.
- Select .
- For Prisma Access (Managed by Panorama):
- Launch Privileged Remote Access from the Cloud Services plugin on Panorama by selecting .
- Click Get Started.
- Select .
Click .![]() Configure general settings for the app.
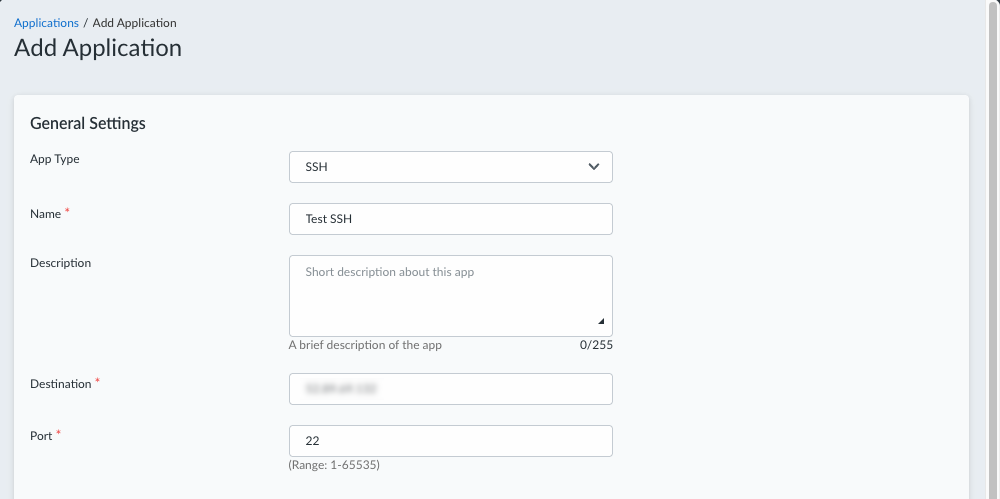
Configure general settings for the app.- Select .Enter a Name for the app.(Optional) Enter a description for the app.Enter the Destination FQDN or IP address of the app. The FQDN or IP address must be reachable using a Service Connection in your Prisma Access tenant.Enter the Port to use for the app, if different from the default port.You can enter only one port between 1-65535. (Default: 22)
![]() (Optional) Configure authentication settings for the app.
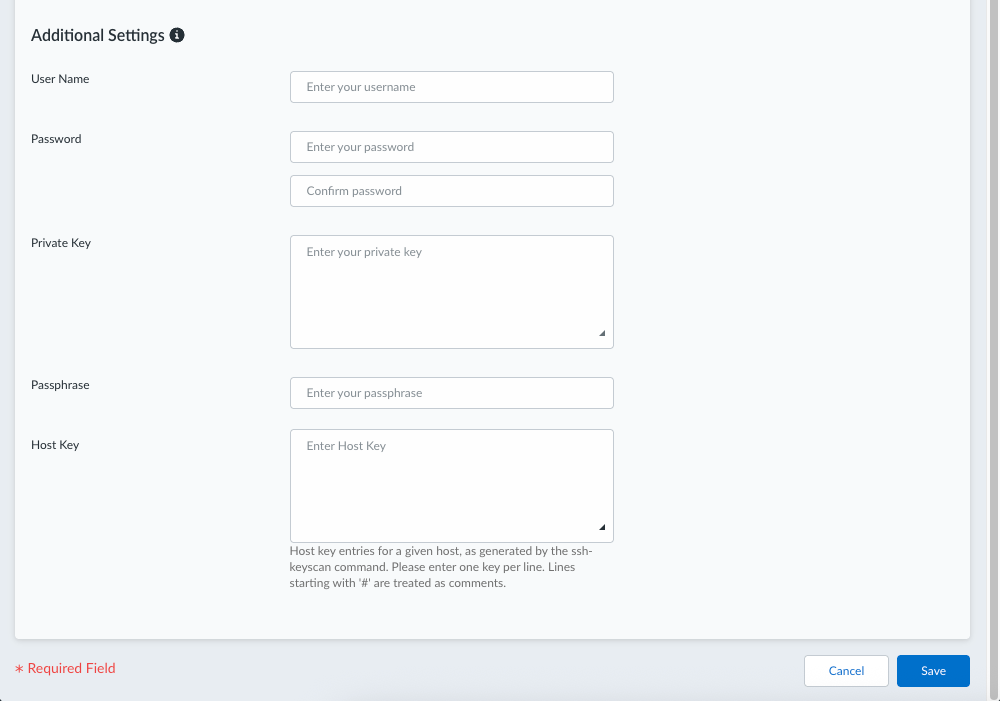
(Optional) Configure authentication settings for the app.- Enter the User Name and Password for the remote app, and confirm the password. If you enter a username and don't enter a password, you must provide a private key.(Optional) Enter the Private Key for the app. If the private key is encrypted, enter your passphrase.(Optional) Enter the Passphrase for the app.(Optional) Enter the Host Key entries for the remote host, which you can obtain by running the ssh-keyscan command on the host. Enter one key per line. Lines that begin with # are treated as comments.
![]() Save your settings. The application is added to the Applications table. You can visit this page later to add, edit, or remove an app.
Save your settings. The application is added to the Applications table. You can visit this page later to add, edit, or remove an app.![]()
Configure VNC Applications for Privileged Remote Access
Add the VNC apps that your users will access remotely from the Privileged Remote Access portal.To add the VNC apps that your users will remotely access from your PRA portal:- Navigate to the PRA Applications page.
- For Prisma Access (Managed by Strata Cloud Manager):
- Log in to Strata Cloud Manager as the administrator.
- Select .
- For Prisma Access (Managed by Panorama):
- Launch Privileged Remote Access from the Cloud Services plugin on Panorama by selecting .
- Click Get Started.
- Select .
Click .![]() Configure general settings for the app.
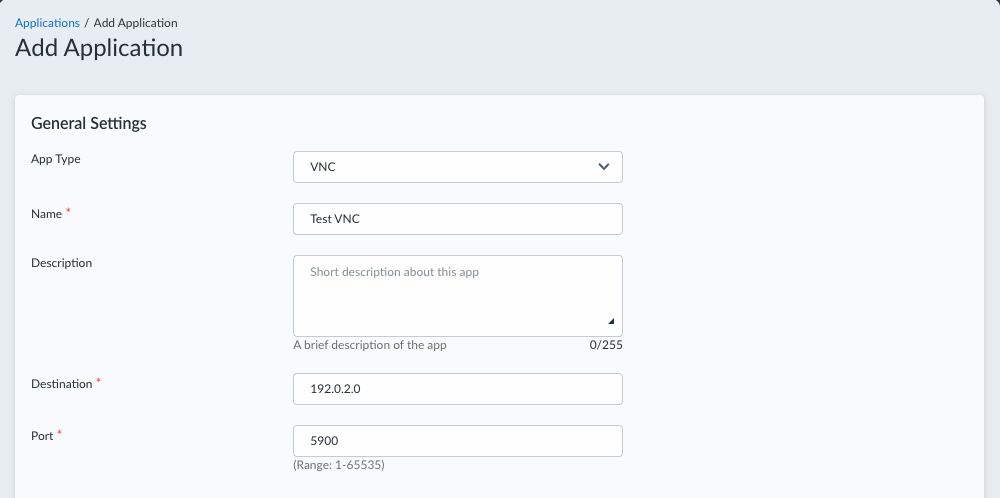
Configure general settings for the app.- Select .Enter a Name for the app.(Optional) Enter a description for the app.Enter the Destination FQDN or IP address of the app. The FQDN or IP address must be reachable using a Service Connection in your Prisma Access tenant.Enter the Port for the destination, if different from the default port.You can enter only one port between 1-65535. (Default: 5900)
![]() (Optional) Configure additional settings for the app.
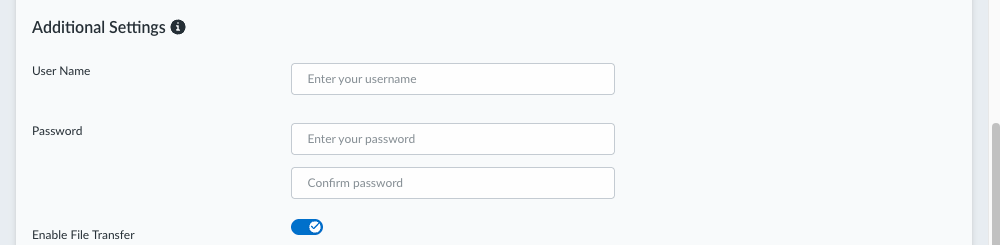
(Optional) Configure additional settings for the app.- (Optional) Enter the User Name and Password for the remote app, and confirm the password. The username and password are optional, but you must enter both settings or leave both blank.Enable File Transfer to allow your users to upload and download files using SFTP (SSH File Transfer Protocol).
![]() If you enabled file transfer in the previous step, configure the file transfer settings.
If you enabled file transfer in the previous step, configure the file transfer settings.- Enter your SFTP Username and SFTP Password. If you don't provide a password, you must provide the SFTP private key.The SFTP Hostname is automatically populated with the Destination FQDN or IP address. No entry is required.Enter the SFTP Port to use for file transfers. You can enter only one port between 1-65535. (Default: 22)Enter the SFTP Private Key. This is required if you don't enter an SFTP password.(Optional) Enter the SFTP Passphrase. This is required if the SFTP private key is encrypted.(Optional) Enter the SFTP Host Key entries for the remote host, which you can obtain by running the ssh-keyscan command on the host. Enter one key per line. Lines that begin with # are treated as comments.
![]() Save your settings. The application is added to the Applications table. You can visit this page later to add, edit, or remove an app.
Save your settings. The application is added to the Applications table. You can visit this page later to add, edit, or remove an app.![]()

- For Prisma Access (Managed by Strata Cloud Manager):
- For Prisma Access (Managed by Strata Cloud Manager):
- For Prisma Access (Managed by Strata Cloud Manager):