Prisma Access
SAML Authentication Using Okta as IdP for Mobile Users (Strata Cloud Manager)
Table of Contents
Expand All
|
Collapse All
Prisma Access Docs
-
- 6.1 Preferred and Innovation
- 6.0 Preferred and Innovation
- 5.2 Preferred and Innovation
- 5.1 Preferred and Innovation
- 5.0 Preferred and Innovation
- 4.2 Preferred
- 4.1 Preferred
- 4.0 Preferred
- 3.2 Preferred and Innovation
- 3.1 Preferred and Innovation
- 3.0 Preferred and Innovation
- 2.2 Preferred
-
-
- 4.0 & Later
- Prisma Access China
-
-
SAML Authentication Using Okta as IdP for Mobile Users (Strata Cloud Manager)
Configure Prisma Access to establish a trust relationship with your Okta IdP for
SAML 2.0 authentication of your mobile users.
There are two different procedures you can take to use SAML authentication with Okta
in Prisma Access.
- If you are able to access the Palo Alto Networks—Prisma Access app in Okta, use the steps in Configure SAML Authentication Using the Palo Alto Networks—Prisma Access app in Okta to configure Okta authentication with Prisma Access. This procedure simplifies the SAML authentication process because you do not have to enter each gateway name manually in Okta.
- If you cannot access the Palo Alto Networks—Prisma Access app in Okta, you must configure each gateway manually in Okta. See Configure SAML Authentication Without Using the Palo Alto Networks—Prisma Access app in Okta for details.
Complete this task to configure SAML 2.0 in Prisma Access by using Okta as the
IdP.
Configure SAML Authentication Using the Palo Alto Networks—Prisma Access app in Okta
If you are able to access the Palo Alto Networks—Prisma Access app in Okta, use
the steps in this procedure to configure SAML authentication using Prisma Access.
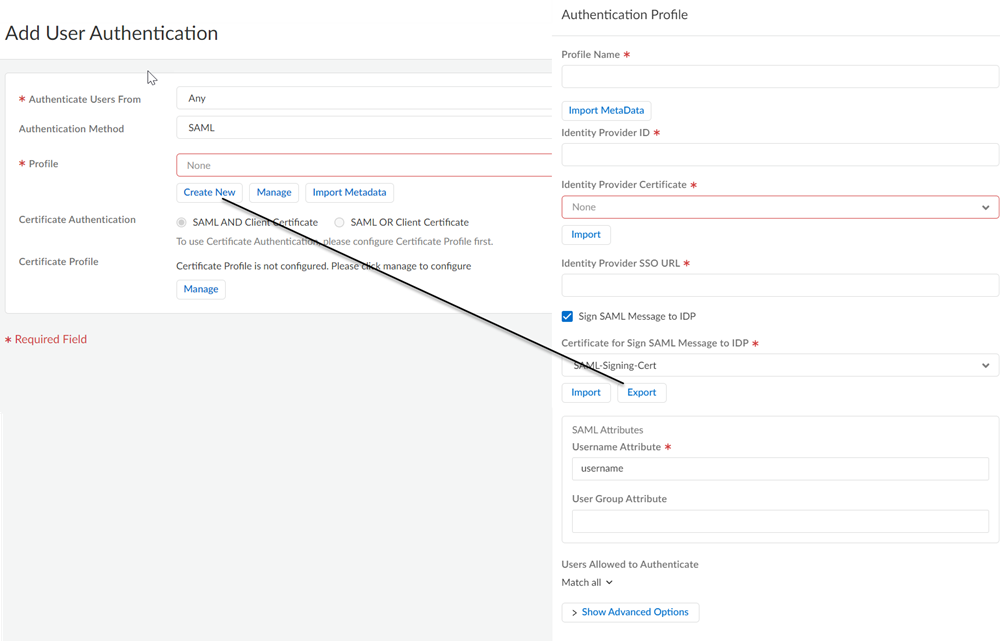
- Enable Mobile Users to Authenticate to Prisma Access.Complete the steps for defining the Service Provider (SP) settings, including generating or importing the certificate that Prisma Access uses to sign SAML messages that it sends to the identity provider (IdP).Export the Prisma Access signing certificate so that you can import it onto your IdP.
![]() Find the portal and gateway FQDNs to use as your Unique Gateway ID in Okta.
Find the portal and gateway FQDNs to use as your Unique Gateway ID in Okta.- To view the Portal Name, go to ConfigurationNGFW and Prisma Access, select the Configuration Scope as GlobalProtect, then click the gear to select Infrastructure Settings.
![]() In the Gateways area, take the gateway name and make a note of the data between the last dash in the gateway name and .gw.gpcloudservice.com.For example:
In the Gateways area, take the gateway name and make a note of the data between the last dash in the gateway name and .gw.gpcloudservice.com.For example:- Given a gateway name of india-west-acme.gp123abc.gw.gpcloudservice.com, make a note of the truncated FQDN acme.gp123abc.
- Given a gateway name of uzbekistan-acme.gp123abc.gw.gpcloudservice.com, make a note of the truncated FQDN acme.gp123abc.
- Given a gateway name of us-northwest-g-acme.gp123abc.gw.gpcloudservice.com, make a note of the truncated FQDN acme.gp123abc.
![]() Use the Palo Alto Networks—Prisma Access app to configure SAML login settings.This app is part of the Okta Integration Network (OIN) and simplifies the Prisma Access SAML authentication process.If you cannot access the Palo Alto Networks—Prisma Access app, you must configure each gateway manually in Okta by completing the procedure in Configure SAML Authentication Without Using the Palo Alto Networks—Prisma Access app in Okta.
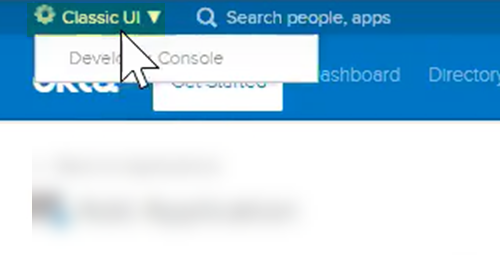
Use the Palo Alto Networks—Prisma Access app to configure SAML login settings.This app is part of the Okta Integration Network (OIN) and simplifies the Prisma Access SAML authentication process.If you cannot access the Palo Alto Networks—Prisma Access app, you must configure each gateway manually in Okta by completing the procedure in Configure SAML Authentication Without Using the Palo Alto Networks—Prisma Access app in Okta.- Log in to Okta.Make sure that you are logged in to the Classic UI and not the Developer Console.
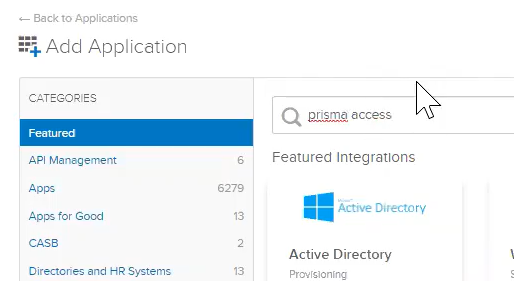
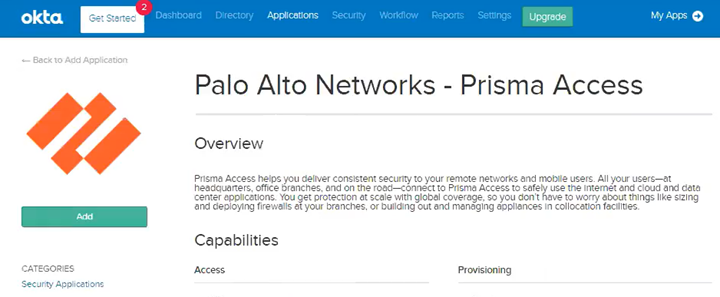
![]() Select Applications; then, Add Application and search for Prisma Access.
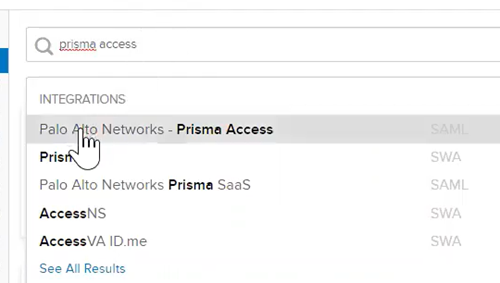
Select Applications; then, Add Application and search for Prisma Access.![]() Select Palo Alto Networks—Prisma Access.
Select Palo Alto Networks—Prisma Access.![]() Add the app.
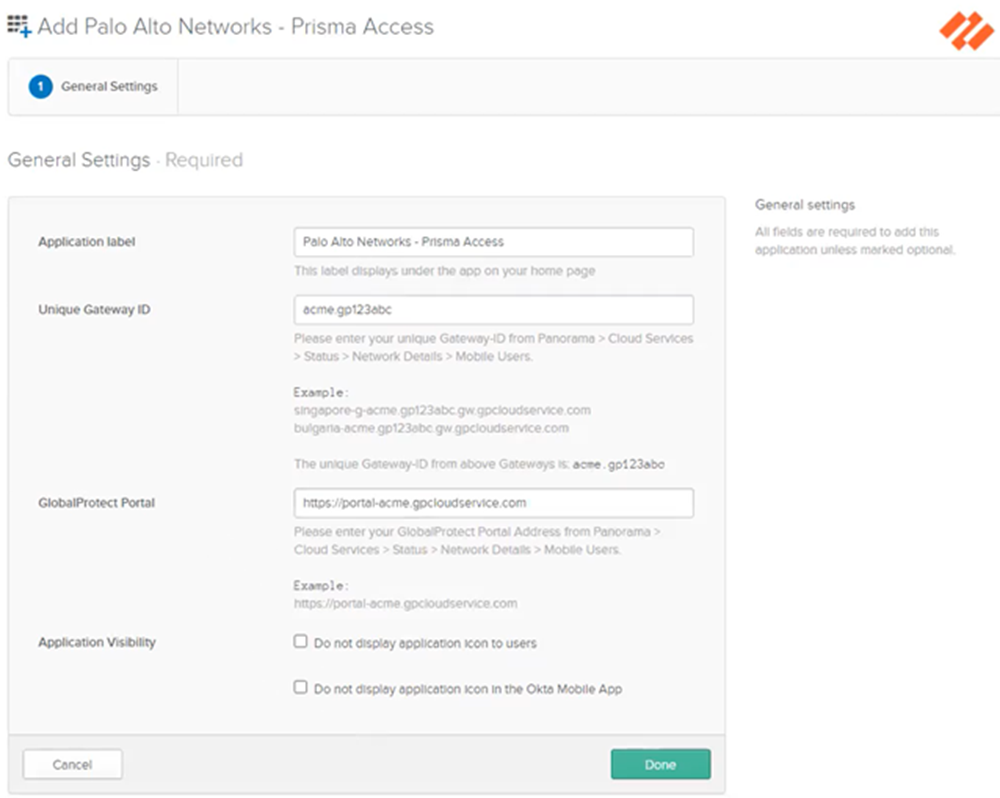
Add the app.![]() Click the General tab and, in the General Settings area, enter the following information, then click Done:
Click the General tab and, in the General Settings area, enter the following information, then click Done:- Application Label—Leave as Palo Alto Networks—Prisma Access app.
- Unique Gateway ID—Enter the truncated gateway FQDN you copied from a previous step.
- GlobalProtect Portal—Enter the portal FQDN you copied from a previous step.
- Application Visibility—Leave this field blank.
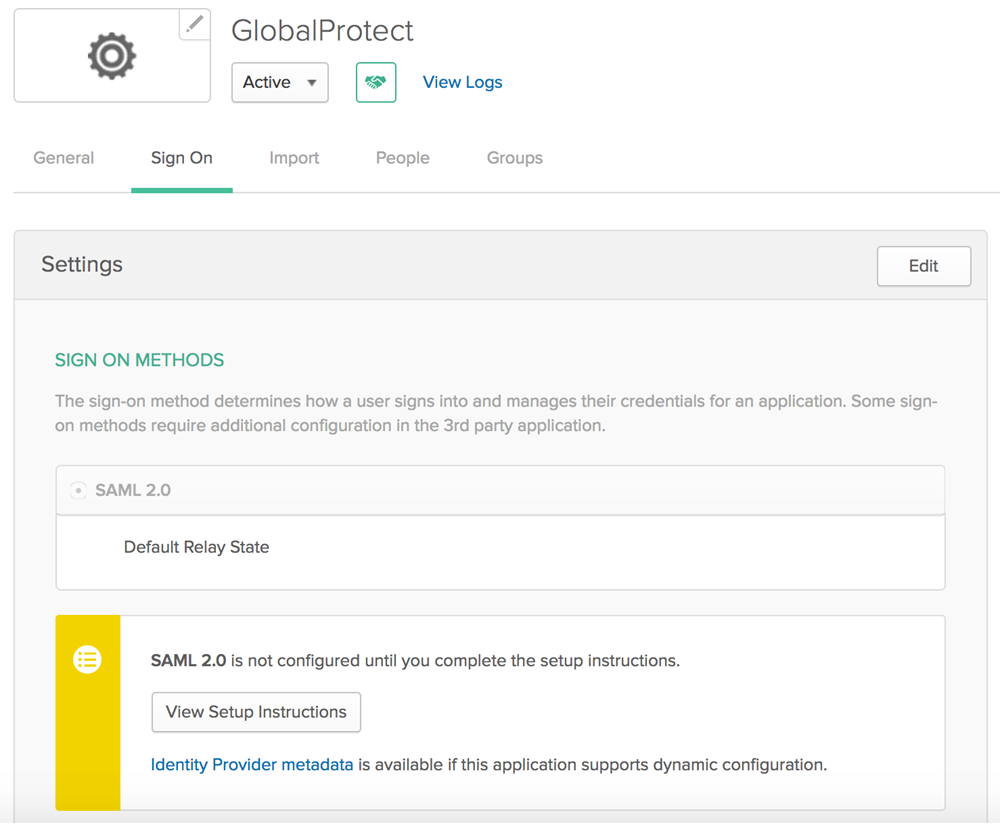
You do not need to enter any information in the Mobile, Import, or Assignments tabs; you configure sign on values in the Sign On tab in a later step.![]() Complete the configuration of the SAML 2.0 web application in Okta and enable the users to use the application. Use the link on the Okta site https://saml-doc.okta.com/SAML_Docs/How-to-Configure-SAML-2.0-for-Palo-Alto-Networks-Prisma-Access.html for details.(Optional) If you use a certificate issued by a Certificate Authority (CA), configure it as the IdP certificate.See the link on the Okta site https://developer.okta.com/docs/guides/sign-your-own-saml-csr/overview/ for details.To download the metadata files for the portal and gateways, click the Sign On tab, then select Identity Provider metadata and copy that information.
Complete the configuration of the SAML 2.0 web application in Okta and enable the users to use the application. Use the link on the Okta site https://saml-doc.okta.com/SAML_Docs/How-to-Configure-SAML-2.0-for-Palo-Alto-Networks-Prisma-Access.html for details.(Optional) If you use a certificate issued by a Certificate Authority (CA), configure it as the IdP certificate.See the link on the Okta site https://developer.okta.com/docs/guides/sign-your-own-saml-csr/overview/ for details.To download the metadata files for the portal and gateways, click the Sign On tab, then select Identity Provider metadata and copy that information.![]() Import the metadata file and the CA certificate from Okta into Prisma Access.
Import the metadata file and the CA certificate from Okta into Prisma Access.- Log in to Strata Cloud Manager and go to ConfigurationNGFW and Prisma AccessConfiguration ScopePrisma AccessMobile Users. Select GlobalProtect Setup or Explicit Proxy Setup and edit the User Authentication configuration.In SAML IdP Profile click Add SAML IdP Profile and Import the metadata file you exported from the Okta server.Save the IdP profile.
Configure SAML Authentication Without Using the Palo Alto Networks—Prisma Access app in Okta
If you are not able to use the Palo Alto Networks—Prisma Access app in Okta, use the following steps to configure SAML authentication using Okta. This procedure requires you enter the gateway names manually in Okta.- Enable Mobile Users to Authenticate to Prisma Access.Complete the steps for defining the Service Provider (SP) settings, including generating or importing the certificate that Prisma Access uses to sign SAML messages that it sends to the identity provider (IdP).Export the Prisma Access signing certificate so that you can import it onto your IdP.
![]() Find the portal and gateway FQDNs to use as your Unique Gateway ID in Okta.
Find the portal and gateway FQDNs to use as your Unique Gateway ID in Okta.- To view the Portal Name, go to ConfigurationNGFW and Prisma Access, select the Configuration Scope as GlobalProtect, then click the gear to select Infrastructure Settings.
![]() To find the gateway names, go to the Gateway FQDNs section and select Copy FQDN List to get a copy of the list of gateways.
To find the gateway names, go to the Gateway FQDNs section and select Copy FQDN List to get a copy of the list of gateways.![]() Log into Okta as an administrator and create and create SAML 2.0 applications for Prisma Access.
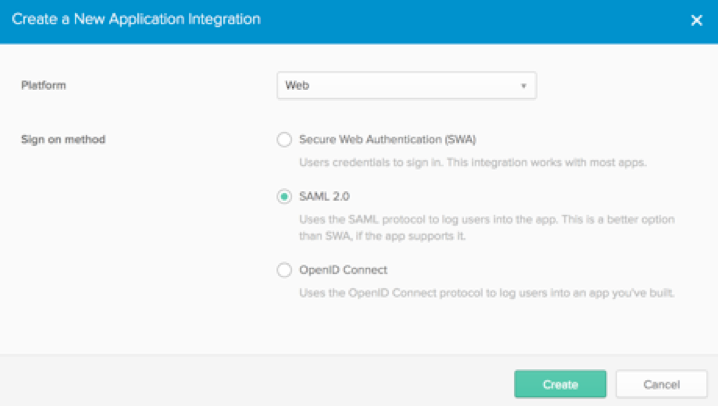
Log into Okta as an administrator and create and create SAML 2.0 applications for Prisma Access.- Create a new application integration for Prisma Access. Specify the Platform Type as Web and the sign-on method as SAML 2.0 and click Create.
![]() Configure the following application integration options:
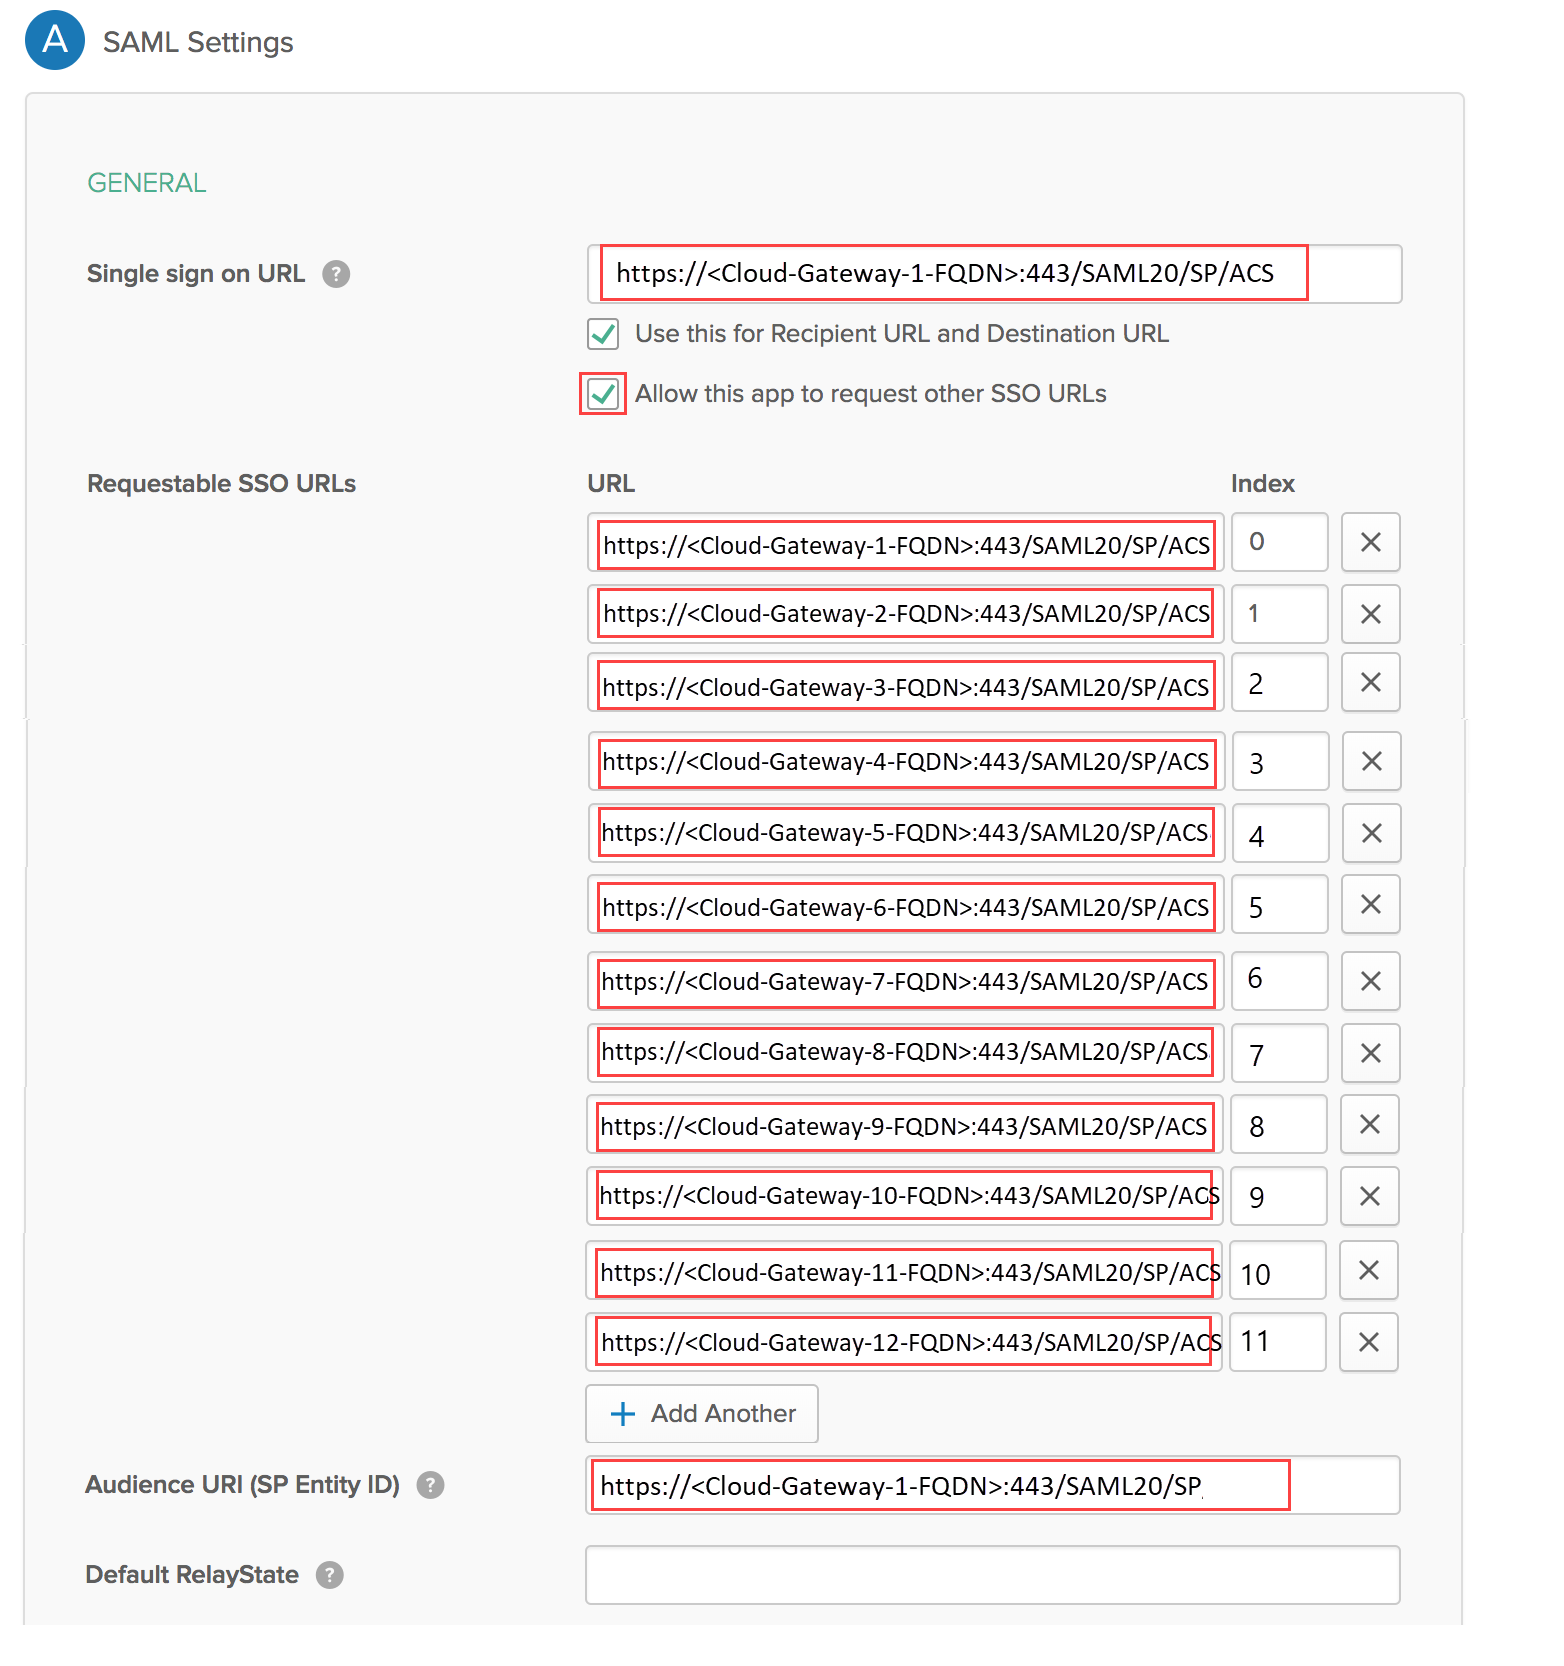
Configure the following application integration options:- Single sign on URL—Enter the URL for the portal (i.e. https://portal114.gpcloudservice.com:443/SAML20/SP/ACS)
- Use this for Recipient URL and Destination URL—Select this check box.
- Allow this app to request other SSO URLs—Select this check box and add the URLs for all Prisma Access gateways on the list you copied in the Requestable SSO URLs field.
- Audience URI (SP Entity ID)—Enter the URL for the portal (i.e. https://portal114.gpcloudservice.com:443/SAML20/SP).
- Default RelayState—Leave blank.
- Name ID format—Select EmailAddress.
- Application username—Select Okta Username.
![]() Select Show Advanced Settings and configure these settings:
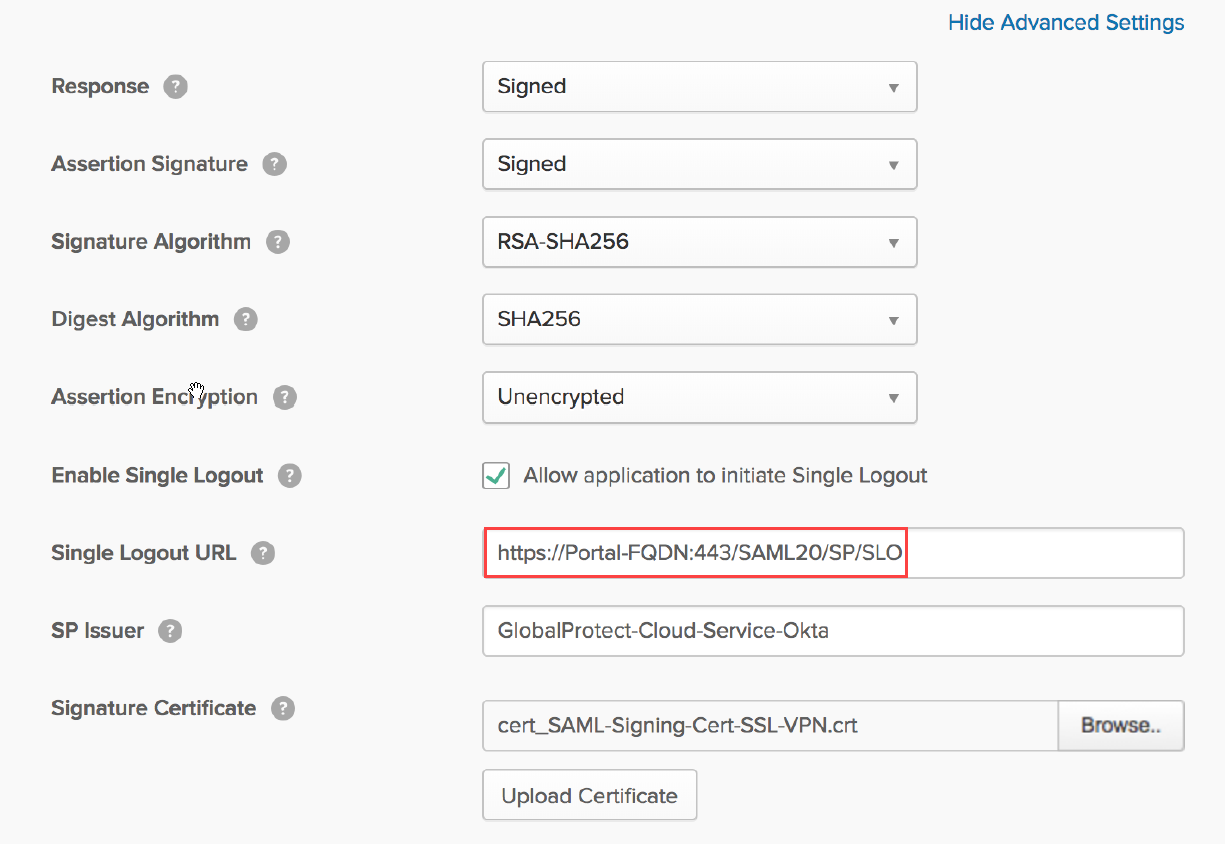
Select Show Advanced Settings and configure these settings:- Allow application to initiate Single Logout—Select this check box.
- Single Logout URL—Enter https://<Prisma Access-FQDN>:443/SAML20/SP/SLOWhere <Prisma-Access-FQDN> is the FQDN you defined for Prisma Access when you set up the environment.
- SP Issuer—Enter the issuer for the service provider.
- Signature Certificate—Browse to and then select the SAML signing certificate that you exported from Prisma Access, then click Upload Certificate.
![]() In the ATTRIBUTE STATEMENTS (OPTIONAL) area, specify users, Name formats, and values in Okta Expression Language.These fields reference, transform and combine attributes to define the Username attribute format to match what you set up on Prisma Access. For example, specify a name format of Basic and a Value of user.firstName.
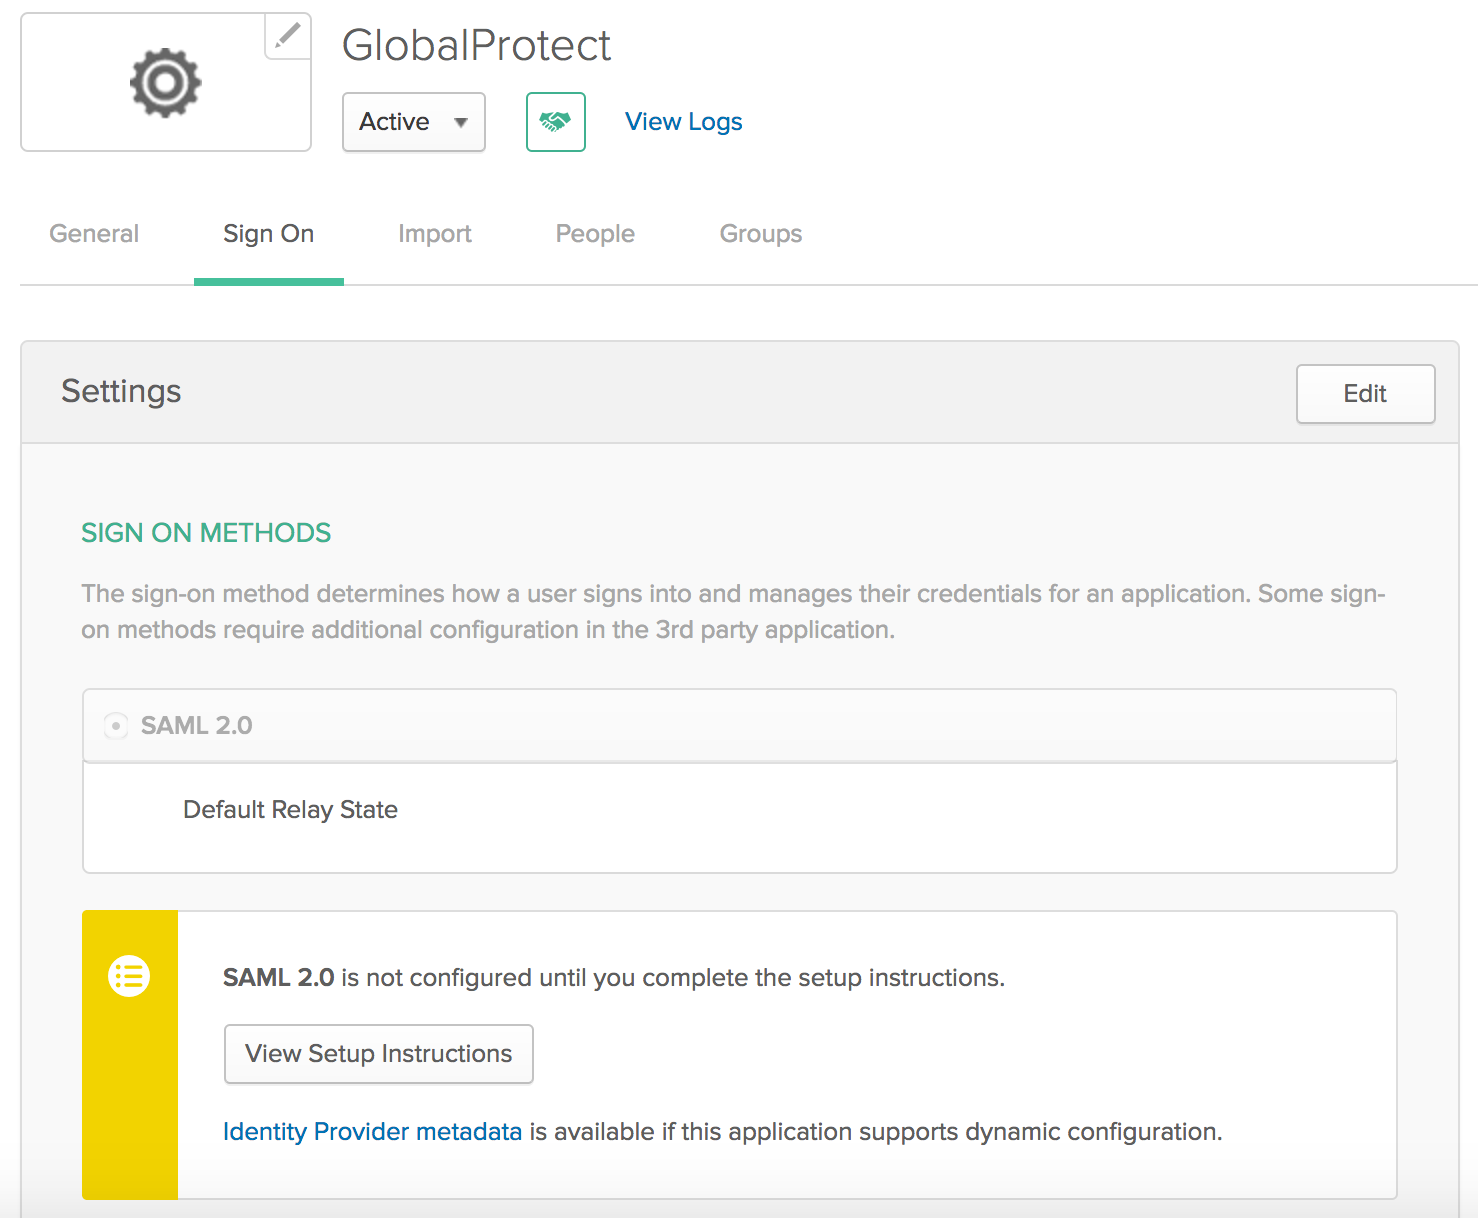
In the ATTRIBUTE STATEMENTS (OPTIONAL) area, specify users, Name formats, and values in Okta Expression Language.These fields reference, transform and combine attributes to define the Username attribute format to match what you set up on Prisma Access. For example, specify a name format of Basic and a Value of user.firstName.![]() Optionally, in the Group Attribute Statements (Optional) area, create group attribute options.You can’t use group information that’s retrieved from the SAML assertion in either security policy rules or the GlobalProtect app configuration.Save the configuration.Complete the configuration of the SAML 2.0 web application in Okta and enable the users to use the application. Click View Setup Instructions for details.To download the metadata files for the portal and gateways, click Identity Provider metadata and copy that information.
Optionally, in the Group Attribute Statements (Optional) area, create group attribute options.You can’t use group information that’s retrieved from the SAML assertion in either security policy rules or the GlobalProtect app configuration.Save the configuration.Complete the configuration of the SAML 2.0 web application in Okta and enable the users to use the application. Click View Setup Instructions for details.To download the metadata files for the portal and gateways, click Identity Provider metadata and copy that information.![]() Import the metadata file and the CA certificate from Okta into Prisma Access.
Import the metadata file and the CA certificate from Okta into Prisma Access.- From Strata Cloud Manager, go to ConfigurationNGFW and Prisma AccessConfiguration ScopePrisma AccessMobile Users. Select GlobalProtect Setup or Explicit Proxy Setup and edit the User Authentication configuration.In SAML IdP Profile click Add SAML IdP Profile and Import the metadata file you exported from the Okta server.Save the IdP profile.

