- Home
- Prisma Access
- Integrate Microsoft Products with Prisma Access
- Microsoft Entra ID SAML Authentication for Mobile User Deployments
- Configure Mobile Users using Cloud Identity Engine (Recommended)
- Configure Mobile Users using Cloud Identity Engine (Recommended) (Panorama)
- Configure Explicit Proxy Mobile Users using Cloud Identity Engine (Recommended) (Panorama)
Prisma Access
Configure Explicit Proxy Mobile Users using Cloud Identity Engine (Recommended) (Panorama)
Table of Contents
Expand All
|
Collapse All
Prisma Access Docs
-
- 6.1 Preferred and Innovation
- 6.0 Preferred and Innovation
- 5.2 Preferred and Innovation
- 5.1 Preferred and Innovation
- 5.0 Preferred and Innovation
- 4.2 Preferred
- 4.1 Preferred
- 4.0 Preferred
- 3.2 Preferred and Innovation
- 3.1 Preferred and Innovation
- 3.0 Preferred and Innovation
- 2.2 Preferred
-
-
- 4.0 & Later
- Prisma Access China
-
-
Configure Explicit Proxy Mobile Users using Cloud Identity Engine (Recommended) (Panorama)
Use the Cloud Authentication (CAS) component of the Cloud Identity Engine to
authenticate Prisma Access mobile users in a Mobile Users—Explicit Proxy deployment.
To configure the Cloud Authentication Service to authenticate Explicit Proxy mobile
users, you must have the following minimum required product and software versions:
- A minimum Prisma Access version of 3.2 (either Preferred or Innovation).
- A minimum Panorama version of 10.1.3.
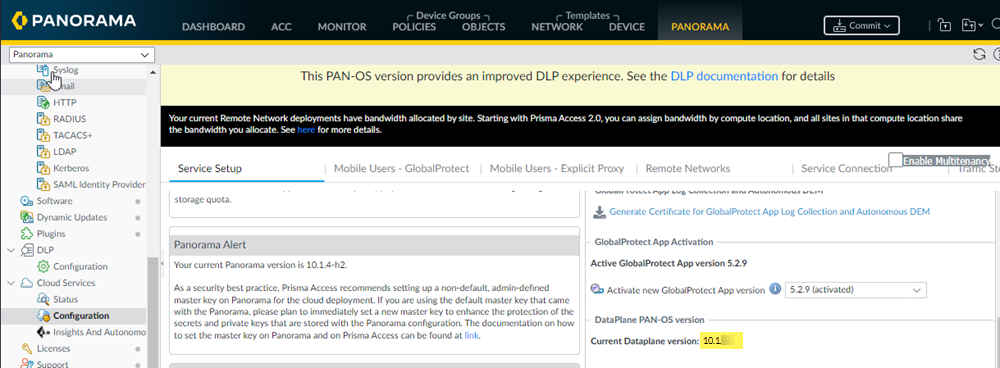
- A minimum dataplane version of 10.1.3.To verify your dataplane version, select PanoramaCloud ServicesConfigurationService Setup and view the Current Dataplane version in the DataPlane PAN-OS version area. If your dataplane version is lower than 10.1.3, reach out to your Palo Alto Networks account representative and submit a request.
![]()
- A SAML IdP provider that is supported with the Cloud Identity Engine.All IdP providers that are supported by the Cloud Identity Engine are supported, including Azure, Okta, PingOne, PingFederate, and Google.
To configure authentication for a Mobile Users—Explicit Proxy deployment using the
Cloud Identity Engine, complete the following steps.
- From the Panorama that manages Prisma Access, set up and configure a Mobile Users—Explicit Proxy deployment.Before you configure Explicit Proxy guidelines, be aware of how explicit proxy works and how explicit proxy identifies users, go through the planning checklist, and learn how to set up the Explicit Proxy PAC file.From the Panorama that manages Prisma Access, install the Panorama device certificate.You must generate a one-time password (OTP) and retrieve the device certificate to successfully authenticate Panorama with the Cloud Identity Engine.
- Log into the Customer Support Portal to generate the One Time Password (OTP).Select AssetsDevice Certificates and Generate OTP.For the Device Type, select Generate OTP for Panorama and Generate OTP.Select the Panorama Device serial number.Generate OTP and Copy to Clipboard.From the Panorama that manages Prisma Access, select PanoramaSetupManagementDevice Certificate Settings and Get certificate.
![]() When you have successfully installed the certificate, the Current Device Certificate Status (PanoramaSetupManagementDevice Certificate) displays as Valid.
When you have successfully installed the certificate, the Current Device Certificate Status (PanoramaSetupManagementDevice Certificate) displays as Valid.![]() From the hub, activate the Cloud Identity Engine if you have not yet done so to create your first instance.
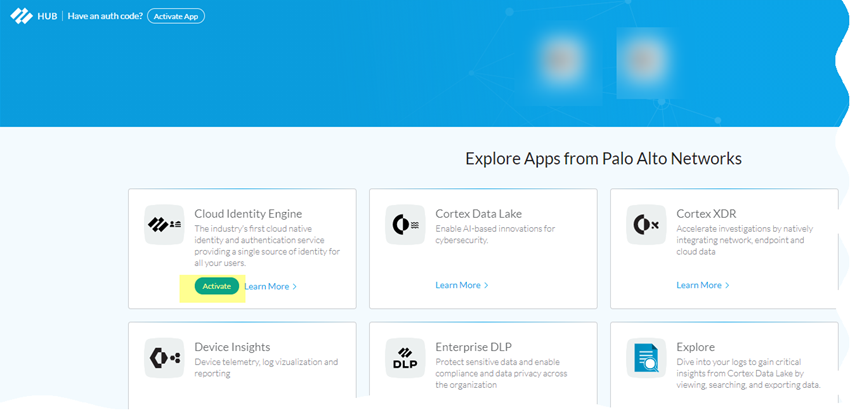
From the hub, activate the Cloud Identity Engine if you have not yet done so to create your first instance.- Log in to the hub.Activate the Cloud Identity Engine.If the Activate button is not available, ensure that your role has the necessary privileges.
![]() Enter the information for your Cloud Identity Engine instance.
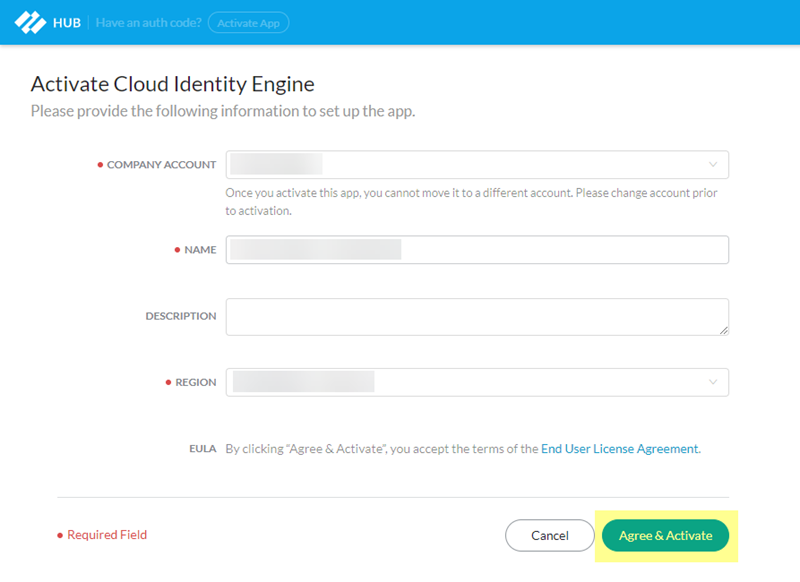
Enter the information for your Cloud Identity Engine instance.![]()
- Select the Company Account for the instance.
- Specify an Name to identify the instance.
- (Optional) Enter a Description to provide more information about the Cloud Identity Engine instance (for example, details about the instance’s purpose).
- Select a Region.Make a note of the region; you specify the same region when you create an authentication profile in Panorama.
- Agree to the EULA.
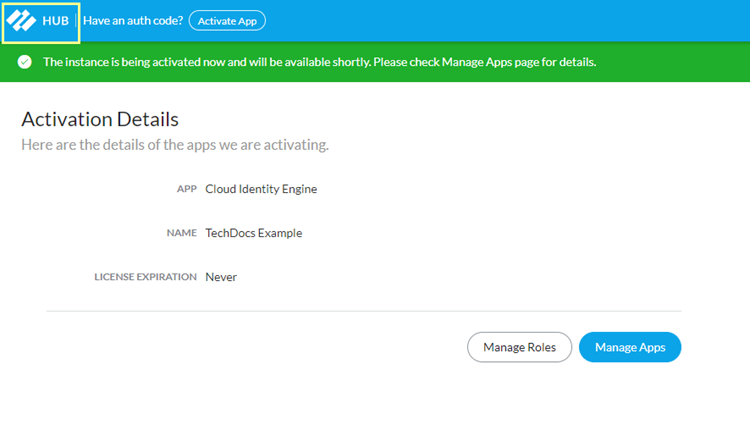
Agree & Activate the instance.On the Activation Details page, select the hub in the upper left.![]() The Cloud Identity Engine displays.
The Cloud Identity Engine displays.![]() (Optional) If you require a separate instance for Explicit Proxy, configure a Cloud Identity Engine Instance.If you want to isolate your Explicit Proxy directory data, or allow different Palo Alto Networks cloud applications and services to access different sets of directory data, you can create a Cloud Identity Engine instance specifically for Explicit Proxy.
(Optional) If you require a separate instance for Explicit Proxy, configure a Cloud Identity Engine Instance.If you want to isolate your Explicit Proxy directory data, or allow different Palo Alto Networks cloud applications and services to access different sets of directory data, you can create a Cloud Identity Engine instance specifically for Explicit Proxy.- Log in to the hub.
![]() Click the gear in the upper right corner of the page to manage the settings; then, select Manage Apps and click Add Instance.
Click the gear in the upper right corner of the page to manage the settings; then, select Manage Apps and click Add Instance.![]() Configure the instance.
Configure the instance.![]()
- Select the Company Account for the instance.
- Specify an Name to identify the instance.
- (Optional) Enter a Description to provide more information about the Cloud Identity Engine instance (for example, details about the instance’s purpose).
- Select a Region.Make a note of the region; you specify the same region when you create an authentication profile in Panorama.
- Agree to the EULA.
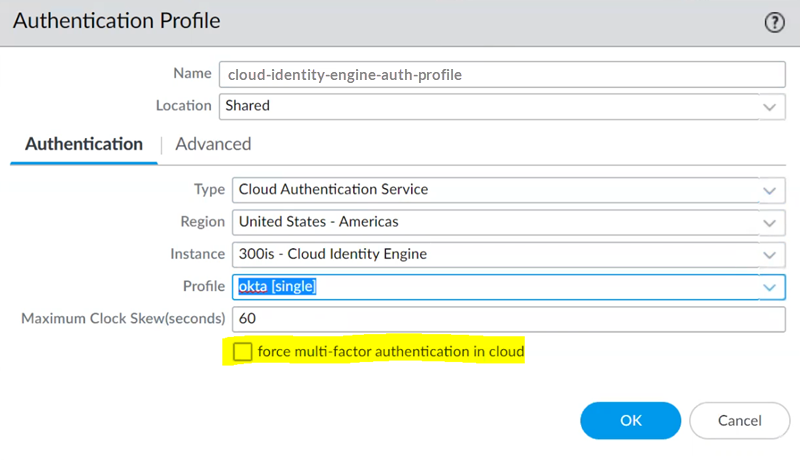
Agree & Activate the instance.From the Cloud Identity Engine app, configure a SAML 2.0 IdP in the Cloud Identity Engine.The Cloud Identity Engine Getting Started guide has the procedures you need to configure a SAML IdP in the Cloud Identity Engine:Do not configure single logout, it is not supported. .Set up an authentication profile in the Cloud Identity Engine and select the users and groups that can use this authentication method.You specify this profile when you create an authentication profile in Panorama in a later step.Return to the Panorama that manages Prisma Access and configure an authentication profile to use with the Cloud Authentication Engine.- Select DeviceAuthentication Profile and Add an authentication profile.Be sure that you are in the Explicit_Proxy_Template.Enter a Name for the Authentication profile.Select Cloud Authentication Service as the Type.Select the Region of your Cloud Identity Engine instance.Specify the same region you used when you created your Cloud Authentication Engine instance.Select the Cloud Identity Engine Instance to use for this Authentication profile.Select an authentication Profile that specifies the authentication type you want to use to authenticate users.Specify the authentication profile you created in the Cloud Identity Engine.Specify the Maximum Clock Skew (seconds), which is the allowed difference in seconds between the system times of the IdP and the firewall at the moment when the firewall validates IdP messages (default is 60; range is 1–900). If the difference exceeds this value, authentication fails.(Optional) If the profile you selected has multi-factor authentication (MFA) enabled, select Force multi-factor authentication in cloud.Selecting this option means that the IdP (for example, Okta) specified by the profile is responsible for performing MFA. If you select this check box and incorrect MFA information is received from the Cloud Identity Engine, authentication fails.Click OK.
![]() Allow the necessary authentication traffic to be passed to Explicit Proxy.
Allow the necessary authentication traffic to be passed to Explicit Proxy.- Create a URL list as a custom URL category to allow the necessary traffic for the Cloud Identity Engine.Add the following Cloud Identity Engine URLs to the URL category.If you do not need to strictly limit traffic to your region, you can enter *.apps.paloaltonetworks.com. Otherwise, determine your region-based URL using the show cloud-auth-service-regions command in the Cloud Identity Engine to display the URLs for the region associated with your Cloud Identity Engine instance and enter each region-based URL. The following table includes the URLs for each region:
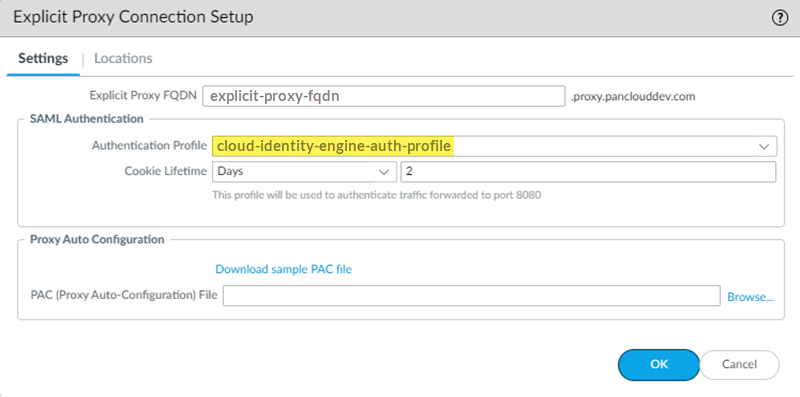
Region Cloud Identity Engine Region-Based URL United States cloud-auth.us.apps.paloaltonetworks.com cloud-auth-service.us.apps.paloaltonetworks.comEurope cloud-auth.nl.apps.paloaltonetworks.com cloud-auth-service.nl.apps.paloaltonetworks.comUnited Kingdom cloud-auth.uk.apps.paloaltonetworks.com cloud-auth-service.uk.apps.paloaltonetworks.comSingapore cloud-auth.sg.apps.paloaltonetworks.com cloud-auth-service.sg.apps.paloaltonetworks.comCanada cloud-auth.ca.apps.paloaltonetworks.com cloud-auth-service.ca.apps.paloaltonetworks.comJapan cloud-auth.jp.apps.paloaltonetworks.com cloud-auth-service.jp.apps.paloaltonetworks.comAustralia cloud-auth.au.apps.paloaltonetworks.com cloud-auth-service.au.apps.paloaltonetworks.comGermany cloud-auth.de.apps.paloaltonetworks.com cloud-auth-service.de.apps.paloaltonetworks.comUnited States - Government cloud-auth-service.gov.apps.paloaltonetworks.com cloud-auth.gov.apps.paloaltonetworks.comIndia cloud-auth-service.in.apps.paloaltonetworks.com cloud-auth.in.apps.paloaltonetworks.comEnter the URLs that your IdP requires for user authentication (for example, *.okta.com) in the custom URL category.Create a security policy rule to allow traffic to the authentication type and Cloud Identity Engine and select the custom URL category as the match criteria.Specify the authentication profile for Explicit Proxy.- Select PanoramaCloud ServicesConfigurationMobile Users—Explicit Proxy.Select the Connection Name.Specify the Cloud Identity Engine Authentication Profile.
![]() Commit and Push your changes.Verify that the Cloud Identity Engine is successfully authenticating your Explicit Proxy mobile users.
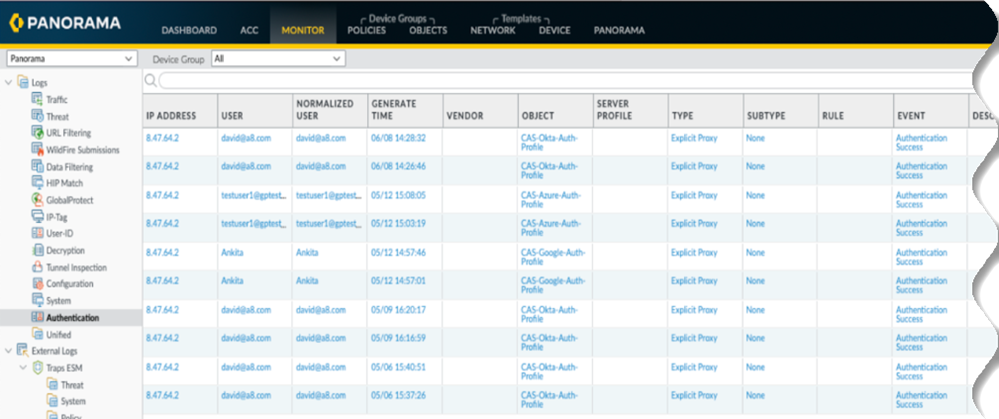
Commit and Push your changes.Verify that the Cloud Identity Engine is successfully authenticating your Explicit Proxy mobile users.- From the Panorama that manages Prisma Access, select MonitorLogsAuthentication.View the Event status.
![]() If the authentication fails, view the Description for more details about the failure.
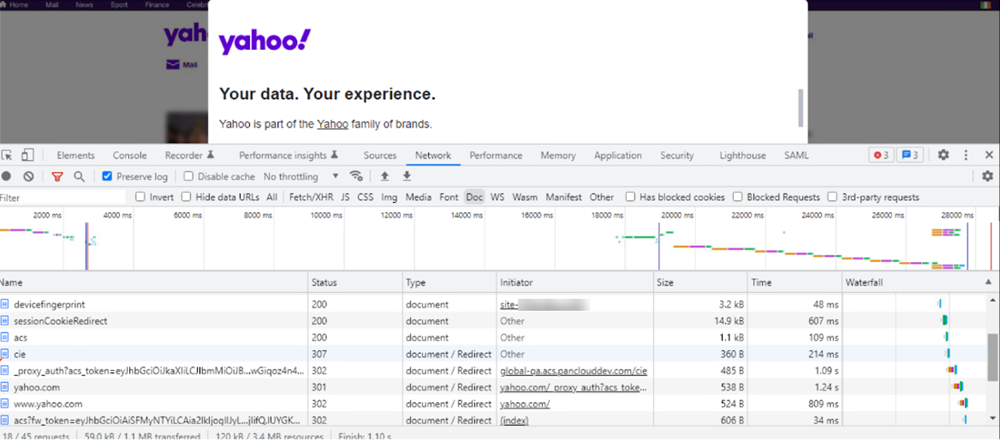
If the authentication fails, view the Description for more details about the failure.![]() From the mobile user’s endpoint, use dev tools to view the Cloud Identity Engine authentication flow.
From the mobile user’s endpoint, use dev tools to view the Cloud Identity Engine authentication flow.![]()

